How to Improve Video Quality in Smartphone
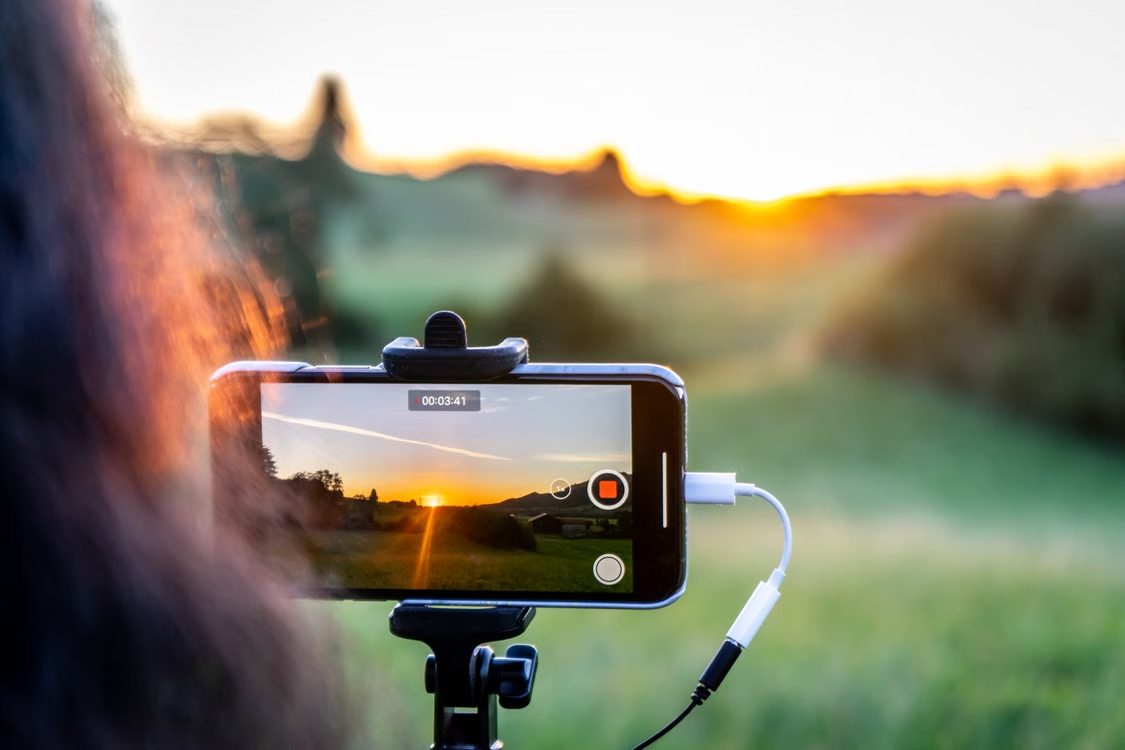
You grab your phone, hit record, and the footage looks… okay. Not great. It's a little shaky.
The colors are off. Maybe it's grainy in the shadows. You've been there.
That's exactly why you're searching for how to improve video quality in smartphone right now.
The good news is you don't need a new phone or expensive gear. Most of the fix comes down to understanding a few settings and making the right call before you hit that red button. Manufacturer specifications confirm that even older flagship phones from 2022 or 2023 can shoot gorgeous 4K footage when you use the right approach.
The difference between amateur and pro-looking video is almost never the hardware itself. It's the decisions you make in the first ten seconds of setting up a shot.
Image source: Bing (Web (fair-use with source credit))
Quick Answer
Adjust your shutter speed to double your frame rate. Lock exposure and white balance before recording. Avoid digital zoom at all costs.
Use a tripod or gimbal for movement. Choose 4K at 30fps for most situations. These five steps fix 80% of video quality problems instantly.
What's Actually Making Your Video Look Bad? (The Real Frustrations)
Before we talk fixes, let's name the enemy. Your smartphone camera is a tiny computer with a tiny lens. It tries to do everything automatically.
That's the problem.
The three biggest offenders:
- Shakiness. You notice it the second you play the footage back. Walking shots look like you're on a boat. Even your hands trembling slightly while holding the phone creates micro-jitters that kill the pro feel.
- Bad exposure and color. Your phone guesses what the scene should look like. In tricky light, it gets it wrong. Faces go dark. Highlights blow out to pure white. Skin tones shift toward orange or green.
- Noise and grain. This happens most in low light. The sensor doesn't have enough photons to work with, so the processor cranks up the ISO. More ISO equals more grain. It's physics. You can't fix it with software later without making everything look soft or plastic.
Here's the kicker. You can have a $1,200 phone and still get all three problems if you let the camera make every decision for you. The phone's brain (the image signal processor, or ISP) prioritizes getting a usable shot over getting a great shot.
Usable means exposed well enough to see, sharp enough to recognize. Great means cinematic, artifact-free, color-accurate. Those are two different goals.
So the real question becomes: how do you take control away from the phone and start making those decisions yourself? That starts with one setting that ties everything together.
The One Setting That Fixes Everything (Shutter Speed + Frame Rate)

Image source: Bing (Web (fair-use with source credit))
Here's the single most powerful thing you can learn about video. Shutter speed should always be double your frame rate. Filmmakers call this the 180-degree shutter rule. It's not optional if you want natural-looking motion.
Let me explain with a simple table.
| Frame Rate | Correct Shutter Speed | Why It Matters |
|---|---|---|
| 24 fps | 1/50th of a second | Cinema standard. Motion blur matches what your eye expects. |
| 30 fps | 1/60th of a second | Standard for online content. Smooth but not soap-opera smooth. |
| 60 fps | 1/120th of a second | Good for slow motion. Captures more frames to slow down later. |
| 120 fps | 1/240th of a second | True slow motion. Needs very bright light to expose properly. |
When you set shutter speed correctly, motion in your video looks natural. A person walking across the frame has just the right amount of blur on their moving arm. A car driving past leaves a smooth trail.
If your shutter speed is too high, every frame freezes perfectly, and the motion looks stuttery and jarring. That's the "action cam" look. Sometimes you want that.
Most of the time, you don't.
Most phones let you lock shutter speed in the "Pro" or "Manual" video mode. Look for it in your camera app settings. If your phone doesn't have manual controls, download a third-party app like Filmic Pro or Motion Cam.
These apps give you direct control over shutter speed, ISO, and white balance. They cost a few dollars and are worth every cent.
Now let's talk about frame rate. What should you actually shoot at?
- 24 fps is the standard for movies and cinematic content. It has a dreamy, classic feel. Use it for narrative, travel montages, or anything where you want a film look.
- 30 fps is more common on YouTube and social media. It handles motion a little better than 24 fps. Use it for talking head videos, interviews, or everyday content.
- 60 fps captures smoother motion. Great for fast action or sports. But it eats up storage and can look too smooth (the "soap opera effect") if used for everything.
- 120 fps and above is for slow motion. You record at high frame rate, then play back at 24 or 30 fps. The result is smooth, beautiful slow motion.
Our recommendation for most shooters as of 2026: shoot 4K at 30 fps with a shutter speed of 1/60th. It's the sweet spot between quality, file size, and natural motion. Switch to 24 fps only when you want a more cinematic feel.
Step 1: Check Your Light — Then Decide Your Settings
Light is the single biggest factor in video quality. You cannot out-smart bad light with software. Period.
So before you change any setting, look at your scene and decide what kind of light you're working with.
You're in Bright Sunlight
This is the easiest scenario. You have plenty of photons. Your phone's sensor can work at its lowest ISO, which means zero noise.
The image will be sharp and clean.
Settings for bright sun:
- Shutter speed: whatever the 180-degree rule gives you (1/60th for 30 fps, 1/120th for 60 fps)
- ISO: locked as low as it goes (usually 50 or 100)
- White balance: set to "Sunny" or 5500K
- Frame rate: 30 fps works great
One problem: harsh shadows. The sun creates hard light on faces. If you can, position your subject so the sun is behind you and slightly to the side.
Avoid direct overhead sun. That creates raccoon eyes under the brows. A simple fix is to stand in the shade.
Open shade gives beautiful even light.
You're Indoors With Artificial Light
Indoor lighting is a minefield. Most homes have a mix of overhead LEDs, lamps, and windows. The phone's auto white balance will shift constantly.
Your footage will go from warm to cool and back again.
Settings for indoor artificial light:
- Shutter speed: this gets tricky. In countries with 60 Hz electrical systems (US, Canada, Japan), set shutter speed to 1/60th. In 50 Hz regions (Europe, UK, Australia), set it to 1/50th. This prevents flickering from lights.
- White balance: DO NOT use auto. Set it manually. For warm incandescent bulbs, use 3200K. For cool white LEDs, try 4000K. For office-style fluorescent, try 5000K.
- ISO: expect to need 200 to 800 depending on how bright the room is
- Add light: seriously. Turn on every lamp in the room. Open curtains. Point a desk lamp at the subject's face. You want the face to be the brightest thing in the frame.
One more thing. If your lights flicker on camera even after you set shutter speed correctly, you might need to switch to a different shutter speed by a small fraction. Try 1/50th instead of 1/60th in a 60 Hz region.
Some LED bulbs pulse at weird frequencies. This takes trial and error.
You're Shooting at Night or in Very Low Light
This is the hardest condition. Your phone will try to boost ISO to 1600, 3200, or higher. The result is noise.
Grain everywhere. Detail smudged away by noise reduction.
Settings for low light:
- Frame rate: drop to 24 fps. This gives each frame more time to gather light.
- Shutter speed: 1/50th for 24 fps. Do not go lower than 1/30th. If you do, motion becomes blurry and unnatural.
- ISO: keep it as low as possible. Accept that you may need ISO 1600. That's okay. Grainy video is better than unusably dark video.
- Stabilization: use a tripod. Every tiny shake becomes visible in low light because the shutter is open longer.
- Do not use digital zoom. Low light plus digital zoom is a recipe for pure noise. Get closer physically.
If you absolutely must shoot in low light without a tripod, brace your arms against your chest, lean against a wall, and hold your breath while recording. It sounds silly. It works.
Step 2: Are You Moving or Standing Still? (Stabilization Decision)
Your phone has built-in stabilization. Every modern phone does. But that stabilization works differently depending on what you're doing.
You need to make a choice based on movement.
Handheld With No Gimbal
If you're standing still and recording a talking head, your phone's electronic image stabilization (EIS) is fine. Keep both hands on the phone. Tuck your elbows into your ribs.
This creates a stable base.
Settings for static handheld:
- Enable EIS in your camera settings. It crops the image slightly to give a stabilization buffer.
- Do not walk while recording. EIS handles small shakes. It does not handle big footsteps.
- Keep the phone in landscape orientation. Portrait video looks amateur on every platform.
Walking or Following Action
This is where things get rough. Walking while recording handheld, even with EIS, looks like a roller coaster. The footage is watchable for a few seconds.
Any longer and viewers get motion sickness.
The only real fix is a gimbal.
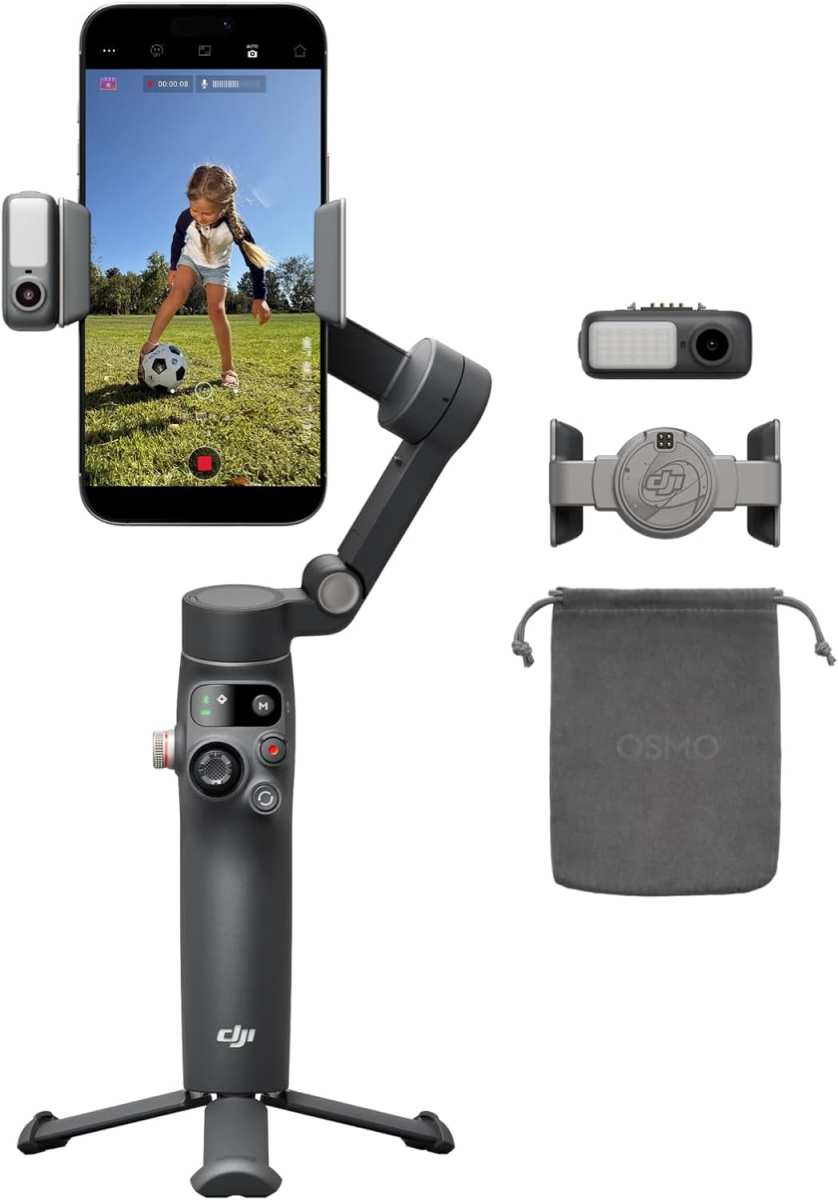
Image source: Bing (Web (fair-use with source credit))
A gimbal is a motorized handle that keeps your phone level no matter how you move. You walk, the gimbal counteracts the motion. The footage looks like you're on a dolly track.
Popular options include the DJI Osmo Mobile and Zhiyun Smooth series. They cost somewhere between $80 and $150. That's the best money you can spend on video quality improvement.
If you don't have a gimbal: walk like a ninja. Bend your knees slightly. Place your heel down first, then roll onto the ball of your foot.
This smooths out your footsteps. It works. It's not as good as a gimbal, but it's way better than normal walking.
Using a Tripod or Static Shot
Static shots from a tripod are the easiest way to get professional-looking footage. No stabilization needed. No motion to compensate for.
The camera stays perfectly still.
When to use a tripod:
- Interviews and talking heads
- Product close-ups
- Time lapses and hyperlapses
- Any scene where you want a locked-off, steady look
You don't need an expensive tripod. A $25 basic tripod with a phone mount works perfectly. The key is that it stands solidly.
Don't set it up on a wobbly table. If the table shakes when you walk past, your footage shakes too.
Step 3: Pick Your Resolution and Frame Rate Based on What You're Filming
You can't just set everything to "max" and walk away. Shooting 4K at 60 fps with HDR looks great, but it also chews through battery and storage. Your phone might overheat and stop recording after 15 minutes.
You need to match your settings to the scene.
Fast Action or Sports
When your subject is moving fast, you need high frame rates. A soccer ball kicked across the field at 24 fps looks like a blurry streak. At 60 fps, you can see the spin on the ball.
Recommended settings for action:
- 1080p at 60 fps (use 1080p for easier editing and smaller files)
- Shutter speed: 1/120th of a second
- Auto focus: use continuous autofocus with tracking
- Keep the camera wide. Do not zoom in. Fast movement plus digital zoom equals missed shots.
Talking Head / Vlog
This is the easiest setup. The subject barely moves. The camera stays still.
Recommended settings for talking heads:
- 4K at 24 fps for a cinematic look, or 30 fps for standard YouTube
- Shutter speed: 1/50th for 24 fps, 1/60th for 30 fps
- Lock focus on the subject's eyes
- Use a tripod. No movement needed.
Slow Motion Needs
To get true slow motion, you need high frame rates. 60 fps slowed to 24 fps gives you 2.5x slow motion. 120 fps slowed to 24 fps gives you 5x slow motion. 240 fps gives you 10x.
Recommended settings for slow motion:
- 1080p at 120 fps (most phones do 120 fps at 1080p, not 4K)
- Shutter speed: 1/240th of a second
- Record with bright light. High frame rates need tons of light to expose properly.
- Slow motion works best on moments with clear physical action. A splash of water. Hair blowing in wind. A ball hitting a bat. Slow motion of someone just walking is rarely interesting.
The Digital Zoom Trap — And What to Do Instead
Digital zoom is the number one mistake people make. Here's what happens: you pinch to zoom in, your phone crops the image and stretches the pixels back to full resolution. You lose detail.
You get blur. The image looks terrible. And there's no fixing it in post.
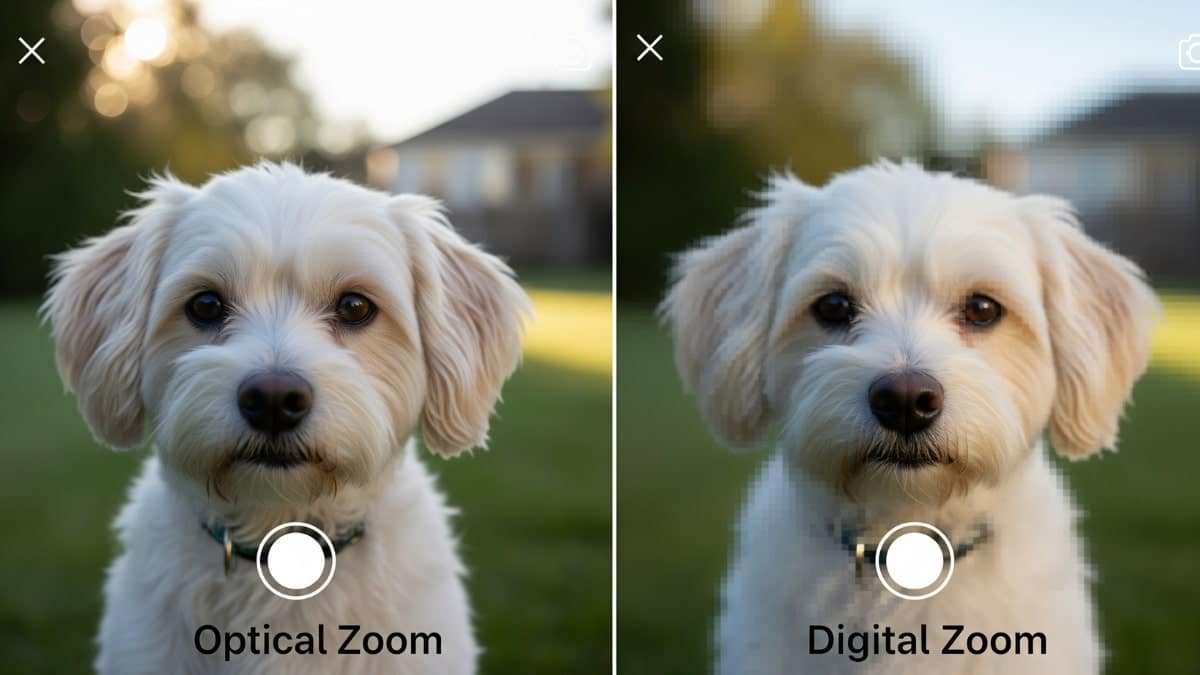
Image source: Bing (Web (fair-use with source credit))
The rule: never use digital zoom for video. Not even a little.
What should you do instead?
- Get closer physically. This is the best solution. Walk toward your subject. Move your tripod. Rearrange the scene. Physical proximity gives you a clean, full-resolution image.
- Crop in post. Shoot wider than you think you need, then crop the frame in your editing software. This has the exact same effect as digital zoom, but you can try different crops without losing the original shot.
- Use optical zoom if your phone has it. Some phones have a dedicated telephoto lens. If yours does, use that. Optical zoom uses a second lens with its own sensor. No pixel stretching.
- Accept the wide shot. Sometimes the best video is a wide shot that shows the environment. Don't feel like you have to be close.
Common Mistakes That Ruin Good Footage (Even With Expensive Phones)
Let's run through the mistakes that trip up even experienced shooters. Avoid these and you're already ahead of 90% of smartphone videographers.
Mistake 1: Recording in portrait orientation.
Unless you're shooting exclusively for TikTok or Instagram Reels, rotate your phone to landscape. Vertical video looks unprofessional on YouTube, Facebook, and any TV or monitor. It leaves black bars on the sides.
It's the single most recognizable sign of an amateur.
Mistake 2: Using auto white balance.
Your phone constantly shifts white balance while recording. A cloud passes overhead. Someone turns on a lamp.
Your footage shifts from warm to cool mid-scene. This is nearly impossible to fix in editing. Lock white balance before you start.
Mistake 3: Not cleaning the lens.
Your phone lives in your pocket. The lens collects grease, dust, and fingerprints. Wipe it with a microfiber cloth before every shoot.
A dirty lens creates a hazy wash over your footage that no amount of editing can fix.
Mistake 4: Relying on digital stabilization for walking.
EIS cannot fix walking footage. It crops in and tries to smooth motion, but the result is warped edges and a swimming effect. Use a gimbal or walk like a ninja.
Mistake 5: Recording at max settings without testing.
4K at 60 fps with HDR and high bitrate looks amazing for the first five minutes. Then your phone overheats and stops recording. Always do a test recording of the full length you need before the real shoot.
Pro Tricks That Don't Cost a Thing (Focus Lock, Exposure Lock, Grid Lines)
You don't need expensive gear to get pro results. These three tricks are free and available on every smartphone.
Tap to lock focus and exposure.
Most people just tap to focus, let go, and assume it's done. That's not enough. Tap and hold on your subject until you see "AE/AF Lock" or a yellow lock icon.
This locks both autofocus and auto exposure. The phone will stop adjusting either one. Perfect for static shots and interviews.
Use the grid.
Turn on the grid overlay in your camera settings. The standard grid is a 3×3 pattern. Use it to follow the rule of thirds.
Place your subject on one of the vertical lines. Leave empty space in the direction they're looking. This is the simplest composition trick in existence, and it transforms your framing instantly.
Use focus peaking.
Some phones have a mode called focus peaking. It highlights the in-focus parts of your image with a colored outline. Use this for macro shots or any scene where precise focus matters.
Quick Reference: Decision Guide for Any Shooting Situation
Here's a cheat sheet you can screenshot and bookmark. For any situation, find your row and follow the column.
| Situation | Resolution | Frame Rate | Shutter Speed | Stabilization | Notes |
|---|---|---|---|---|---|
| Bright outdoor vlog | 4K | 30 fps | 1/60th | EIS on | Lock WB to Sunny |
| Indoor interview | 4K | 24 fps | 1/50th | Tripod | Add face light |
| Night street scene | 1080p | 24 fps | 1/50th | Tripod | Accept grain |
| Walking travel shot | 4K | 30 fps | 1/60th | Gimbal | Walk like a ninja without one |
| Sports / action | 1080p | 60 fps | 1/120th | EIS on | Stay wide, no zoom |
| Slow motion (water, hair, impact) | 1080p | 120 fps | 1/240th | Tripod | Needs bright light |
| Cinematic short film | 4K | 24 fps | 1/50th | Tripod | Flat color profile if available |
| Product close-up | 4K | 30 fps | 1/60th | Tripod | Lock focus, use macro lens |
Frequently Asked Questions
What is the best resolution for smartphone video?
4K at 30 fps is the best all-around choice as of 2026. It gives excellent detail with manageable file sizes. 1080p is good for action shots, slow motion, or when you need longer recording times. 8K exists on some phones but offers minimal real-world benefit and causes overheating quickly.
Why is my smartphone video so shaky?
Shakiness happens because you're holding the phone with both hands but your body isn't perfectly still. Enable electronic image stabilization in settings, keep your elbows tucked, and avoid walking while recording. For walking footage, the only reliable fix is a gimbal.
Does changing the resolution affect video quality?
Yes, but not always how you'd think. Higher resolution captures more detail in good light. In low light, 1080p sometimes looks better than 4K because the pixels are larger and gather more light.
Match your resolution to the light available.
How can I reduce noise in low-light video?
The only fix that works well is more light. Turn on lamps, open curtains, or add an LED panel. In software, lower your ISO to the minimum acceptable level and accept slight underexposure.
Noise reduction in editing (DaVinci Resolve, CapCut) helps but adds a plastic look if pushed too far.
Should I use HDR video?
HDR video preserves more detail in bright and dark areas. But it creates larger files and not every screen displays HDR correctly. Use HDR only if you plan to edit for HDR output.
For standard YouTube or sharing, standard color works fine.
Is optical zoom better than digital zoom?
Yes, optical zoom uses a separate physical lens and preserves image quality. Digital zoom crops and stretches the image, reducing resolution. If your phone lacks optical zoom, physically move closer instead of pinching to zoom.
Do third-party camera apps improve video quality?
Yes. Apps like Filmic Pro and Motion Cam give manual control over shutter speed, ISO, white balance, and bitrate. They bypass the phone's automatic processing and let you make professional decisions.
The free built-in camera app hides most of these controls.

Similar Posts