How To Improve Airpods Pro 2 Mic Quality For Better Calls

To instantly boost your AirPods Pro 2 mic quality, ensure they are clean, update their firmware, and test different device settings. Using noise reduction features and speaking closer to the mic can also make a big difference. These quick fixes can significantly enhance clarity and reduce background noise during calls.
If your AirPods Pro 2 mic isn’t performing well, there are simple steps you can take to improve its sound quality. Keeping the microphones clean, updating your device’s software, and adjusting settings for optimal performance can make your voice clearer and reduce ambient noise. Sometimes, minor adjustments can transform a muffled call into a crisp, clear conversation.
Good microphone quality is essential for seamless communication, especially with remote work and virtual calls becoming commonplace. If you’re experiencing muffled audio, static, or background noise, don’t worry—there are practical solutions. In this guide, we’ll walk through ways to improve your AirPods Pro 2 mic quality quickly and effectively, ensuring your voice is always heard loud and clear.

How to Improve AirPods Pro 2 Mic Quality
Understanding How the AirPods Pro 2 Microphone Works
The AirPods Pro 2 uses multiple microphones to capture your voice clearly while filtering out background noise. These microphones are located both inside and outside the earbuds. The external mic picks up your voice and environmental sounds, while the internal mic focuses on clearing noise from your voice.
Knowing how these microphones operate helps you identify what affects mic quality. Factors like wind, nearby conversations, or even earwax can influence how well your microphone performs. Improving mic quality involves managing these factors and ensuring your device is functioning properly.
Basic Tips to Improve Microphone Clarity
Start with simple steps to enhance your AirPods Pro 2 microphone quality.
- Clean your microphones regularly to remove dirt, earwax, or debris that can block sound entry.
- Ensure your AirPods are properly seated in your ears for optimal microphone positioning.
- Keep your device updated with the latest firmware, as Apple releases improvements and bug fixes.
- Check for any physical damage or wear and tear that might impair microphone function.
Making these small changes can significantly reduce background noise and improve your voice clarity during calls or recordings.
Proper Maintenance and Cleaning of AirPods Pro 2 Microphones
Regular cleaning keeps your AirPods performing at their best.
Tools Needed for Cleaning
- Soft-bristled brush or a clean, dry toothbrush
- Lint-free cloth or microfiber cloth
- Isopropyl alcohol (optional, for deep cleaning)
Cleaning Steps
- Gently brush around the microphone openings to remove dust or lint.
- Use a slightly damp cloth to wipe the exterior surfaces.
- Avoid using liquids directly on the microphones to prevent damage.
- For deep cleaning, dip a cloth in isopropyl alcohol, then wipe the surfaces carefully.
Maintaining clean microphones ensures clearer voice transmission and reduces muffling caused by blockage.
Optimizing Your Environment for Better Microphone Performance
Your surroundings greatly impact mic quality.
Choose a Quiet Space
Speak in areas with minimal background noise. Soft furnishings like curtains and carpets absorb sound, reducing echoes and ambient noise.
Avoid Wind and Drafts
Wind can cause wind noise, making your voice hard to hear. Use your hands or a cover to shield the microphone when outdoors.
Limit Overlapping Conversations
Background chatter can confuse the microphone’s noise reduction. Try to be in a quiet, controlled environment during calls.
Using Accessories and Apps to Enhance Microphone Functionality
Additional tools can improve mic quality beyond basic adjustments.
Microphone Covers and Windshields
Using small foam or silicone covers can reduce wind noise and pops, especially outdoors.
Third-Party Audio Apps
Apps like Krisp or Motorola’s Hear Clear can provide real-time noise suppression and enhance voice clarity. These work well when using AirPods with compatible devices.
Equalizer and Sound Settings
Adjusting sound settings on your device or through specific apps can help improve vocal clarity by emphasizing voice frequencies and reducing background sounds.
Apple Settings and Firmware Updates
Keeping your device up-to-date ensures you have the latest enhancements for microphone performance.
Check for Firmware Updates
Connect your AirPods Pro 2 to an iPhone, then go to Settings > General > About > AirPods to see if a new firmware version is available. Updates often include bug fixes that improve mic quality.
Ensure Proper Device Settings
Navigate to Settings > Bluetooth, find your AirPods, and select Info. Enable features like Noise Control and Spatial Audio to optimize sound during calls.
Maximizing Bluetooth Connection for Best Microphone Quality
A stable Bluetooth connection reduces audio dropouts and improves clarity.
Maintain a Clear Line of Sight
Keep your device close and avoid physical obstructions between your device and AirPods Pro 2.
Limit Interference from Other Devices
Turn off or move away from other Bluetooth devices that may cause interference during calls.
Reset and Reconnect Your AirPods Pro 2
If sound quality drops, try resetting your AirPods. To do this, press and hold the setup button on the case until the LED flashes amber then white, and reconnect to your device.
Troubleshooting Common Microphone Issues
If your microphone still isn’t performing well, these steps can help.
Test the Microphone
Use Voice Memos or a call to check voice clarity. If issues persist, proceed with troubleshooting.
Reset Your AirPods Pro 2
This recalibrates the device and often fixes bugs affecting mic quality.
Contact Apple Support
Persistent issues may indicate hardware problems requiring professional inspection or replacement.
Additional Tips for Better Microphone Performance
Small adjustments can make a big difference.
- Always store your AirPods in a clean, dry case when not in use.
- Avoid exposing your AirPods to extreme temperatures or moisture.
- Use the “Find My” app to ensure your earbuds are not misplaced or damaged.
- Test microphone performance after each adjustment or cleaning to gauge improvements.
Incorporating these practices guarantees your AirPods Pro 2 mic remains clear, functional, and ready for calls and recordings of high quality. Consistent maintenance, proper environment, and software updates play crucial roles in achieving the best microphone performance possible.
How To Improve AirPods Mic Quality!
Frequently Asked Questions
How can I ensure my AirPods Pro 2 mic is free from obstructions?
Regularly check the microphone openings on your AirPods Pro 2 for dirt, earwax, or debris. Use a soft, dry brush or cloth to gently clean these areas. Keeping the microphone clear prevents muffled sound and improves voice clarity during calls. Avoid using liquids or sharp objects that could damage the microphone components.
What settings can I adjust to improve microphone quality during calls?
Navigate to your device’s Bluetooth settings and select your AirPods Pro 2. Enable the “Noise Control” features like Transparency mode to better capture your voice. Additionally, go to the microphone settings in your device’s accessibility options and set the AirPods as the preferred microphone source. These adjustments help your device better isolate your voice from background noise.
How does positioning impact microphone performance, and what is the best way to hold my AirPods?
Ensure your AirPods are properly seated in your ears with the microphones aligned close to your mouth. Avoid adjusting them frequently or wearing them loosely, as this can hinder sound pickup. Proper fit not only enhances passive noise reduction but also ensures the microphones pick up your voice clearly without interference.
Are software updates beneficial for microphone functionality?
Yes, keeping your device and AirPods Pro 2 firmware updated can improve microphone performance. Firmware updates often include bug fixes and enhancements that optimize sound capture and overall microphone quality. Check for updates regularly through your device’s settings to maintain optimal performance.
What are some troubleshooting steps if my AirPods Pro 2 microphone quality drops?
Start by disconnecting and reconnecting your AirPods Pro 2. Clean the microphones as described earlier. Restart your device and ensure all software is current. If issues persist, reset your AirPods by holding the setup button on the case until the status light flashes. If problems continue, contact Apple support for further assistance.
Final Thoughts
To improve airpods pro 2 mic quality, start by cleaning the microphones regularly to remove dirt and debris. Adjust the fit of your AirPods for better sound pickup and reduce background noise. Keep your device software updated to ensure optimal performance.
In conclusion, the best way to enhance airpods pro 2 mic quality is to follow these simple steps. Paying attention to cleaning, fit, and updates makes a significant difference in mic clarity.
Related posts

New Iphone Setting Up: A Complete Guide For Beginners
**To set up a new iPhone quickly, follow a few simple steps to get started right away.** When…
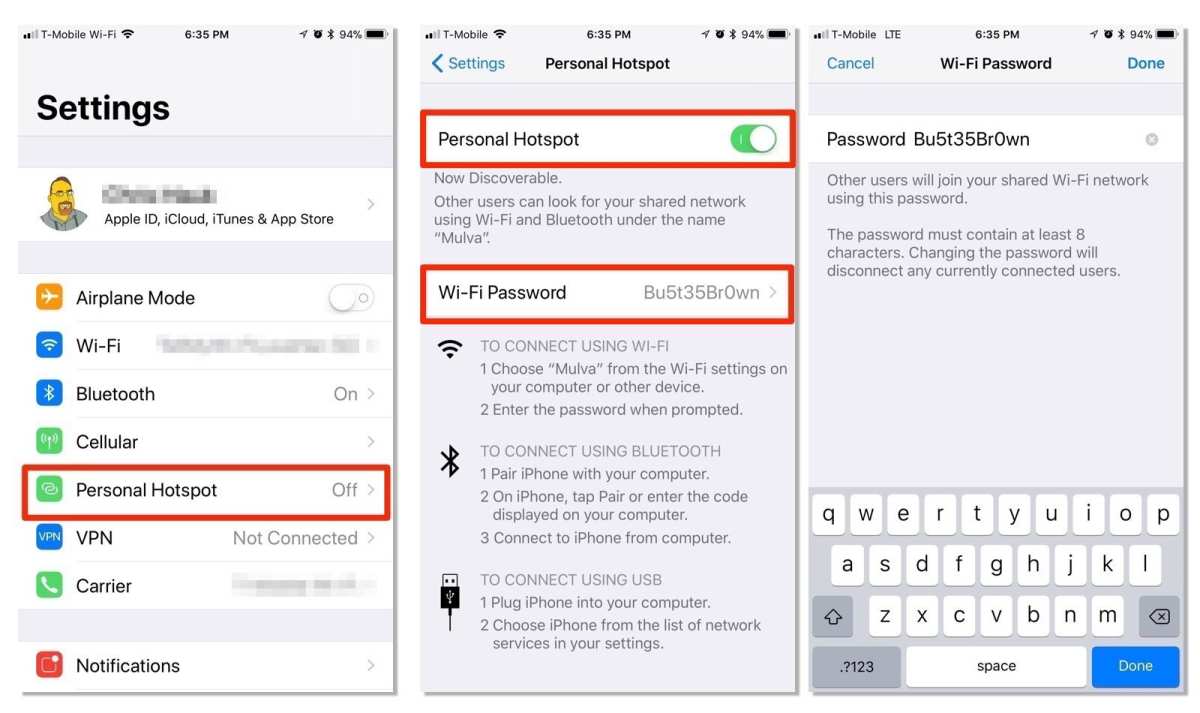
Iphone Setting Up Hotspot: Easy Steps To Connect Your Device
**To set up your iPhone as a hotspot, simply turn on Personal Hotspot in your settings.** If you’re…
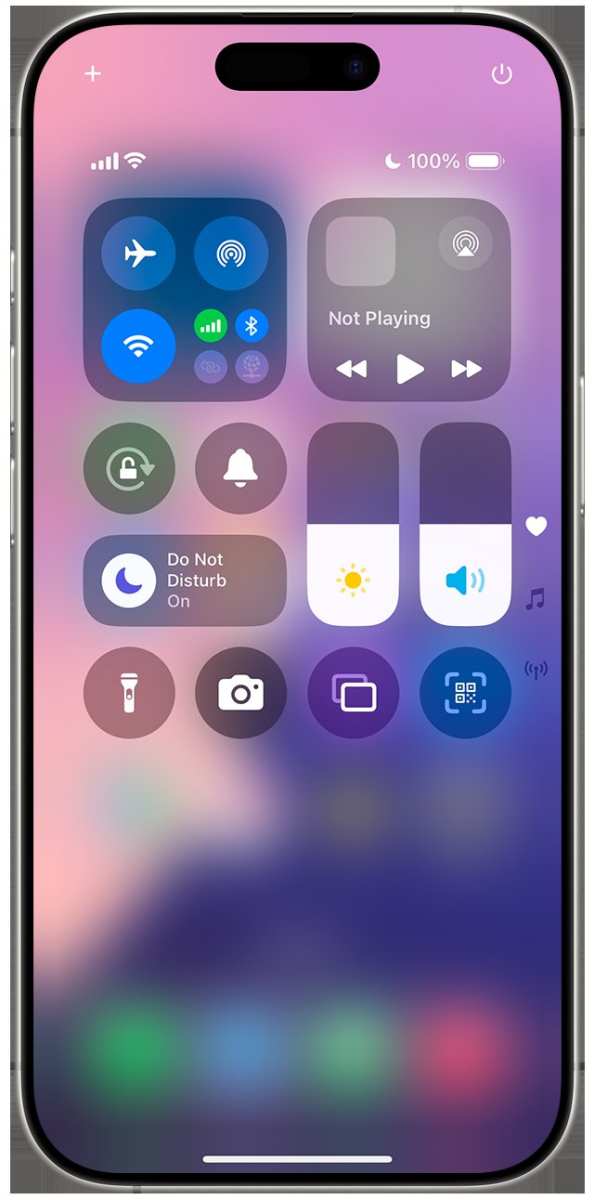
Effective Guide To The Do Not Disturb Iphone Setting
The ‘do not disturb iPhone setting’ instantly silences notifications, giving you peace when needed. If you want your…