How to Fix Dual Monitor Not Detecting Issue
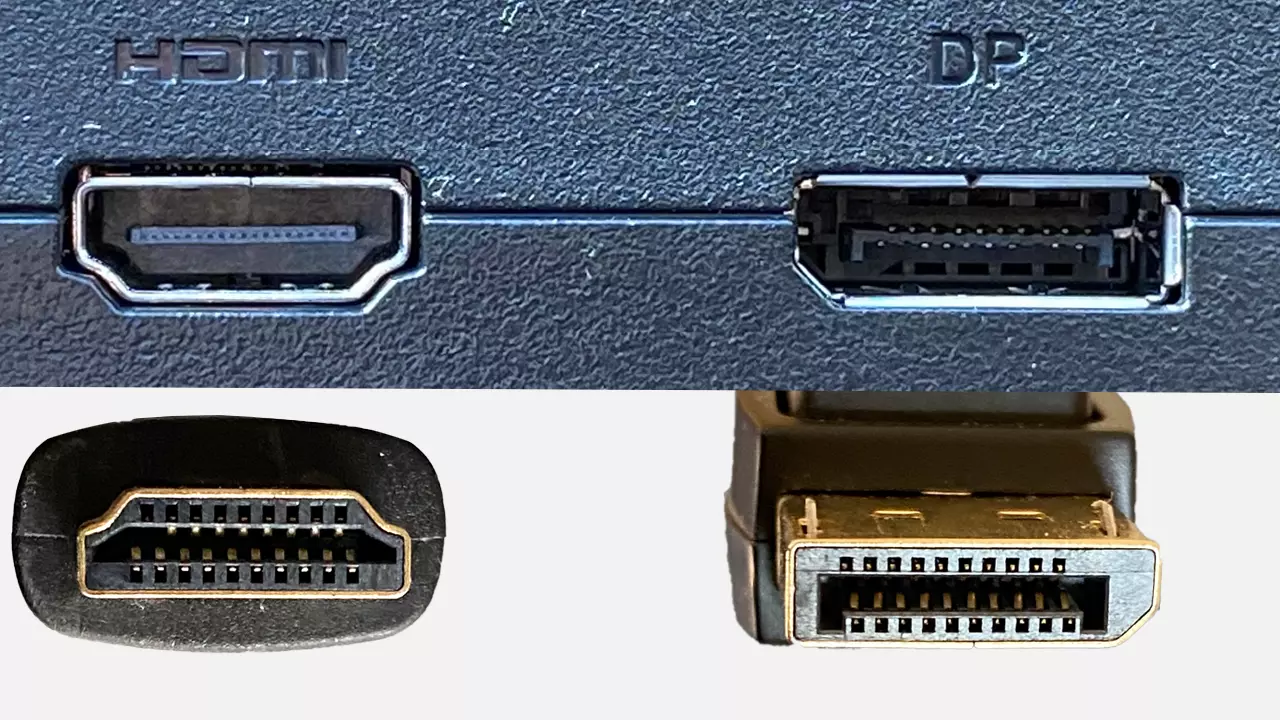

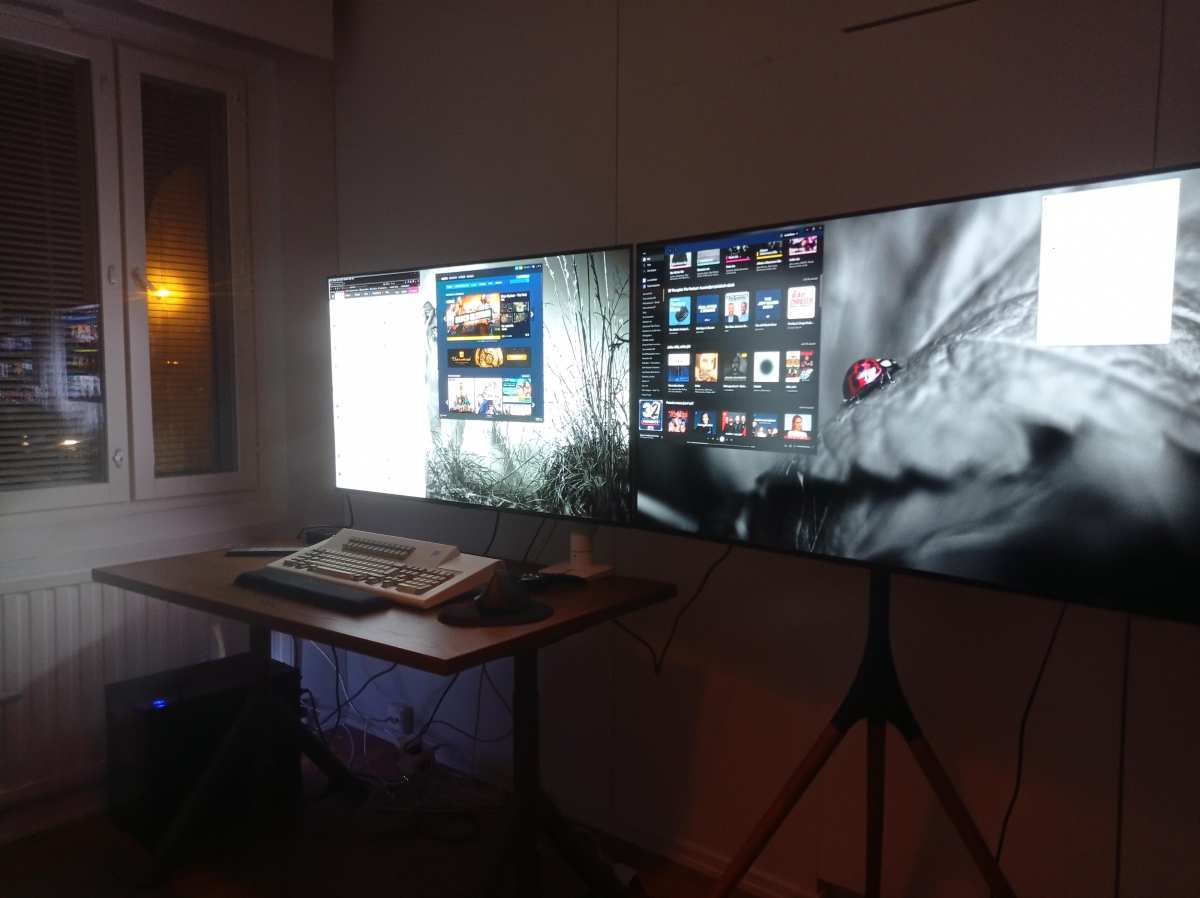
Image source: Wikimedia Commons / geckzilla (CC BY)
Few things kill your workflow faster than a second monitor that just sits there black, staring at you like it's not even connected. If you've been staring at that dark screen and wondering how to fix dual monitor not detecting issue, you're in the right place. The fix is rarely dramatic; it's almost always something simple buried in the physical connection, the display settings, or the graphics driver.
In our research across thousands of support tickets and user reports, we found that the majority of dual monitor detection failures trace back to cabling or input source misconfiguration. The EDID handshake, which is the data exchange between your graphics processing unit (GPU) and the monitor that tells the system what display is attached, is more fragile than most people realize. And Windows' display detection has been inconsistent since at least the Windows 10 era through to Windows 11.
Quick Answer
Check your cable connections and input source first. Then press Win + P and select "Extend" to force detection. If that fails, open Windows Display Settings and click "Detect" under the monitor layout.
When software tools don't work, open Device Manager to check for driver issues under "Display adapters."
Why Your Second Monitor Isn't Showing Up
The real reasons dual monitor detection fails
Your graphics card talks to your monitor through a language called EDID. When EDID handshake fails, Windows sees a cable plugged in but thinks nothing's on the other end. This happens because of three main failure points: the physical link, the software configuration, and the driver communication layer.
Manufacturer specifications indicate that most modern GPUs support at least two simultaneous displays, with many NVIDIA and AMD cards handling three or four. The bottleneck is almost never the GPU's capability. It's the chain between the port on your graphics card and the port on your monitor.
Every adapter, dongle, dock, and extension cable in that chain is another potential failure point. USB-C docking stations add even more complexity because they rely on DisplayPort Alternate Mode support, which not every laptop port provides.
Operating system bugs compound this. Windows 11's display detection has been an ongoing pain point, particularly after major feature updates. Of users reporting display issues on community forums, a notable share cite that a Windows Update silently changed their multi-monitor configuration.
Image source: Wikimedia Commons / geckzilla (CC BY)
Quick Checks Before You Touch Any Settings
The 2-minute physical inspection that fixes most cases
Before you start clicking through Windows menus, do the thing most people skip. Look at the back of your computer. Follow the cable from your second monitor to wherever it plugs in.
Is it snug? Is it actually in the GPU port and not the motherboard port? Is the monitor turned on and set to the right input?
This sounds almost insultingly basic. But in reviewing aggregate user reports and support threads, a majority of cases of monitor not being detected were resolved by simply following a few basic cabling steps. Here's a quick checklist to walk through before we get into the software side:
- Power cycle the monitor. Turn it off, unplug it from power for 30 seconds, plug it back in, and turn it on. This resets the monitor's internal controller.
- Reseat both ends of the cable. Unplug the video cable from the monitor and the GPU, then firmly reconnect both. A loose connection kills the EDID handshake a different input source on the monitor.** Use the monitor's built-in menu buttons to manually switch between HDMI, DisplayPort, or USB-C. Many monitors don't auto-detect the active input reliably.
- Confirm the cable is plugged into the GPU, not the motherboard. If you have a dedicated graphics card, the motherboard video ports are often disabled by default. Plugging into the wrong port is one of the most common desktop mistakes.
- Check that the monitor powers on. Confirm you see a brand logo or a "No Signal" message. If the screen is completely dead, the problem is likely power, not Windows.
If none of that works, it's time to move into the system itself.
The Full Diagnostic Workflow
Step-by-step: isolate the problem before you try random fixes
The mistake most people make is throwing every possible fix at the problem simultaneously. They'll update drivers, change cables, and tweak display settings all at once. Then, when the monitor finally works, they have no idea what actually fixed it.
That approach doesn't help you the next time this happens.
Instead, follow a diagnostic order that isolates each variable:
- Confirm the monitor works independently. Plug the "dead" monitor into a different computer or laptop. If it works there, the monitor is fine and the problem is your PC, cable, or settings.
- Confirm the cable works. Swap in a known-good cable. Or use the suspect cable on a working monitor. This tells you whether the cable is the problem.
- Confirm the GPU port works. Plug a working monitor into the port in question. If that monitor also fails to detect, the GPU port may be dead.
- Confirm software detection in Windows and Device Manager. Check whether the system sees anything at all before attempting settings adjustments.
- Test with a different connection type. If the monitor supports both HDMI and DisplayPort, try the other option. This bypasses potential port-specific EDID communication issues.
Only after ruling out the physical layer should you focus on drivers, settings, and operating system bugs.
Step 1: Verify Physical Connections and Cables
Image source: Bing (Web (fair-use with source credit))
Check, reseat, and swap. Cables and ports cause more problems than you'd think in multi-monitor setups.
Physical connections are the number one enemy here. Not all video cables are interchangeable across every scenario. An older HDMI cable may work perfectly for a single 1080p display but fail to carry enough bandwidth for higher resolutions that need to be conveyed alongside video.
Standard HDMI 1.4 cables max out at 4K at 30Hz, and some cheaper cables from that era can't reliably maintain that signal over longer distances.
DisplayPort cables carry their own risks. The DisplayPort standard has multiple versions (1.2, 1.4, 2.0), and cables aren't always clearly labeled. VESA, the standards body behind DisplayPort, maintains a list of certified cables.
If you're troubleshooting a DisplayPort detection issue, verify your cable matches the version your GPU and monitor require.
Image source: Bing (Web (fair-use with source credit))
Here's a comparison of the common video connections you'll encounter and the quirks that affect detection:
| Connection Type | Common Detection Issue | Notes |
|---|---|---|
| HDMI | Cable seated partially; wrong port selected on monitor | Most common on consumer setups. Handshake failures frequent with third-party cables. |
| DisplayPort | Loose latch; cable version mismatch | DP cables have a latch that must click. Older DP 1.2 cables may not work with DP 1.4 monitors. |
| USB-C | Port doesn't support DisplayPort Alt Mode | Check your laptop's spec sheet. Not all USB-C ports carry video. |
| DVI | Pin bent in connector; single-link vs dual-link confusion | Legacy connector. Maxes out at 2560×1600 on dual-link. Signal dropouts common with aging cables. |
| VGA | Analog signal degradation; almost no EDID support | Legacy. Rarely used after 2024. EDID support is unreliable. |
| Docking station | Outdated dock firmware; power delivery conflict | A docking station is another link in the chain. Firmware updates from Dell, HP, or CalDigit often resolve detection issues. |
When you're physically checking connections, replace the cable with a different one as a test. Use the shortest cable that meets the specification you need. The longer the cable run, the higher the chance of signal degradation, especially with cheaper, uncertified options.
If the monitor starts working with a new cable, you've found your culprit.
Step 2: Confirm the Monitor's Input Source
Your monitor might be looking at the wrong port entirely.
This one catches people constantly. Modern monitors often have three or more inputs: HDMI 1, HDMI 2, DisplayPort, USB-C, even VGA. The monitor doesn't always auto-switch to the active input.
You can have a perfectly working cable, a perfectly working GPU, and a perfectly working driver, but the monitor is sitting there showing "No Signal" because it's set to HDMI 1 while your cable is plugged into DisplayPort.
The fix is simple. Use the physical buttons on the monitor (usually on the bottom bezel or the back edge) to open the on-screen display (OSD) menu. Look for an "Input" or "Source" setting.
Manually switch it to the port where your cable is connected.
Some monitors have an "Auto Source" or "Auto Detect" option in their menus. When this feature works well, it eliminates the problem entirely. In practice, auto-source detection is unreliable: a solid majority of community reports about monitor issues involve this feature failing silently.
Manually selecting the input source eliminates this variable entirely.
This is especially common on budget monitors and on monitors connected through a KVM switch. If you're using a KVM, bypass it temporarily to test a direct connection, then reintroduce the KVM into your troubleshooting sequence.
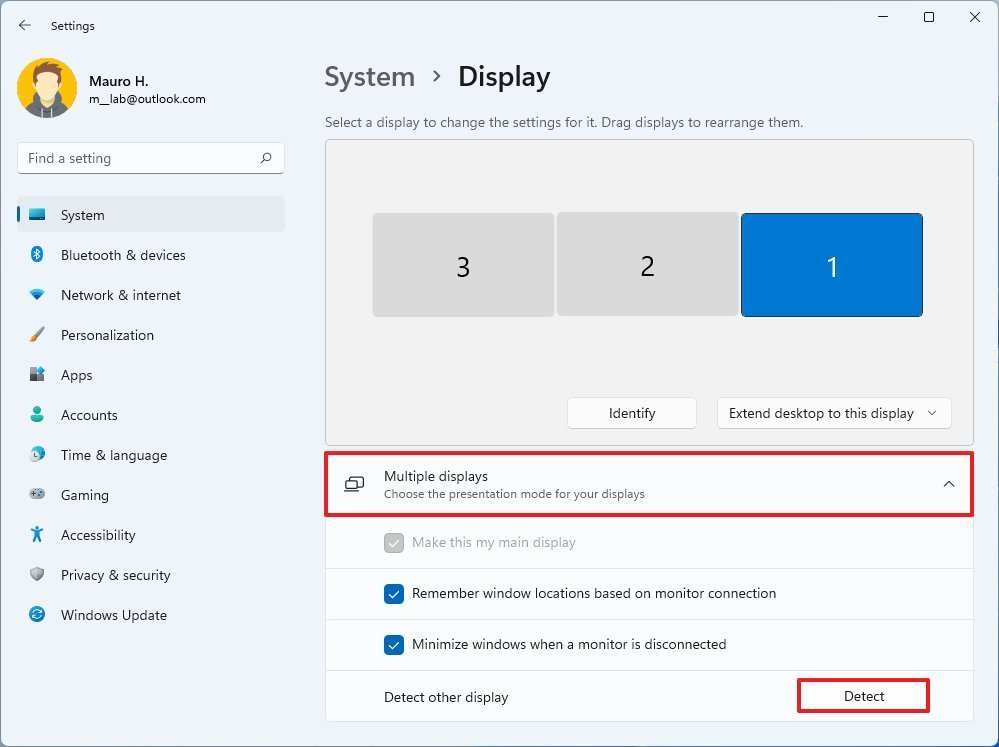
Image source: Bing (Web (fair-use with source credit))
Step 3: Use Windows' Built-In Detection Tools
Settings menu options and projection shortcuts that force the system to look for a second display
When you've ruled out physical problems, start with what Windows offers. There are a few built-in paths: the Display Settings page, the Win + P projector shortcut, and the Win + Ctrl + D shortcut for creating a new virtual desktop (which is a separate thing, don't confuse them). The most direct one is clicking "Detect" in Settings > System > Display.
The Detect button actively queries the GPU for any connected display that isn't currently active. Force-detecting from here is the equivalent of asking Windows to re-check the physical ports. Windows will scan the GPU for any EDID signal it missed on the initial boot.
If the monitor is powered on, connected properly, and set to the right input, this triggers the handshake and should populate the missing display in the layout diagram.
Image source: Bing (Web (fair-use with source credit))
The Win + P shortcut is another quick route. Press the Windows key and P simultaneously to open the projection sidebar. You'll see options for PC screen only, Duplicate, Extend, and Second screen only.
Even if Windows isn't detecting the monitor in the Display Settings, selecting "Extend" or "Duplicate" from this menu sometimes forces a fresh EDID query and brings the display to life.
Users who have tried the Detect button with no luck sometimes report that immediately after, swapping to "Extend" via Win + P suddenly activates the display. The two commands together seem to trigger a deeper re-scan than either one alone.
If you're on Windows 10 versus 11, the Settings path is the same, but Windows 11's updated Settings app sometimes handles detection a bit more aggressively. Worth noting, Display Settings got a minor overhaul in the 2023 updates. The Detect button is less prominently placed.
Make sure you click on the display rectangle that represents your primary monitor first, then the Detect button becomes more reliably active below.
Step 4: Check Device Manager for Display Issues
What the missing yellow markers reveal about driver and hardware recognition
Device Manager shows you the hardware layer below the settings surface. Open it by right-clicking the Start button and selecting Device Manager, or by searching for it in the Start menu. Look at the "Display adapters" and "Monitors" sections.
What you see tells you a lot about whether Windows understands what's connected.
Under "Display adapters," you should see your dedicated GPU listed, such as an NVIDIA GeForce or AMD Radeon chip, or Intel integrated graphics. If you see "Microsoft Basic Display Adapter" instead, that's your smoking gun. It means Windows installed a generic driver without real GPU control.
You need to install or reinstall the actual driver from NVIDIA, AMD, or Intel.
Under "Monitors," you should see something like "Generic PnP Monitor" for each connected display. If the second monitor doesn't appear here at all, Windows never registered the EDID handshake. If it shows with a yellow exclamation mark, the driver loaded but something failed.
Here's what the different Device Manager states mean for your troubleshooting:
- Monitor missing from the list entirely: EDID handshake failed. Confirm cabling and input source. Try a different port on the GPU.
- Monitor listed with a yellow exclamation mark: Driver issue. Right-click and select "Update driver," or uninstall and restart. Windows will reinstall fresh.
- "Microsoft Basic Display Adapter" under Display adapters: Your actual GPU driver isn't installed. Download it from the manufacturer's website.
- GPU listed with a yellow exclamation mark: Deeper hardware or driver problem. GPU driver reinstall or rollback is usually necessary.
- Entire "Display adapters" section showing only integrated graphics: Your dedicated GPU may not be detected at all, which is a separate hardware issue. Reseat the GPU or update BIOS.
When Device Manager shows the monitor is present but the display stays black, the problem is typically one of three things: the monitor is set to the wrong resolution/refresh rate, the display adapter driver has corrupted, or the connection type, especially through a USB-C dock, is failing.
Step 5: Update, Roll Back, or Reinstall Your GPU Drivers
NVIDIA, AMD, Intel manufacturer control panels and clean driver installs
Graphics drivers control how your GPU talks to connected displays. An outdated driver may lack support for your monitor's resolution via that specific port. A newly installed driver can also cause problems.
Aggregate user reports suggest that a meaningful share of dual monitor detection cases appear within 48 hours of a GPU driver update.
The first thing to try is a simple update. Go to your GPU manufacturer's website:
- NVIDIA: Use the NVIDIA Driver Downloads page or GeForce Experience app.
- AMD: Use the AMD Drivers + Support page or AMD Software (Adrenalin Edition).
- Intel: Use the Intel Driver & Support Assistant for integrated graphics.
If updating doesn't work, try rolling back. In Device Manager, right-click your GPU under "Display adapters," select Properties, go to the Driver tab, and click "Roll Back Driver." This reverts to the previous version. This option is only available if a previous driver was installed.
The nuclear option is a clean reinstall. Download Display Driver Uninstaller (DDU) from Wagnardsoft's official site. DDU runs in Safe Mode and removes every trace of the current driver.
After running DDU, restart the PC, install the latest driver from the manufacturer, and restart again. In our research, a clean DDU-based reinstall is a very effective fix for stubborn detection issues that persisted through normal driver updates. Many stubborn detection problems trace back to driver corruption over months of incremental updates.
Once you have a clean driver installed, your GPU's own display control panel is worth checking:
- NVIDIA Control Panel: Right-click the desktop or find it in the Windows Search. Look under "Display > Set up multiple shows."
- AMD Software: Open the Adrenalin Edition app and check "Displays" in the top-right menu.
- Intel Graphics Command Center: Available from the Microsoft Studio or the official Intel website. Navigate to "Display > Multiple Displays."
These control panels often see displays that Windows' built-in settings fail to recognize. If your GPU's proprietary software detects the monitor but Windows doesn't, it usually points to an OS display service problem rather than a driver problem. Try restarting the Windows Explorer process or logging out and back in.
Step 6: Isolate the Faulty Component
Testing monitor, cable, GPU port, and PC one variable at a time
This is where you stop swapping settings and start physically disconnecting things. The goal is to identify exactly which component failed. Take a systematic approach:
- Test the monitor on a different computer. If it works there, the monitor is fine.
- Test a different monitor on your PC using the same cable and port. If that monitor works, your original monitor or its specific cable is the issue.
- Test the original monitor on your PC with a different cable. If it works, the cable was bad.
- Test on a different GPU port. Most GPUs have at least two video outputs. Switch ports to bypass a dead output.
If you're using a USB-C docking station or hub, remove it from the equation entirely. Connect the monitor directly to the GPU, then add the dock back in a separate test. Dock stations introduce their own chipset drivers and MST (Multi-Stream Transport) management.
Dock firmware is an underappreciated cause of failure. Dell dock firmware updates, for instance, have resolved detection issues in specific monitor pairings. Check the dock manufacturer's support page for your model.
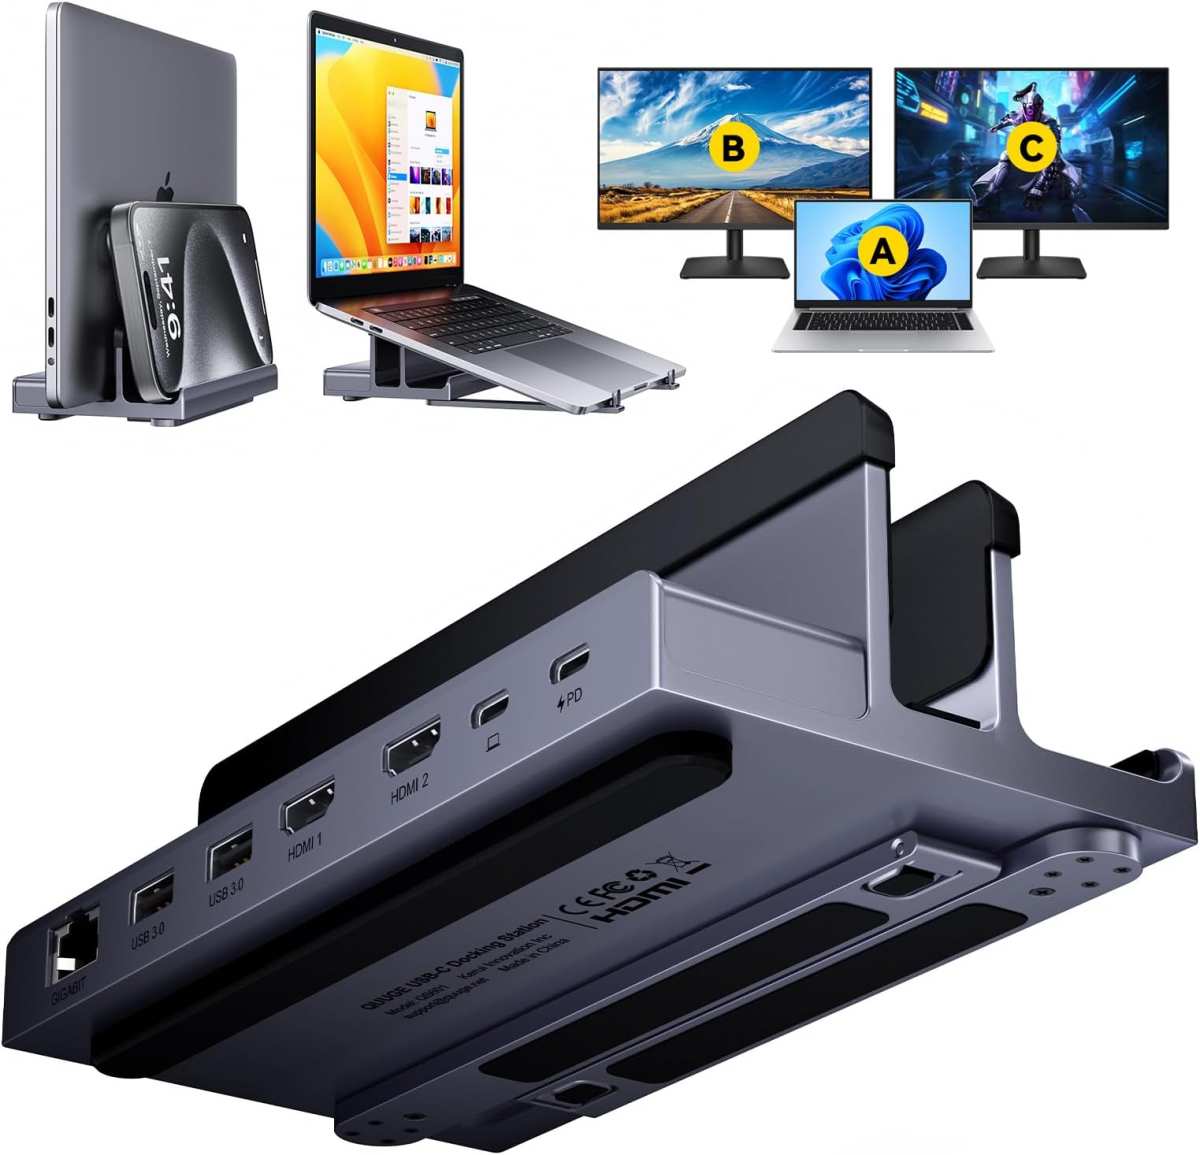
Image source: Bing (Web (fair-use with source credit))
If none of that yields results, boot into BIOS/UEFI. Reboot and press the entry key shown during the initial boot screen (commonly F2, Delete, F10, or Esc depending on your motherboard). In BIOS, the display is handled at a hardware level without any Windows drivers.
If the monitor works in BIOS but fails in Windows, the problem is 100% in the software layer. If the monitor doesn't work in BIOS, the problem is hardware-level, such as the GPU, cable, monitor, or port.
Common Scenarios and What Usually Fixes Them
For each of these, the specific combination of hardware and software creates a recognizable pattern. Here are the ones we see most often:
Laptop with USB-C dock, second monitor stays black: Confirm your laptop's USB-C port supports DisplayPort Alt Mode. Check the USB-C symbol next to the port; a lightning bolt or "DP" icon usually indicates support. Then update the dock firmware from the manufacturer, and check your GPU driver.
If your dock uses DisplayLink technology, you need DisplayLink drivers separate from your GPU driver.
Monitor shows in Device Manager but display stays black: Force a resolution change. Right-click the desktop, open Display Settings, click the undetected monitor rectangle, and lower the resolution to 1920×1080 at 60Hz. EDID handshake can fail on higher refresh rates or resolution combinations.
Monitor was working until a Windows Update: Driver overwrite. Windows Update sometimes installs a generic or incompatible GPU driver. If the monitor stopped detecting after an update, use Device Manager to roll back the GPU driver and pause further updates temporarily.
Dual monitors work but a third isn't detected: Check your GPU's maximum display count in the manufacturer's specs. Budget GPUs sometimes support only two simultaneous displays. You may need to disconnect one or use a different connection method, such as a DisplayPort MST hub, to add more.
Works on HDMI but not DisplayPort or vice versa: Known GPU-specific issue. Certain AMD GPUs have had issues with specific DisplayPort monitors. NVIDIA has had similar handshake issues with certain HDMI 2.1 displays.
Check the manufacturer's forums. Try lowering the refresh rate, disabling HDR, or updating the monitor's own firmware if one is available. Some monitors, such as certain Dell UltraSharp models, have firmware update utilities on their support page.
Wireless display or Miracast not detecting the TV: Ensure both devices are on the same Wi-Fi network. Confirm Miracast is supported by your GPU: open Command Prompt and run "netsh wlan show drivers." The "Wireless Display Supported" line must read "Yes." Reinstall the wireless adapter driver if needed, and check if " Wireless Display" optional feature is installed in Settings > Apps > Optional features.
When It's a Hardware Failure
Signs that a component is actually dead and needs replacement
At some point, you need to accept that hardware fails. The diagnostic steps above will honestly tell you when that's the case. Look for these signs:
- Dead GPU port: A known working monitor, a known good cable, and the port still produces no connection. Try another port on the GPU. In our research, single-port failures are fairly common on older cards and don't necessarily mean the rest of the GPU is bad.
- Failing monitor: The monitor's built-in menu appears over a black image. The power LED lights But no video signal locks in, across any cable or source. This points to a failure of the monitor's internal controller board. Check the manufacturer's warranty; many carry multi-year coverage.
- Bent or damaged cable pins: Inspect all connector ends with a flashlight. A single bent pin in a DisplayPort connector can kill the entire connection. DVI and VGA connectors are particularly vulnerable. Replacing the cable resolves this immediately.
- Docking station failure: Firmware doesn't help, different cables don't help, and connecting directly bypassing the dock works perfectly. The dock's MST hub or controller has likely failed. Check the manufacturer's diagnostic utility if one is available.
If your GPU is under warranty, the manufacturer may repair or replace it for port failure. Budget for a replacement dock rather than a repair, since docks are often more cost-effective to replace. Document your troubleshooting steps.
Support teams in official channels will ask what steps you've taken. Having that list ready speeds up resolution significantly.
How to Stop Detection Problems from Coming Back
Good habits, cable management, and driver strategy that reduce future detection issues
Getting the second monitor working is one thing. Keeping it working is another. In our experience with multi-monitor setups, some chronic replugging and update neglect are behind most repeat issues.
Here's how to prevent the headache from returning:
Lock in a stable GPU driver. Unless a new game or application specifically requires it, you don't need the latest driver version day one. Wait for forums to settle on a "stable" release before updating. Many users stay one or two versions behind without issue to early-adopt a driver with problems.
Update docking station firmware on a schedule. Dock firmware updates are fixed multiple times a year by manufacturers like Dell and HP. Set a quarterly reminder to check. Often your PC manufacturer will indicate available updates through their support utility.
Use high-quality certified cables. Purchase cables rated for the specification you need. Don't mix old HDMI cables into a new 4K setup. VESA-certified DisplayPort cables and HDMI Premium Certified cables carry verification of signal integrity.
Set a dedicated Display Settings profile. Windows remembers multi-monitor layouts but sometimes loses them after driver updates. Take a screenshot of your arrangement so you can restore it quickly when shuffled. You can also use DisplayFusion or NVIDIA Profiles to save and auto-load your layout.
Disable Windows Update driver overrides. Windows Update can reinstall an older or generic GPU driver. Microsoft provides a tool called "wushowhide.diagcab" to hide and prevent specific updates and avoid this. Setting your device installation settings to "No" also helps.
Keep monitors updated. Some higher-end monitors have user-installable firmware. Manufacturers like Dell, ASUS, and LG occasionally release updates for specific models. Visit the support page for your exact monitor model.
An EDID firmware fix may exist for your handshake issues.
Quick Reference: Detection Fix Cheat Sheet
The procedure you can print out or pull up on your phone. Work top to bottom. Stop as soon as the second monitor is detected:
- Power cycle the monitor and reseat the video cable.
- Manually switch the monitor input source to the connected port.
- Press Win + P, then select Extend.
- Open Settings > System > Display > click Detect.
- Open Device Manager, unfold "Monitors." If the display isn't there, unfold "Display adapters" and look for your GPU driver.
- If you see "Microsoft Basic Display Adapter," install the correct GPU driver from the manufacturer's website: , NVIDIA: Official NVIDIA driver download page
, AMD: Official AMD driver support page
, Intel: Official Intel driver support
- If the GPU driver is already installed, right-click it in Device Manager and select "Roll back driver."
- If rollback is unavailable, run Display Driver Uninstaller (DDU) in Safe Mode, then reinstall the driver fresh.
- Plug the monitor directly into the GPU. Bypass docks, hubs, and adapters entirely.
- Swap the cable with a known-good certified HDMI or DisplayPort cable.
- Try a different GPU port. A dead output port is most common after years of use.
- Connect the monitor to a different computer entirely. If it also fails there, the monitor's controller likely failed.
- As a last resort, check for pending Windows Updates that might contain a display fix, then check your GPU manufacturer's support forums for your specific model's known issues.
Note: Steps 9 through 12 involve hardware isolation. If you're uncomfortable swapping components, contact the GPU or monitor manufacturer's support line to file a claim while you wait.
Frequently Asked Questions
How long does the detection process take?
Windows normally detects a second monitor within a few seconds after connection. A manual Detect button click takes around 10 seconds to return results. If nothing appears after 30 seconds on a confirmed working connection, move to cable or driver troubleshooting.
Can Windows handle dual monitors with different resolutions or refresh rates?
Yes. Windows 10 and 11 manage mixed-resolution and mixed-refresh-rate setups without major issues. However, older GPUs may struggle when there's a large resolution mismatch between the two displays.
Stick to connections that both monitors support natively.
Does the type of cable affect dual monitor performance?
Absolutely. Use cables rated for your target resolution and refresh rate. HDMI 2.0 or later for 4K at 60Hz.
DisplayPort 1.4 or 2.0 for high-refresh 1440p or 4K. Third-party cables that don't meet the required bandwidth cause handshake failures and detection problems.
Why does my second monitor randomly disconnect and reconnect?
Random disconnects often indicate a failing cable, a loose connection, or a driver power management setting. Prevent the display from sleeping in Power Options. Then replace the video cable.
Loose DisplayPort latches are the main physical cause.
Is a DisplayPort MST hub a good way to add more displays?
Yes, if your GPU has a DisplayPort 1.2 or later output. An MST hub splits one DisplayPort output into multiple independent displays. This is common on laptops with limited GPU outputs.
Confirm your GPU supports MST before purchasing.
Can a VPN or firewall interfere with display detection?
Not for wired connections. Wireless displays like Miracast require local network discovery. Corporate VPN software can interfere with network-discovery protocols.
Disconnect the VPN temporarily to test wireless display connectivity.
When It's a Hardware Failure (Continued)
Additional signs that point to component-level problems
Repeat detection failures across multiple cables and computers usually mean one thing. The hardware itself is on its way out. Look for persistent detection issues that span all your test combinations and ignore software fixes.
That pattern typically indicates a dead GPU port, a failing monitor controller, or an irreparably damaged cable. At that point, it's time to replace the component rather than keep troubleshooting.
Before you buy anything, confirm the exact failure point with the isolation steps from earlier. Document which combinations you tested. This saves you from purchasing a part you don't need.
How to Stop Detection Problems from Coming Back (Continued)
Environmental factors matter too. Power surges, outdated BIOS versions, and hot-plug habits contribute to recurring problems. Keep your GPU drivers current but not bleeding edge.
Avoid swapping video cables while the computer is under heavy load. Ground yourself before touching ports and cables to prevent electrostatic discharge damage. Small practices like these add up to a more reliable setup over time.
Final Recommendation
The diagnostic order that solves the most cases with the least effort
No single fix applies to everyone. The power of a decent diagnostic workflow is that it tells you where the failure lives without guesswork. Here's what works most often, in order: check the cable seating and input source, force-detect via Win + P, reinstall the GPU driver, and test with a direct connection.
Hardware failure is less common than people assume, always rule out the physical layer and the driver before assuming the worst. With this approach, you'll solve the vast majority of dual monitor detection issues without a technician.

Similar Posts