How to Connect Curved Gaming Monitor to PC
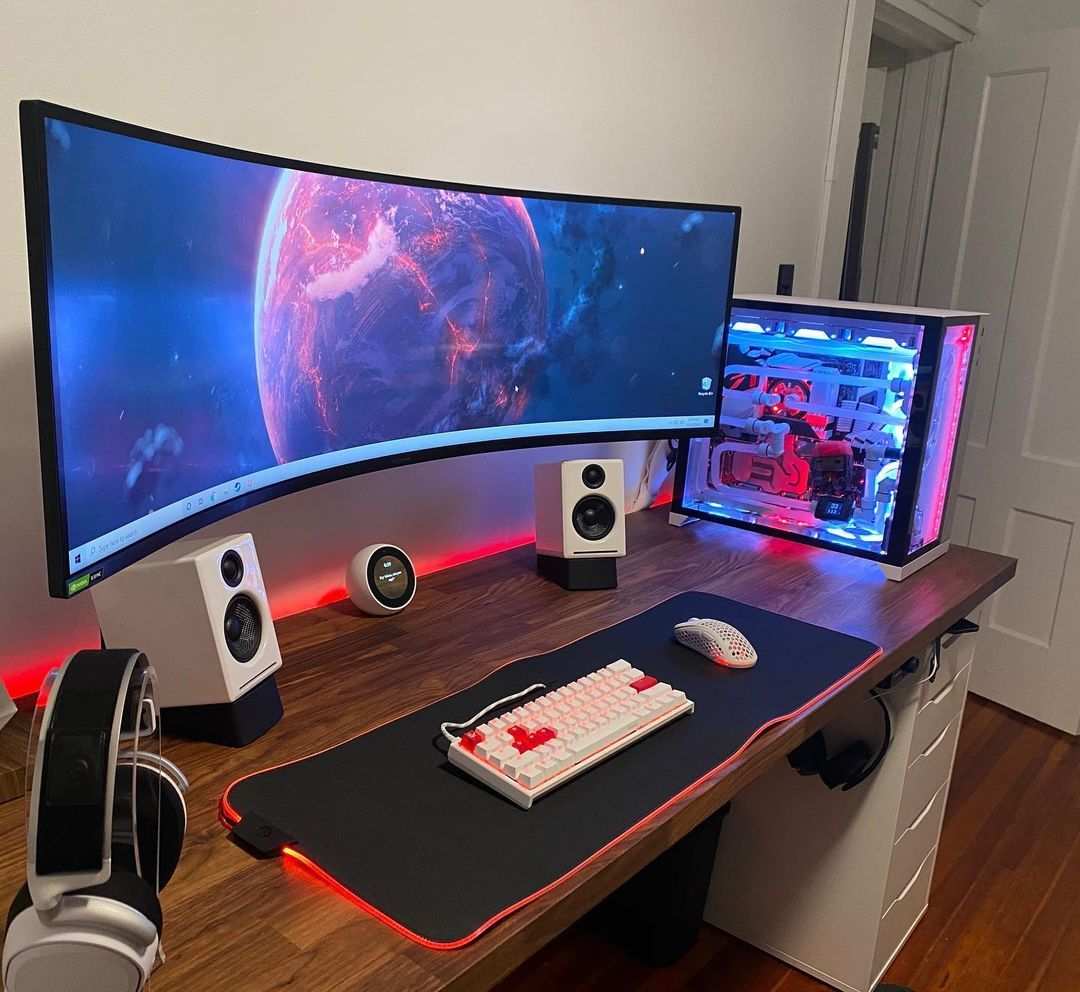
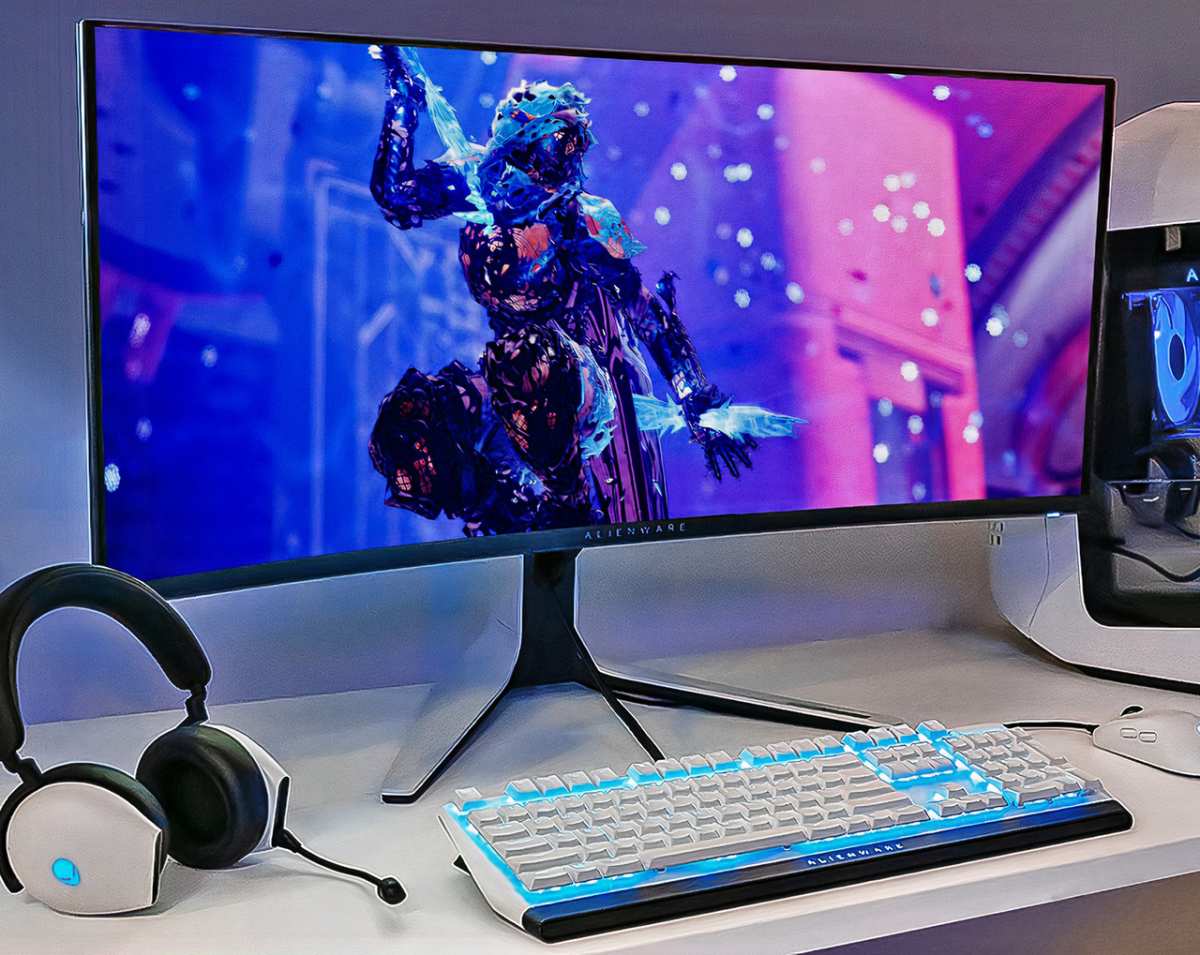
So you've got a shiny new curved gaming monitor and you're ready to hook it up. Learning how to connect curved gaming monitor to pc hardware is simpler than it looks, but there are a few gotchas that can leave you stuck at 60Hz or staring at a blurry screen. The good news?
Once you know which ports to use and which cable actually matters, it's a five-minute job.
The curved part doesn't change how you connect it at all. What does change things is the refresh rate and resolution you're trying to run. A 144Hz 1440p panel needs more bandwidth than a basic 60Hz 1080p display, and the cable you pick determines whether you actually get what you paid for.
DisplayPort 1.4 and HDMI 2.1 are the two standards worth knowing about as of 2026, and we'll break down exactly when each one matters.
")
The #1 Mistake People Make (And Why Your Monitor Might Look Wrong)
Here's the one mistake that accounts for about half the support forums posts on this topic. People plug their monitor cable into the motherboard's video output instead of the graphics card.
The motherboard ports connect to your CPU's integrated graphics. Those are meant for basic desktop use, not gaming. If you plug in there, your monitor will probably display an image, but you're bypassing your entire dedicated GPU.
That means terrible frame rates and no access to your graphics card's features.
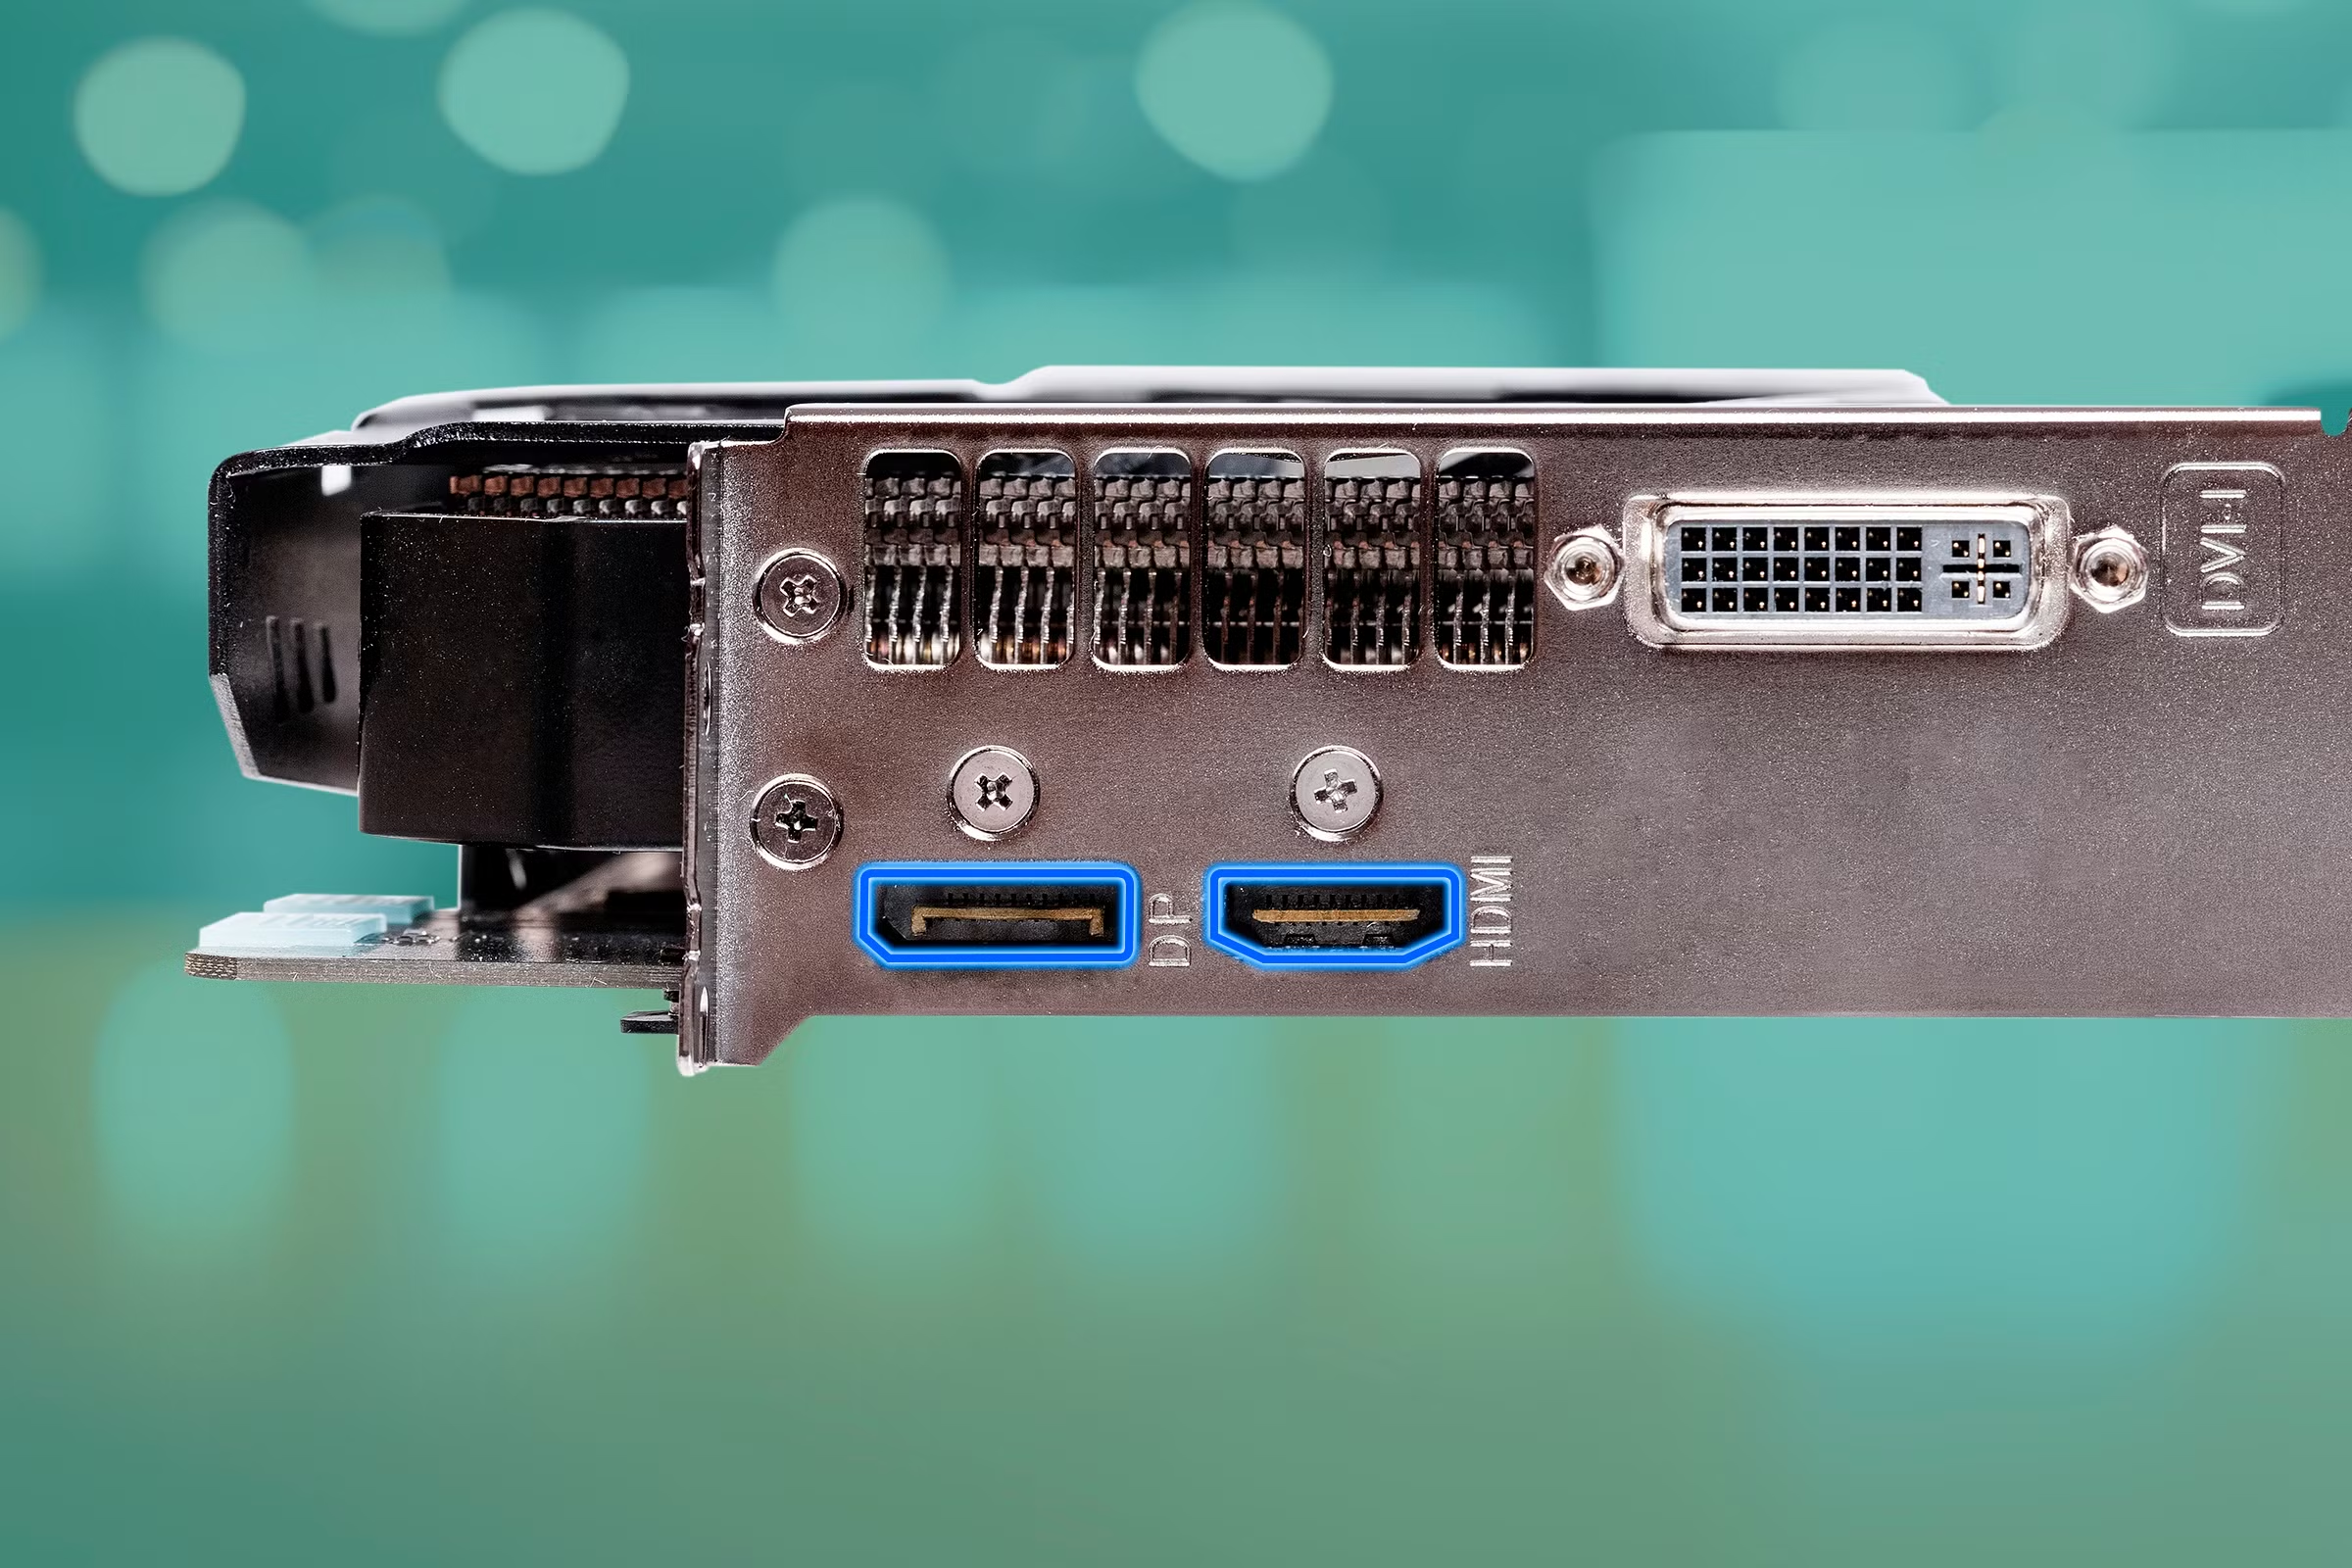
The fix is simple. Look at the back of your PC. The horizontal slots lower down on the case are your GPU.
The vertical ports near the top, clustered around your USB ports and ethernet jack, are the motherboard. Always plug into the lower set.
If you're on a laptop, this isn't an issue. Just use whatever video output your laptop has. Most gaming laptops route their USB-C or HDMI port directly to the dedicated GPU already.
Quick Answer
Connect your curved gaming monitor to your PC's graphics card using a DisplayPort 1.4 cable for the best gaming experience. Set your resolution and refresh rate in Windows Display Settings. Then enable G-Sync or FreeSync in your GPU's control panel.
That's the whole process in under five minutes.
What You Actually Need: Cables, Ports, and GPU Compatibility
Before you grab any cable that's lying around, let's figure out what you're actually working with. The connection process depends entirely on what your GPU supports and what inputs your monitor accepts.
Check Your GPU Ports First
Look at the back of your PC where the video cables plug in. Modern graphics cards typically have a mix of these:
- DisplayPort (DP), The standard for PC gaming. Usually 1 to 3 ports.
- HDMI, Common on almost every GPU. Usually 1 port.
- USB-C (with DisplayPort Alt Mode), Found on some newer cards, especially from NVIDIA's RTX 40-series reference designs.
Most gaming-focused GPUs prioritize DisplayPort. If you have a card from the last five years, you'll almost certainly have at least two DisplayPorts and one HDMI.
Check Your Monitor's Inputs
Curved gaming monitors vary by price and generation. Budget models might only have HDMI 1.4 and VGA. Mid-range and high-end panels usually pack HDMI 2.0 or 2.1 and DisplayPort 1.4.
Some premium models add USB-C with video input.
Check the spec sheet or look at the back of the monitor itself. Write down exactly what you have on both sides before buying or grabbing a cable.
Matching Cable to Port: The Quick Reference
Here's the simple version. If both your GPU and monitor have DisplayPort, use DisplayPort. If one side only has HDMI, HDMI will work fine.
USB-C is a bonus option for laptops or monitors that support it.
The cable that came in the monitor box is usually adequate. But if it's an older HDMI cable or you're chasing a high refresh rate at 1440p or above, you might need something better.
DisplayPort vs. HDMI for Curved Gaming Monitors: Which Cable Should You Use?
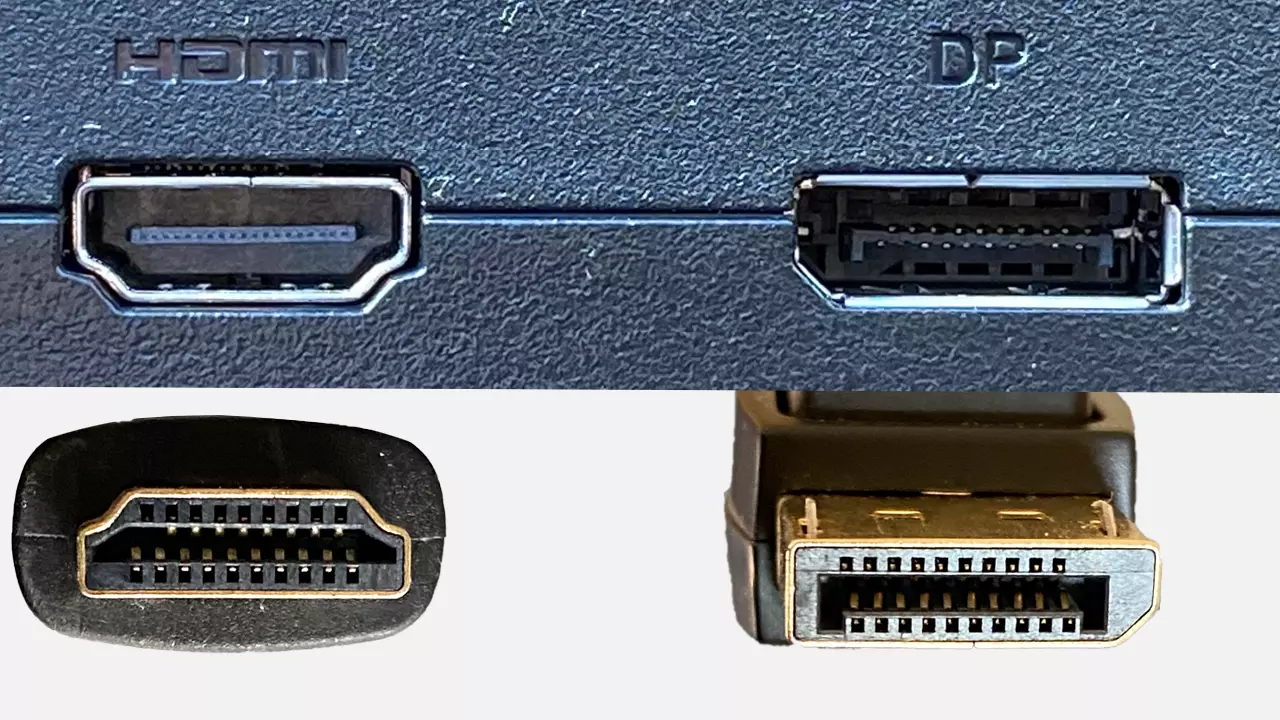
This is where most of the confusion lives. Both cables carry video and audio. Both will give you a picture.
But for gaming, they're not equal.
When DisplayPort Wins
DisplayPort is the native PC gaming standard. It was designed for computer monitors, not home theater gear. Here's why it matters:
- Higher bandwidth at DP 1.4, Supports 1440p at up to 240Hz or 4K at 120Hz with Display Stream Compression.
- Adaptive sync support, FreeSync and G-Sync both work over DisplayPort. G-Sync in particular was built around DP.
- Daisy chaining, Some monitors support multi-stream transport (MST) to chain displays.
- Locking connectors, DP cables have a latch that keeps them plugged in. No accidental disconnects.
For any curved gaming monitor running at 144Hz or higher, DisplayPort is the way to go. It's the safer bet and the one GPU manufacturers design around.
When HDMI Is Fine (Or Your Only Option)
HDMI 2.1 closes the gap significantly. It supports 4K at 120Hz and 1440p at 240Hz. If your monitor and GPU both have HDMI 2.1, you'll get a great gaming experience.
HDMI makes the most sense when:
- Your GPU's DisplayPort slots are already occupied by other monitors.
- You're connecting a laptop that only has HDMI out.
- Your monitor is a 60Hz or 75Hz curved panel where bandwidth isn't a concern.
- You're using a shorter cable run and want the more universally available connector.
Just make sure you're not using an old HDMI 1.4 cable. That'll cap 1080p at 60Hz or 1440p at 30Hz. Not ideal for gaming.
USB-C and Thunderbolt: The Laptop Wildcard
Many modern curved gaming monitors include a USB-C input that carries video. This is incredibly convenient for laptops. One cable for display and charging.
But not all USB-C ports support video. The port needs to support DisplayPort Alt Mode. Most Thunderbolt 3 and Thunderbolt 4 ports do.
Many USB-C 3.2 ports do not. Check your laptop's specs before assuming.
Also note that USB-C video output bandwidth depends on the DP version the port supports. A Thunderbolt 4 port with DP 1.4 Alt Mode gives you the same bandwidth as a physical DisplayPort 1.4 connection.
")
Step-by-Step: How to Connect Your Curved Gaming Monitor to Your PC
Let's walk through the entire process from unboxing to a fully configured display. Follow these steps in order and you'll avoid 90% of the common headaches.
Step 1: Identify the Right Ports on Your GPU
Shut down your PC. Look at the back. Find the graphics card outputs, the horizontal slots in the lower section of the case.
Do not use the vertical ports near the top of the case. Those are your motherboard's integrated graphics.
If you have a dedicated GPU, those motherboard ports are often disabled entirely in BIOS. Plugging into them will give you nothing.
Step 2: Pick the Correct Cable
Based on what we covered above, choose your cable:
- DisplayPort 1.4 cable, Best for high refresh rate gaming at 1440p or 4K.
- HDMI 2.1 cable, Great alternative if both devices support it.
- USB-C to USB-C, Ideal for laptops with DP Alt Mode support.
Don't use the cable that came with a different device unless you've confirmed its version. That random HDMI cable from your old DVD player is probably HDMI 1.4. It won't cut it for 144Hz.
Step 3: Connect and Power On
Plug one end into your GPU. Plug the other end into your monitor. Make sure both connections are snug.
DisplayPort cables click into place, that's normal.
Turn on your monitor first. Then power on your PC. This helps the system detect the display during boot.
Windows should automatically detect the monitor and extend your desktop.
Step 4: Select the Correct Input on Your Monitor
Most curved gaming monitors have multiple inputs. You need to tell the monitor which one to use. Use the physical buttons on the monitor (usually on the back or bottom edge) to open the on-screen display menu.
Navigate to "Input Source" or "Input Select." Choose the port you plugged into. DisplayPort if you used DP. HDMI if you used HDMI.
USB-C if that's what you went with.
Some monitors auto-detect the active input. Don't rely on this. Manually select it the first time to be sure.
Step 5: Set the Right Resolution and Refresh Rate in Windows
Right-click on your desktop and select "Display settings." Scroll down to "Display resolution" and make sure it's set to the monitor's native resolution. For most curved gaming monitors, that's either 2560×1440 (1440p) or 3840×2160 (4K).
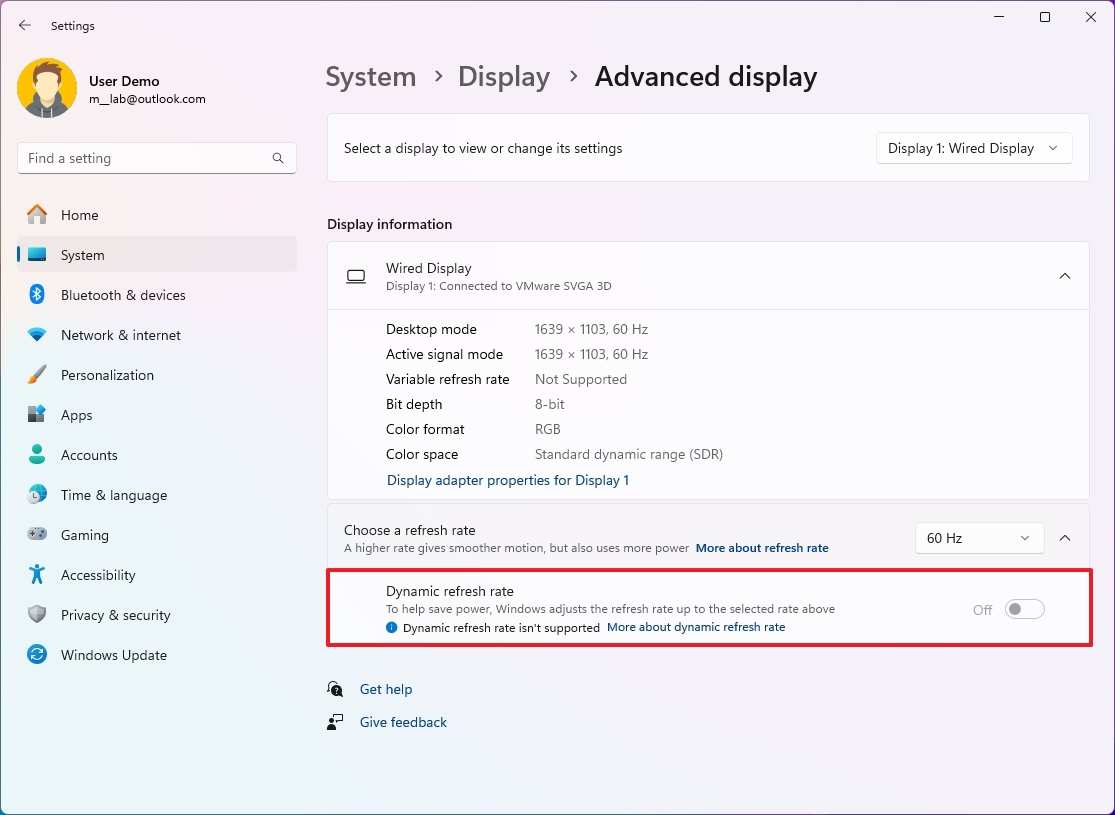
Then click "Advanced display settings." Look for the "Refresh rate" dropdown. This is where the magic happens. If you see 60Hz but your monitor is rated for 144Hz or 165Hz, something is limiting it.
Usually it's the cable or the port.
Select the highest available refresh rate. If the max you see is 60Hz, jump back to Step 2 and check your cable version.
")
Step 6: Enable Adaptive Sync (G-Sync or FreeSync)
This step is optional but highly recommended. Adaptive sync eliminates screen tearing and reduces stutter.
For NVIDIA GPUs:
Open NVIDIA Control Panel. Go to "Display" then "Set up G-Sync." Check the box to enable it. Make sure you've selected the correct monitor if you have multiple displays.
For AMD GPUs:
Open AMD Software (Adrenalin Edition). Go to the "Gaming" tab. Find "AMD FreeSync" and toggle it on.
Your monitor needs to support the corresponding technology. Most curved gaming monitors support FreeSync. G-Sync Compatible models work with NVIDIA cards.
Check your monitor's spec sheet if you're unsure.
Step 7: Verify Everything Is Actually Working
Don't just assume it's all good because the screen looks fine. Verify the actual numbers.
Open Windows Settings > System > Display > Advanced display. Confirm the resolution and refresh rate listed match your monitor's specs.
For adaptive sync, you can test it using the NVIDIA Pendulum Demo or AMD's built-in test. Or just load up a game and toggle V-Sync off. If you see no tearing, adaptive sync is working.
You can also visit testufo.com in your browser. It'll show you the actual refresh rate your monitor is running at in real time. Quick, free, and definitive.
")
Why Is My Curved Monitor Stuck at 60Hz? Common Problems and Fixes
You've plugged everything in, Windows shows your desktop, but something feels off. The motion looks choppy. Your 144Hz monitor is behaving like a basic 60Hz display.
Let's fix that.
The Cable Is the Bottleneck
This is the single most common cause. Not all cables are created equal. An HDMI 1.4 cable physically fits into an HDMI 2.1 port, but it can't carry the bandwidth for high refresh rates.
Here's what happens with the wrong cable at 1440p:
| Cable Version | Max 1440p Refresh Rate | What You'll See |
|---|---|---|
| HDMI 1.4 | 30Hz | Painfully choppy, basically unusable for gaming |
| HDMI 2.0 | 60Hz | Feels "normal" but you're leaving performance on the table |
| HDMI 2.1 | 144Hz+ | Full performance, no issues |
| DisplayPort 1.2 | 144Hz | Works fine for most 144Hz monitors |
| DisplayPort 1.4 | 240Hz+ | Handles everything current gaming monitors throw at it |
If you're stuck at 60Hz, check the printing on the cable itself. It usually says the version somewhere along the sheath. If it doesn't say anything, assume it's old and replace it.
You Plugged Into the Motherboard, Not the GPU
We covered this earlier, but it's worth repeating because it happens constantly. If your monitor is connected to the motherboard's video output, you're using your CPU's integrated graphics.
On many systems, the motherboard ports are completely disabled when a dedicated GPU is installed. You might get a display output during BIOS, but Windows will default to the iGPU. Your games will run terribly, and your refresh rate options will be limited.
Move the cable to the lower ports on the back of your case. The ones screwed into the separate metal bracket. That's your actual graphics card.
Windows Defaulted to a Generic Driver
Sometimes Windows doesn't install the proper monitor driver. It uses a generic "PnP Monitor" driver instead. This can limit your resolution and refresh rate options.
Open Device Manager. Expand "Monitors." If you see "Generic PnP Monitor," right-click it and select "Update driver." Choose "Search automatically for drivers."
Alternatively, download the specific monitor driver (INF file) from the manufacturer's website. Samsung, LG, Dell, and ASUS all host these on their support pages. Install it, restart, and check your refresh rate options again.
Adaptive Sync Isn't Kicking In
If you enabled G-Sync or FreeSync but still see tearing, a few things could be blocking it.
First, make sure V-Sync is turned off in your game's settings. Adaptive sync and in-game V-Sync can conflict. Second, check that your frame rate is within your monitor's adaptive sync range.
Most monitors only support FreeSync or G-Sync between 48Hz and the max refresh rate. If your game drops below 48 FPS, adaptive sync disengages.
Third, verify the feature is actually enabled in your GPU control panel. It's not enough to just plug in the monitor. You have to explicitly turn it on in NVIDIA Control Panel or AMD Software.
Does Curvature Rating Matter for Setup? (1000R vs. 1500R vs. 1800R)
The curvature rating doesn't change how you connect the monitor. But it does affect where you should position it, which matters for the overall experience.
The "R" stands for radius in millimeters. A 1000R curve matches a circle with a 1-meter radius. A 1500R curve matches a 1.5-meter radius.
The lower the number, the more aggressive the curve.
1000R is the tightest curve you'll find. It's designed for single-monitor setups where you sit close to the screen. Think 27-inch to 32-inch panels at about 2 to 3 feet away.
The curve wraps around your field of vision. If you sit too far back, the edges will look distorted.
1500R is the sweet spot for most people. It's noticeable but not extreme. Works well at normal desk distances, roughly 2.5 to 4 feet.
This is the most common curvature on mid-range curved gaming monitors.
1800R is the gentlest curve. It's subtle. You'll notice it in peripheral vision more than directly.
Better for larger monitors, 34 inches and up, or for users who also do productivity work where straight lines matter.
For setup purposes, just know that tighter curves demand more precise positioning. If you're running a 1000R monitor, make sure your desk depth lets you sit at the right distance. Too far away and you lose the immersion benefit entirely.
Quick-Reference Cable and Port Compatibility Table
Here's everything in one place. Bookmark this or keep it handy when troubleshooting.
| Port/Cable Type | Max Resolution at 60Hz | Max Resolution at 144Hz | Max Resolution at 240Hz | Adaptive Sync Support |
|---|---|---|---|---|
| HDMI 1.4 | 4K | 1080p | Not supported | FreeSync (limited) |
| HDMI 2.0 | 4K | 1440p | 1080p | FreeSync |
| HDMI 2.1 | 4K | 4K | 1440p | FreeSync, G-Sync Compatible |
| DisplayPort 1.2 | 4K | 1440p | 1080p | FreeSync, G-Sync |
| DisplayPort 1.4 | 4K | 4K | 1440p | FreeSync, G-Sync, G-Sync Ultimate |
| DisplayPort 2.1 | 8K | 4K | 4K | FreeSync, G-Sync |
| USB-C (DP 1.4 Alt Mode) | 4K | 4K | 1440p | FreeSync, G-Sync Compatible |
A few notes. These are theoretical maximums. Real-world performance depends on cable quality, cable length, and the specific GPU and monitor implementation.
Active cables or certified cables are recommended for runs over 3 meters.
Also, DisplayPort 2.1 is available on newer GPUs like the AMD RX 7000 series. NVIDIA's RTX 40-series tops out at DP 1.4. As of 2026, DP 2.1 is still rare on the GPU side despite being common on newer monitors.
Pro Tips Most Guides Skip
These are the things that separate a working setup from a great one.
Update your GPU drivers before connecting a new monitor. Outdated drivers can cause detection issues, missing refresh rates, and broken adaptive sync. Download the latest driver from NVIDIA or AMD's website. Don't rely on Windows Update for this.
Use the monitor's native resolution only. Curved panels look soft at non-native resolutions. Every pixel is physically mapped. Running 1080p on a 1440p panel will look blurry.
There's no workaround for this.
Check your cable length. Longer cables degrade signal quality. For DisplayPort 1.4 at high refresh rates, keep it under 2 meters if possible. For HDMI 2.1, 3 meters is the practical limit without an active cable.
Disable HDR if your monitor can't handle it properly. Many budget and mid-range curved monitors claim HDR support but lack the brightness and local dimming to do it justice. If colors look washed out in HDR mode, turn it off. Windows HDR settings are in Display Settings.
Set your monitor as the primary display if it's your only screen. Windows sometimes defaults to a secondary display as primary, which can cause games to launch on the wrong screen. Right-click the desktop, go to Display Settings, select the curved monitor, and check "Make this my main display."
Consider your desk depth for curved monitors. A 34-inch 1500R ultrawide needs at least 24 inches of desk depth. A 27-inch 1000R works fine on standard desks. Measure before you buy if space is tight.
Frequently Asked Questions
Can I use any HDMI cable for a curved gaming monitor?
No. Older HDMI cables, specifically HDMI 1.4, will limit your refresh rate. For 144Hz at 1080p or 1440p, you need at least HDMI 2.0.
For 4K at high refresh rates, HDMI 2.1 is required. Check the printing on the cable sheath for the version number.
Does a curved monitor need a special cable?
No. A curved monitor uses the same cables as a flat monitor. The curve is a physical panel feature, not a signal requirement.
DisplayPort and HDMI work identically on curved and flat displays.
Why does my curved monitor look blurry?
You're probably running at a non-native resolution. Curved panels have a fixed pixel grid. Any resolution other than the native one will look soft or stretched.
Set it to the recommended resolution in Windows Display Settings.
Can I connect a curved gaming monitor to my laptop?
Yes, if your laptop has a compatible video output. HDMI and USB-C with DisplayPort Alt Mode are the most common options. Some gaming laptops also have Mini DisplayPort.
Just match the port to what your monitor accepts.
Do I need DisplayPort for G-Sync?
G-Sync requires DisplayPort. It does not work over HDMI for most monitors. Some newer monitors are labeled "G-Sync Compatible" and work over HDMI, but the full G-Sync module experience needs a DisplayPort connection.
My monitor says 144Hz but Windows only shows 60Hz. What gives?
Your cable is almost certainly the bottleneck. Swap it for a DisplayPort 1.4 cable or an HDMI 2.1 cable. Also make sure you're plugged into the GPU, not the motherboard.
After changing the cable, restart your PC and check the refresh rate settings again.
The Bottom Line: Your Connection Checklist
Here's everything condensed into a quick checklist. Follow this and you'll be gaming on your curved monitor in minutes.
- Check your GPU ports. DisplayPort preferred, HDMI acceptable.
- Check your monitor inputs. Know what you're plugging into.
- Use the right cable. DP 1.4 for high refresh, HDMI 2.1 as backup.
- Plug into the GPU, not the motherboard. The lower ports on the back of your case.
- Set native resolution and max refresh rate in Windows Display Settings.
- Enable G-Sync or FreeSync in your GPU control panel.
- Verify with testufo.com that you're actually running at the advertised refresh rate.
That's it. The curved part is just the shape of the screen. The connection process is the same as any other gaming monitor.
The only real variables are your cable and your port choice, and now you know exactly which ones matter.

Similar Posts