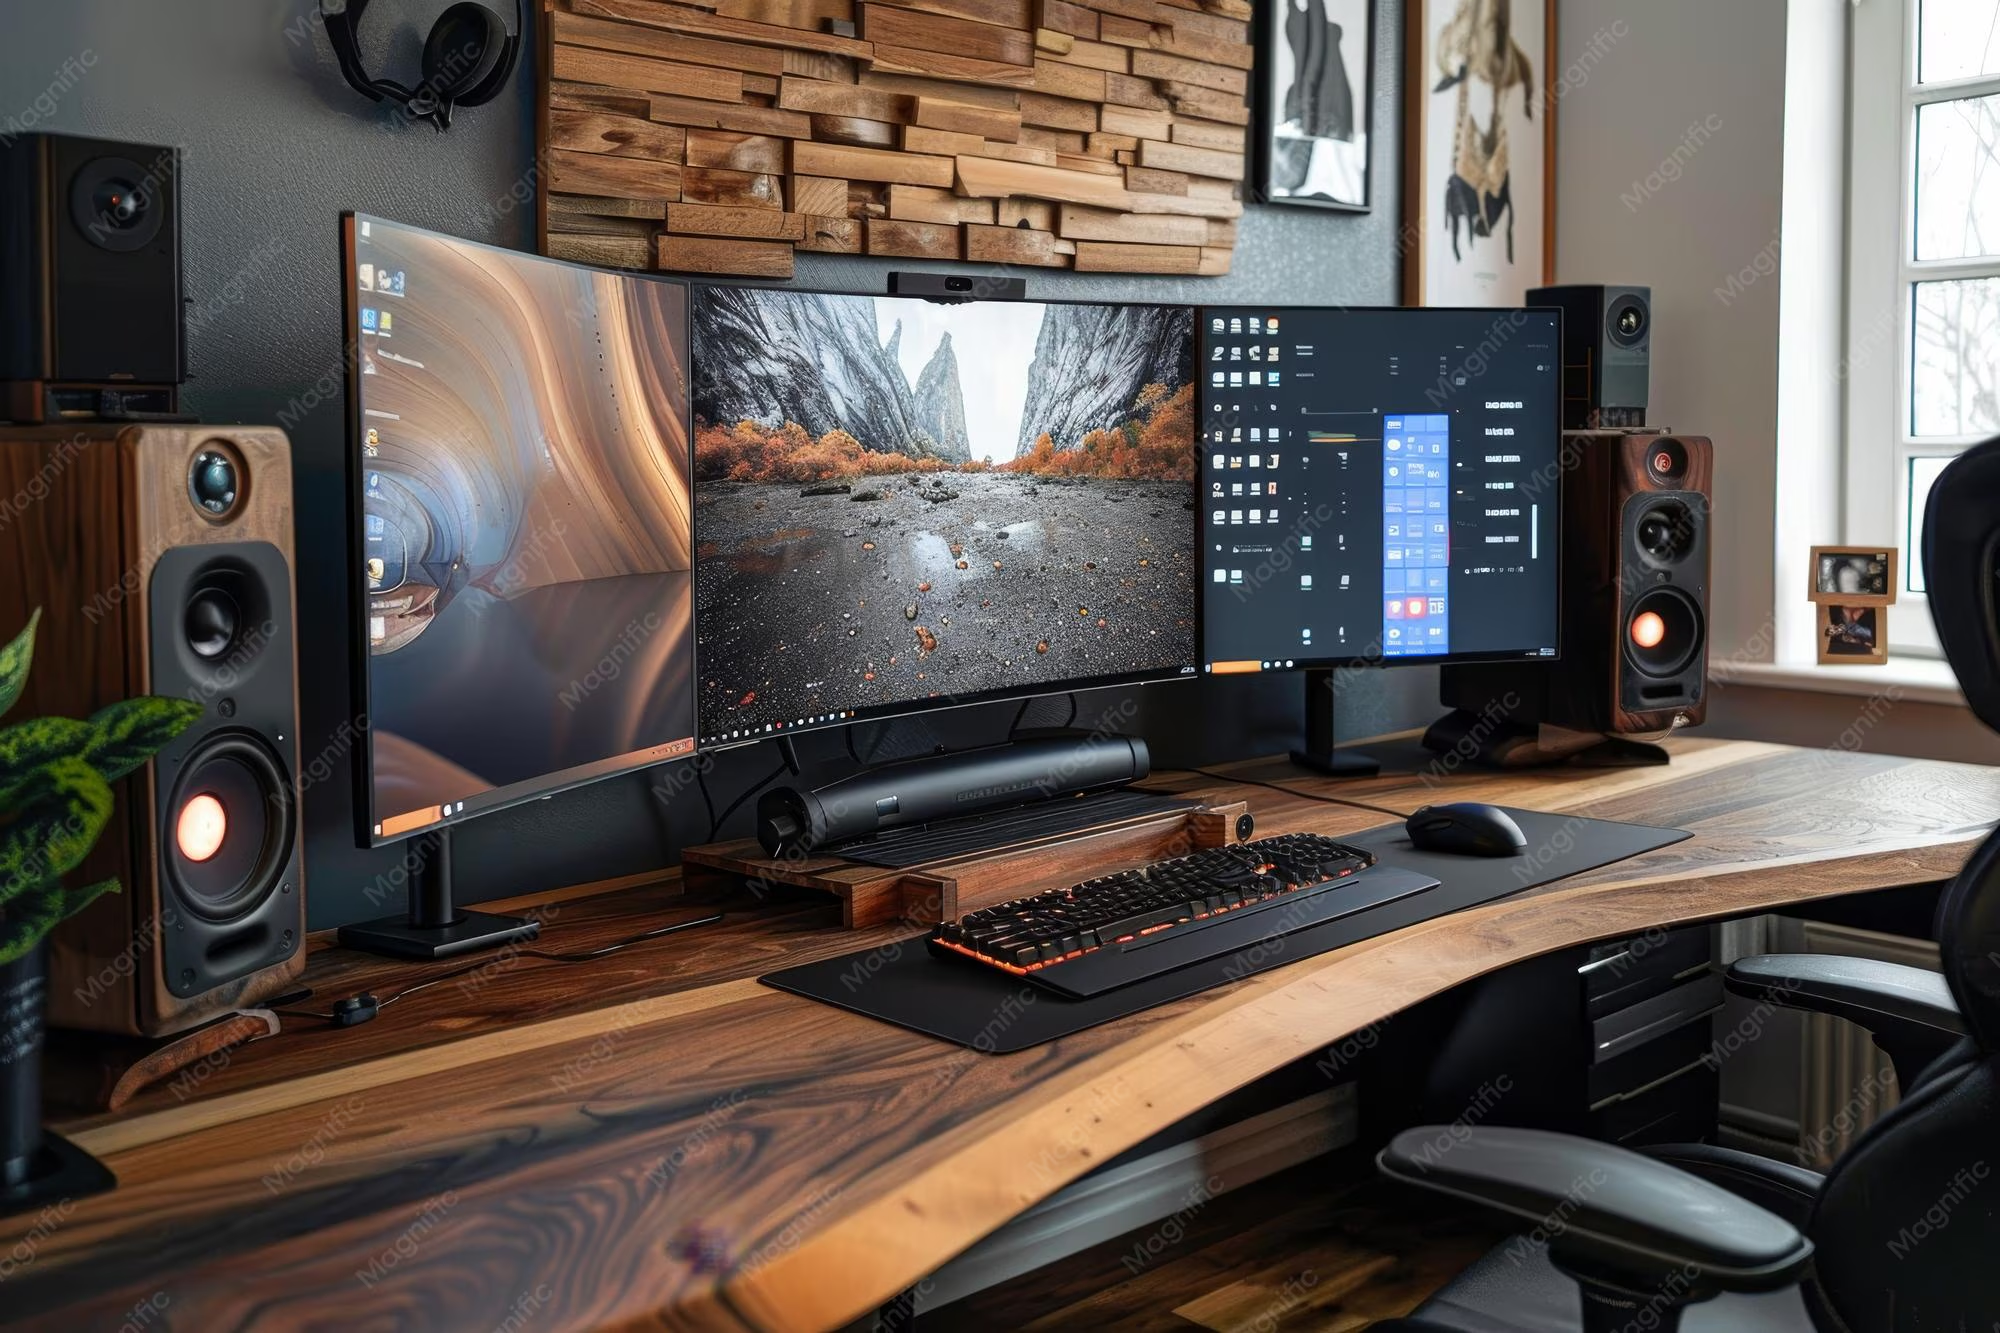
How to Connect 4K Monitor with HDMI
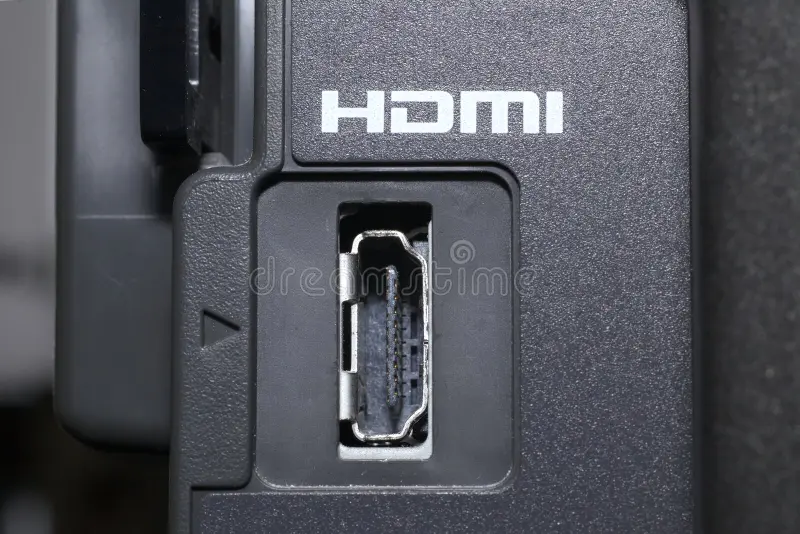
Every HDMI port looks the same. That's the problem. Plugging in a cable and getting 1080p instead of 4K (or 30Hz instead of 60Hz) is one of the most common frustrating tech experiences out there.
It happens because the HDMI standard spans multiple generations, and not one of them guarantees 4K output without checking your hardware first. We exactly what to look for so you don't waste an afternoon wondering why your brand new 4K monitor looks no different from your old screen.
Image source: Bing (Web (fair-use with source credit))
The fix is usually one of three things: your cable isn't rated for enough bandwidth, your source device's HDMI port is an older version, or your operating system just needs the right setting flipped. Let's walk through each possibility.
Quick Answer
Plug a certified Premium High Speed or Ultra High Speed HDMI cable into the HDMI port on your laptop or desktop. Connect it to the HDMI input on your 4K monitor. Open your display settings and set the resolution to 3840 × 2160.
Then confirm the refresh rate matches your monitor's spec (60Hz is standard, 30Hz means your port or cable is limited).
The Real Reason Your 4K Monitor Might Look Wrong
Here's the scenario we see over and over. Someone buys a 4K monitor, grabs whatever HDMI cable is in the drawer, plugs it in, and… it works. Technically.
The screen lights up. But the resolution is stuck at 1080p, or the mouse cursor feels like it's moving through syrup because the display is running at 30Hz instead of 60Hz.
The culprit is almost always a version mismatch somewhere in the chain. Your cable might be a High Speed HDMI cable from 2012. Your laptop might have an HDMI 1.4 port that maxes out at 4K@30Hz.
Or your monitor's HDMI input might only support HDMI 2.0 while you're trying to push a 4K@120Hz signal. The connector shape never changed across HDMI versions, so there's no visual way to tell what you're working with.
The good news? Once you know which three things to check, the fix takes about two minutes.
Before You Plug Anything In: Check These 3 Things
Connecting a 4K monitor with HDMI is physically simple. The cable goes in one port, then the other. The tricky part is making sure every link in the chain can actually handle a 4K signal at the refresh rate you want.
There's no single universal answer because the specs depend on your exact hardware.
Manufacturer specifications indicate that the maximum resolution and refresh rate over HDMI depend on three things. First, the HDMI version on your source device (laptop, desktop, GPU). Second, the HDMI version on your monitor.
Third, the cable connecting them. The chain is only as fast as its weakest link.
Your best course of action is to check all three before you connect anything. That saves you from the classic "why is this stuck at 1080p" troubleshooting rabbit hole.
Step 1: What HDMI Version Does Your Source Device Actually Support?
This is where most people get tripped up. You've got a gorgeous 4K monitor capable of 60Hz or even 120Hz, but the HDMI port on your laptop only supports HDMI 1.4. That port will output 4K, yes, but only at 30Hz.
Fine for reading documents. Rough for anything that moves on screen.
- HDMI 1.4 supports 4K at 30Hz (10.2 Gbps bandwidth)
- HDMI 2.0 supports 4K at 60Hz (18 Gbps bandwidth)
- HDMI 2.1 supports 4K at 120Hz and 8K at 60Hz (48 Gbps bandwidth)
How do you check what your device supports? Look up your laptop or GPU model on the manufacturer's spec sheet. For laptops, this is especially important because manufacturers often include a lower-spec HDMI port than you'd expect.
A thin-and-light ultrabook might only have HDMI 1.4, while a gaming laptop with the same price tag might have HDMI 2.1.
For desktop GPUs, check the spec page AMD, or Intel. Most RTX 30-series and RX 6000-series cards support HDMI 2.1. Older cards like the GTX 10-series top out at HDMI 2.0.
Step 2: What HDMI Version Does Your Monitor Have?
Your monitor's manual or product page will list the HDMI version for each input. Many 4K monitors have multiple HDMI ports with different capabilities. One port might be HDMI 2.1 while the other is HDMI 2.0.
Read the fine print.
If you plug into the wrong port, you'll be limited to that port's specs. This catches people constantly. They buy a monitor that advertises 4K@120Hz over HDMI, but only one specific port supports it.
The other HDMI port is 2.0, capped at 4K@60Hz.
Step 3: Is Your Cable Actually Good Enough?
Here's the thing about HDMI cables. They all look almost identical. The connectors are the same shape.
The price range is enormous ($3 to $50+). And the only real difference is the bandwidth they're certified to carry.
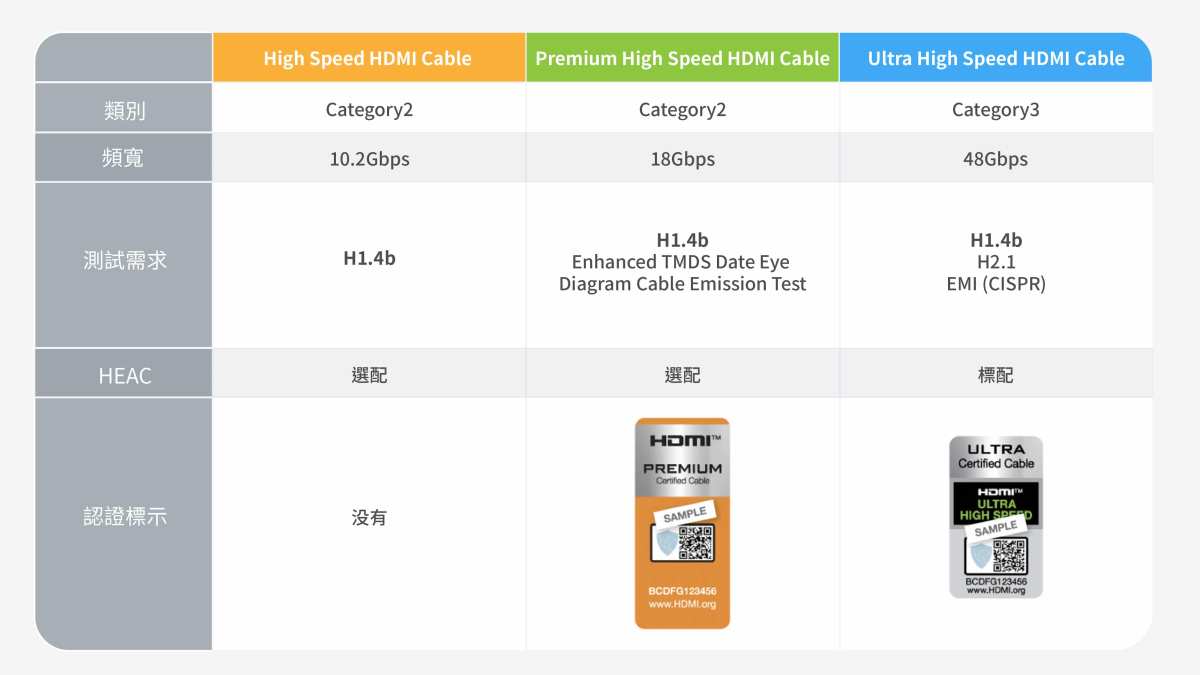
Image source: Bing (Web (fair-use with source credit))
The HDMI Licensing Administrator certifies cables under specific tiers. Look for the official certification label on the packaging or printed on the cable itself.
| Cable Certification | Max Bandwidth | Supports | Price Range |
|---|---|---|---|
| Standard HDMI | 4.95 Gbps | Up to 1080p | $5–$10 |
| High Speed HDMI | 10.2 Gbps | 4K@30Hz | $6–$12 |
| Premium High Speed HDMI | 18 Gbps | 4K@60Hz, HDR | $8–$15 |
| Ultra High Speed HDMI | 48 Gbps | 4K@120Hz, 8K@60Hz, eARC | $15–$30 |
For most 4K@60Hz setups, a Premium High Speed HDMI cable is all you need. If you're running 4K@120Hz or plan to keep this cable for future upgrades, grab an Ultra High Speed certified cable. The price difference is small enough that future-proofing makes sense.
Cable length matters too. Passive copper HDMI cables work reliably up to about 5 meters (16 feet) for 4K signals. Beyond that, you'll want an active HDMI cable or a fiber HDMI cable to maintain signal integrity.
Active cables have built-in signal boosters and can handle 4K over 10 to 15 meters without issues.
Setting Up the Connection Step by Step
Now that you've confirmed your specs and picked the right cable, the physical setup is straightforward. But a few details make the difference between "it works" and "it works perfectly."
Physical Connection
Plug one end of the HDMI cable into your laptop or desktop's HDMI output port. Plug the other end into your monitor's HDMI input. If your monitor has multiple HDMI ports, make sure you're using the one that matches your target specs (check the label next to the port or the manual).
Most modern systems handle hot-plugging fine, meaning you don't need to power everything off first. That said, if you're getting a "no signal" message, try powering off both devices, connecting the cable, then powering the monitor on first, followed by the computer. This forces a clean HDMI handshake.
Once connected, use the monitor's on-screen display (OSD) menu to select the correct HDMI input. Some monitors auto-detect, but it's faster to just pick the right one manually.
Configuring Resolution and Refresh Rate
This is where the magic happens, or where things go sideways. Your operating system might not automatically select the highest available resolution and refresh rate. You'll need to check and set it manually.
Image source: Bing (Web (fair-use with source credit))
On Windows
Open Settings → System → Display. Select your 4K monitor if you have multiple displays. Under "Display resolution," choose 3840 × 2160.
If that option isn't listed, click "Advanced display" and check what's available under "Refresh rate." You should see 60Hz if your setup supports it.
If 4K isn't showing up at all, update your GPU drivers. Outdated drivers are one of the most common reasons a 4K resolution option doesn't appear. Grab the latest driver from NVIDIA, AMD, or Intel's website, not through Windows Update.
For NVIDIA cards, you can also open the NVIDIA Control Panel and adjust resolution, color depth, and dynamic range there. AMD users have the same options in AMD Software (formerly Radeon Software). These control panels sometimes expose options that Windows Display Settings don't show.
On macOS
Go to System Settings → Displays. Hold the Option key and click "Scaled" to see all available resolution options. Select 3840 × 2160. macOS will also show refresh rate options in the same menu.
Apple handles 4K external displays well on M-series Macs, but Intel Macs with only HDMI 1.4 might be limited to 4K@30Hz. If you're on an Intel Mac and stuck at 30Hz, a USB-C to DisplayPort cable might be a better option than HDMI.
Color, HDR, and Image Quality Tweaks
Getting 4K resolution is step one. Making it look right is step two. A few settings can dramatically improve image quality.
RGB Range. Check your GPU control panel for "Output dynamic range." Set it to "Full" instead of "Limited" if your monitor supports it. Limited range (16-235) makes blacks look gray and washed out. Full range (0-255) gives you proper contrast.
Chroma Subsampling. At 4K@60Hz with HDMI 2.0, some setups default to 4:2:0 chroma subsampling to fit within the 18 Gbps bandwidth limit. This can make colored text look slightly fringed. If your setup supports it, set chroma to 4:4:4 in your GPU control panel.
You might need to drop to 8-bit color depth to make this fit within HDMI 2.0's bandwidth at 4K@60Hz.
HDR. If your monitor supports HDR, enable it in Windows Settings → System → Display → HDR. On macOS, it's in the display settings for the connected monitor. Keep in mind that HDR on Windows still has some rough edges with SDR content, so you might prefer leaving it off for desktop use and enabling it only for HDR video or games.
When Things Go Wrong: Troubleshooting Common Problems
You've got everything connected, the cable is rated correctly, and your hardware specs check out. But something is still off. Let's walk through the most common issues and what usually fixes them.
"No Signal" After Connecting
This is almost always a handshake issue. Your monitor isn't receiving a recognizable signal from the source. Try these fixes in order:
- Power off both devices. Disconnect the HDMI cable. Power on the monitor first, then the source. Reconnect the cable.
- Try a different HDMI port on your monitor if it has more than one.
- Boot your computer with the monitor already connected and powered on. Some systems only detect displays during POST.
If you're going through a USB-C hub or docking station, bypass it temporarily. Connect directly with a standard HDMI cable. Many docks cap output at 1080p or have HDMI 1.4 chipsets.
Eliminate variables one at a time.
Stuck at 1080p and Can't Select 4K
Your OS might be falling back to a safe resolution because it can't read the monitor's EDID (Extended Display Identification Data) properly. Update your GPU drivers first. If that doesn't help, check your GPU control panel for a "Custom Resolution" or "Pixel Clock" override.
NVIDIA and AMD both let you manually add 3840 × 2160 if the EDID handshake failed.
On Windows, you can also try Display Settings → Advanced Display → Display Adapter Properties → List All Modes. This forces Windows to query the monitor's full resolution list directly.
Running at 30Hz When You Want 60Hz
Your HDMI source port is almost certainly HDMI 1.4. That version tops out at 4K@30Hz. Check your laptop or GPU spec sheet to confirm.
If you're stuck with HDMI 1.4 on your source device, you have two options. Accept 30Hz for basic desktop work, or switch to a DisplayPort connection (if your monitor and source support it) which almost always handles 4K@60Hz without issue.
Intermittent Flickering or Screen Dropout
This points to a cable problem. The signal is degrading between devices. Try a shorter cable.
Replace the cable with a certified Premium High Speed or Ultra High Speed option. If the flickering stops, your original cable couldn't maintain a stable 4K signal.
Also check for bent pins in the HDMI port. One damaged pin can cause intermittent 4K failures while 1080p works fine, since 4K requires all data lanes to function perfectly.
HDCP Black Screen When Streaming 4K Content
If your desktop looks fine but Netflix, Disney+, or other streaming apps play audio with a black screen, you've got an HDCP compliance issue. 4K content requires HDCP 2.2. Your entire chain (source, cable, monitor) needs to support it. Older monitors may only support HDCP 1.4.
In that case, you'll be limited to 1080p from those streaming apps regardless of your resolution settings.
Color Banding or Washed-Out Picture
Washed-out colors mean a limited/full RGB mismatch. Open your GPU control panel, find the output dynamic range setting, and match it to your monitor. Most monitors default to limited range (16-235).
Setting your GPU to full range (0-235) without changing the monitor causes crushed blacks and faded colors.
Color banding in gradients usually means chroma subsampling is set to 4:2:0 or 4:2:2 to save bandwidth. Change it to 4:4:4 in your GPU control panel. You may need to drop color depth from 10-bit to 8-bit to fit 4:4:4 chroma within your HDMI version's bandwidth limit at 4K@60Hz.
HDMI vs. the Alternatives: Is There a Better Way to Connect?
HDMI is the most universal option, but it's not always the best one. Depending on your hardware and use case, another connection type might give you more for less hassle.
Image source: Wikimedia Commons / Bretwa (CC BY-SA)
DisplayPort
DisplayPort is the go-to for PC monitors. It handles higher refresh rates more reliably than HDMI at the same resolutions. A DP 1.4 cable supports 4K@120Hz with HDR, well beyond HDMI 2.0's 4K@60Hz ceiling.
Native Adaptive Sync support (FreeSync, G-Sync) works more consistently over DisplayPort. If your monitor and GPU both have DisplayPort, use it instead of HDMI unless you have a specific reason not to.
The drawback? Laptops almost never have full-size DisplayPort outputs. You'd need a USB-C to DisplayPort cable or adapter.
USB-C / Thunderbolt
Most modern laptops with Thunderbolt 4 or USB4 can output video directly through their USB-C ports using DisplayPort Alt Mode. A USB-C to DisplayPort cable or a USB-C to HDMI 2.1 adapter gives you flexibility that a built-in HDMI port might not. This is especially useful on thin laptops where the HDMI port is cut down to 1.4 to save space.
USB-C docks with HDMI 2.1 outputs exist but cost $150+. Budget docks typically cap out at HDMI 1.4, which defeats the purpose of going through the dock for 4K. Check the dock's video specs before buying, not just its USB port count.
Wireless Display (Miracast / AirPlay)
Wireless display tech tops out at 1080p for most real-world scenarios. Latency makes it unsuitable for anything beyond static presentations. If you need 4K, stick with a cable.
| Connection Type | Max 4K Refresh Rate | Best For | Common On |
|---|---|---|---|
| HDMI 1.4 | 30Hz | Basic desktop, video playback | Older laptops, budget monitors |
| HDMI 2.0 | 60Hz | General use, HDR content | Most 4K monitors, mid-range laptops |
| HDMI 2.1 | 120Hz | Gaming, high-refresh 4K | PS5, Xbox Series X, newer GPUs |
| DisplayPort 1.4 | 120Hz (with DSC) | PC gaming, multi-monitor setups | Desktop GPUs, most PC monitors |
| USB-C (DP Alt Mode) | Depends on DP version | Laptops without HDMI 2.0+ | Modern ultrabooks, MacBooks |
How to Pick the Right HDMI Cable (Without Overpaying)
Cable marketing is a mess. Retailers push "8K certified" cables at premium prices when you might only need 4K@60Hz. Here's how to cut through the noise.
Match the cable to your actual setup, not your future one. If you're running 4K@60Hz, a Premium High Speed HDMI cable ($8-12) handles it perfectly. You don't need Ultra High Speed unless you're pushing 4K@120Hz, 8K, or eARC audio. Spending $30 on an Ultra High Speed cable for a 60Hz setup gives you zero performance benefit.
Look for the official certification label. The HDMI Licensing Administrator requires certified cables to display a holographic label or QR code. If the packaging just says "supports 4K" without a certification tier, it's marketing fluff. The label should read "Premium High Speed HDMI" or "Ultra High Speed HDMI Cable."
Don't ignore cable length. For runs under 3 meters (10 feet), standard passive copper cables work fine for any 4K signal. Between 3 and 5 meters, stick with certified cables from reputable brands. Beyond 5 meters, active cables or fiber HDMI cables become necessary to maintain signal quality at 4K resolutions.
Skip the gold-plated connector hype. Gold plating prevents corrosion in humid environments. For a dry indoor desk setup, it makes zero difference to signal quality. The certification tier matters.
The connector plating does not.
Quick Decision Guide: What You Actually Need
Your ideal setup depends on what you're doing. Here's a straightforward breakdown by use case.
Productivity and office work. You want 4K@60Hz for crisp text and screen real estate. A Premium High Speed HDMI cable and any HDMI 2.0+ port gets you there. If your laptop only has HDMI 1.4, a USB-C to DisplayPort cable is a better path.
Gaming on PC. DisplayPort 1.4 is the preferred connection for G-Sync and FreeSync. If you must use HDMI, make sure both your GPU and monitor support HDMI 2.1 for 4K@120Hz. An Ultra High Speed HDMI cable is required for 2.1 features.
Console gaming (PS5, Xbox Series X). These consoles use HDMI 2.1 exclusively. The included cable is an Ultra High Speed HDMI cable. Use it.
If you need a longer run, buy a certified Ultra High Speed replacement. Set your console to Performance Mode in system settings to enable 4K@120Hz output.
Photo and video editing. Color accuracy matters more than refresh rate. Use HDMI 2.0 or higher for 4K@60Hz with 4:4:4 chroma. Calibrate your monitor with a hardware colorimeter after connecting.
DisplayPort is equally good here if available.
Connecting through a dock or adapter. Verify the dock's HDMI version before relying on it for 4K. Many USB-C docks cap at HDMI 1.4 (4K@30Hz). Look for docks specifically rated for HDMI 2.0 or 2.1 output.
They cost more but actually deliver the resolution you're paying for.
Frequently Asked Questions
Can HDMI 1.4 do 4K?
Yes, but only at 30Hz. That's usable for reading, browsing, and video playback. It feels sluggish for gaming, video editing, or anything with fast motion on screen.
If your source device only has HDMI 1.4, consider using DisplayPort or USB-C instead.
Do I need a special cable for 4K@60Hz?
You need a Premium High Speed HDMI cable (certified for 18 Gbps). Standard High Speed cables top out at 4K@30Hz. The cable doesn't need to be expensive, just properly certified.
Look for the official Premium High Speed label on the packaging.
Will any HDMI cable work for 4K?
No. Older Standard HDMI and High Speed HDMI cables can't reliably carry a 4K@60Hz signal. They might work at 4K@30Hz or lower.
For a stable 4K@60Hz connection, use at minimum a Premium High Speed certified cable.
Why does my 4K monitor look blurry?
Check that your OS is actually outputting 3840 × 2160, not 1920 × 1080 scaled up. Also verify the RGB output range is set to Full in your GPU control panel. If text still looks soft, make sure chroma subsampling is set to 4:4:4.
Chroma 4:2:0 or 4:2:2 causes visible text fringing at 4K resolutions.
How do I check my laptop's HDMI version?
Look up your exact laptop model on the manufacturer's spec page. Search for "HDMI" in the specifications table. Laptop manufacturers don't always advertise this prominently, so you might need to check the technical specifications sheet or user manual.
If your laptop has an AMD Ryzen processor with integrated graphics, it's often HDMI 1.4 on budget models and HDMI 2.0 on mid-range and above.
Can I use an adapter from USB-C to HDMI for 4K?
Yes, if the adapter supports HDMI 2.0 or higher. Many cheap USB-C to HDMI adapters are limited to HDMI 1.4 (4K@30Hz). Look for adapters explicitly rated for 4K@60Hz.
They usually mention HDMI 2.0 in the product description.
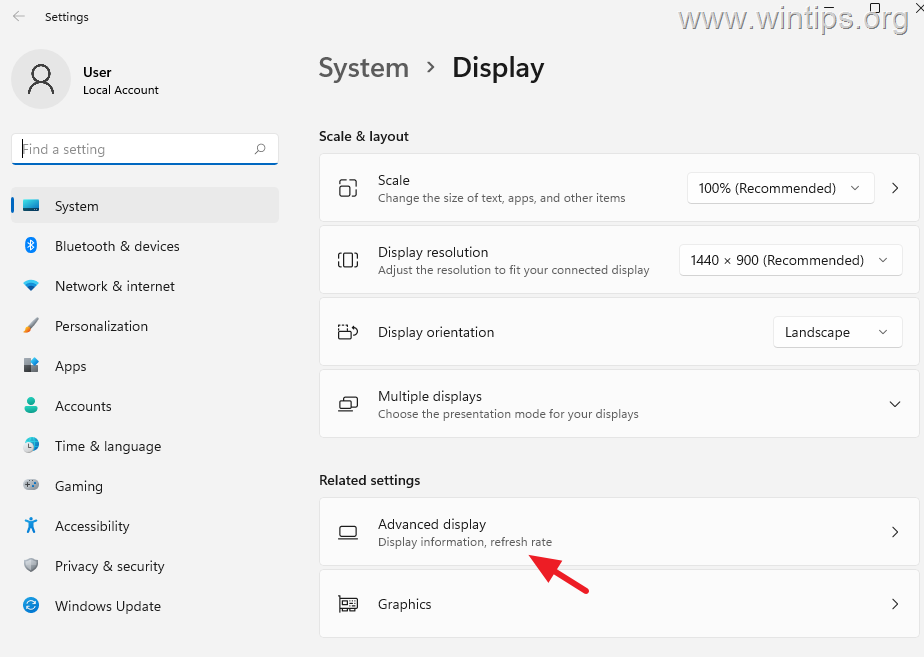
Image source: Bing (Web (fair-use with source credit))

Similar Posts