How to Change Refresh Rate to 144Hz
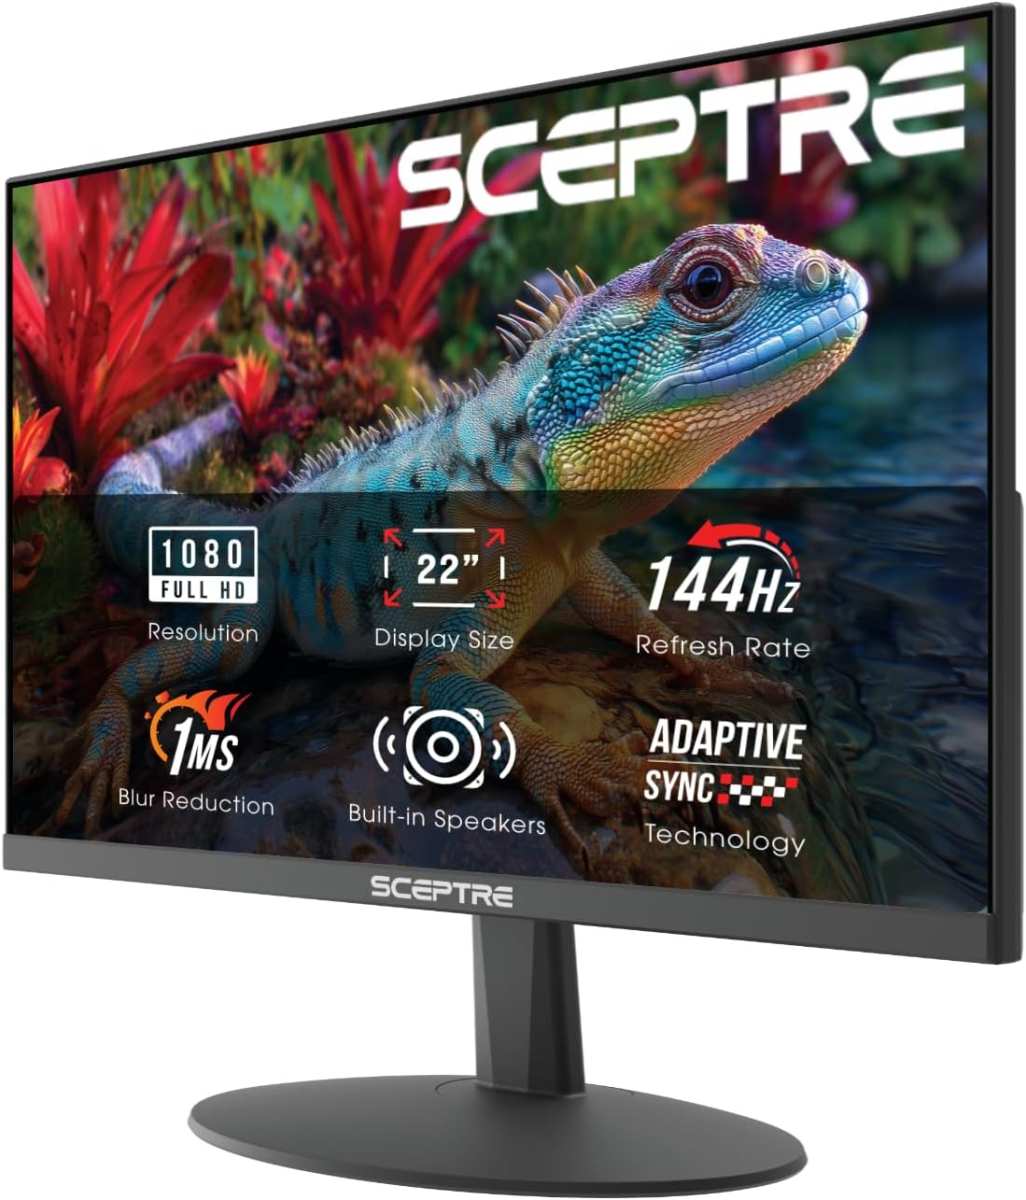
If you've just bought a 144Hz monitor and everything still looks like it did on your old 60Hz display, you're not alone. Learning how to change refresh rate to 144Hz takes about two minutes, but only if your hardware actually supports it and you're using the right cable. The monitor alone won't get you there.
Your connection and GPU play equal roles.
Here's what matters: a single DisplayPort 1.2 cable can carry 144Hz at 1080p without breaking a sweat. But use the wrong HDMI cable or plug into the wrong port on your monitor, and Windows simply won't offer 144Hz as an option. Let's get this sorted step by step.
Why 144Hz Might Not Show Up as an Option
The most common frustration is following the Windows steps correctly but never seeing 144Hz in the dropdown. That tells you the problem isn't in Windows. It's sitting somewhere between your GPU, your cable, and your monitor.
Here are the usual culprits.
- Your cable doesn't have enough bandwidth. An old HDMI 1.4 cable tops out at 120Hz at 1080p. No Windows setting will fix that.
- You plugged into the wrong monitor port. Many 144Hz monitors only deliver 144Hz on specific inputs, usually DisplayPort or HDMI 2.0 and above.
- Your GPU drivers are outdated. Missing or old drivers can hide refresh rate options entirely.
- You're on a resolution that pushes the cable past its limit. 1440p at 144Hz needs DisplayPort 1.4 or HDMI 2.1. Drop the resolution on the same cable and 144Hz might appear.
- Your laptop is routing video through the integrated GPU. Some laptops physically wire certain ports to one GPU, bypassing the dedicated card.
The fix depends entirely on which piece is blocking you. The next section covers how to check.
Quick Answer
Go to Settings > System > Advanced display. Open the "Choose a refresh rate" dropdown. Select 144Hz.
If you don't see 144Hz listed, check your cable and make sure you're on the right GPU output port. For DisplayPort, a DisplayPort 1.2 cable handles 144Hz at 1080p. For HDMI, you need at least HDMI 2.0.
If still missing, set the refresh rate through your NVIDIA or AMD driver software. Verify setup by visiting testufo.com in your browser.
Before You Start: The Three Things That Actually Matter
Don't touch Windows settings yet. Verify these three things first. They save most people a full troubleshooting session.
Your Monitor's Actual Input Specs
Check your monitor's product page. Look at the detailed spec sheet and pay special attention to the I/O section:
Example spec sheet note: "DP 1.4: up to 144Hz at 1080p, up to 120Hz at 1440p. HDMI 2.0: up to 60Hz at 1440p. HDMI 1.4: up to 120Hz at 1080p."
Those numbers matter because a 144Hz monitor doesn't necessarily do 144Hz on every input. If you plugged into HDMI 2.0 expecting 144Hz but the spec sheet says that HDMI port only supports 1080p at 120Hz, that's your issue. And if your monitor lists 144Hz@1440p only on the DisplayPort and your cable is HDMI 2.0, you might hit a 120Hz ceiling because HDMI 2.0 doesn't have enough pixel clock headroom for 144Hz at that resolution.
Your Cable Type and Rating
Look at the cable itself or check what came in the monitor box. That connector on each end matters more than you think.
- Male DisplayPort pins: 20-pin layout with a latch mechanism on one side.
- Standard HDMI cable (Type A): 19 pins, trapezoid shape and wider than USB-C.
- Ultra High Speed HDMI cable (Type A): required for HDMI 2.1 features. Usually packaged with the cable labeled "48 Gbps" or "Ultra High Speed."
A cable that looks physically identical to another might be a different spec. The only way to know is what's printed on the jacket. Many cables won't work for high-refresh signals even if they fit the port perfectly.
Your GPU Output Capability
Your graphics card must support 144Hz on the output port you're using. Most dedicated GPUs from the last decade do, but integrated graphics sometimes don't. Intel UHD Graphics (from 12th-gen onwards) can hit 144Hz over DisplayPort with DP 1.4, but its HDMI 2.0b ports often cap at 60Hz at 4K.
If you're on a laptop with switchable graphics like NVIDIA Optimus, the physical port might be wired only to the integrated GPU and won't pass through the dGPU signals. In some Optimus configurations, the integrated GPU's native DP Alt Mode over USB-C tops out at 1080p 120Hz even if the dedicated chip could push 144Hz.
Step 1: Check What Your Monitor Actually Supports (Per Port)
Don't assume every port on your back of your monitor does the same thing. Many 144Hz monitors have different capabilities per input.
Look up your exact monitor model on the manufacturer's website. Find the "Specifications" page. You're looking for a table that lists each input and the maximum refresh rate it supports at each resolution.
A 27-inch monitor might support 165Hz on DisplayPort 1.4 and only 100Hz on HDMI 2.0. The HDMI port is fine for console gaming. It's not the one you want for 144Hz on PC.
If you don't have your model number handy, it's usually printed on a sticker on the back of the monitor or visible in Windows under Settings > System > Display > Advanced display. There you'll see the monitor name listed right next to the display adapter.
Once you've confirmed which port supports 144Hz, make sure your cable is physically plugged into that port. Not the one next to it. Not "whichever was free." The correct one.
Step 2: Make Sure You're Using the Right Cable
This is where most people get burned. They have a 144Hz monitor, they follow every Windows step correctly, and 144Hz still won't show up. Nine times out of ten, the cable is the bottleneck.
Bandwidth is the core issue. Each cable standard has a maximum data throughput. Pushing 144 frames per second requires more bandwidth than pushing 60, and higher resolutions multiply that demand fast.
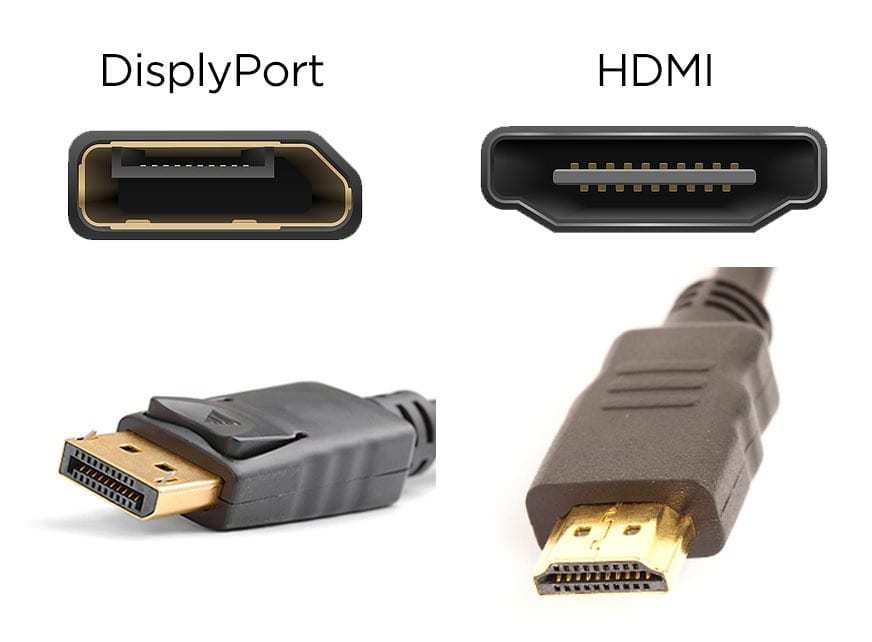
Here's a breakdown of what each standard can actually handle.
| Standard | Max Bandwidth | 1080p at 144Hz | 1440p at 144Hz | 4K at 144Hz |
|---|---|---|---|---|
| DisplayPort 1.2 | 17.28 Gbps | Yes | No | No |
| DisplayPort 1.4 | 25.92 Gbps | Yes | Yes | Yes (with DSC) |
| HDMI 1.4 | 10.2 Gbps | Yes (often capped at 120Hz) | No | No |
| HDMI 2.0 | 18.0 Gbps | Yes | Limited (usually 120Hz) | No |
| HDMI 2.1 | 48.0 Gbps | Yes | Yes | Yes |
DSC stands for Display Stream Compression. It's a visually lossless compression technique that lets DisplayPort 1.4 push higher resolutions and refresh rates without degrading image quality. Most modern GPUs and monitors support it.
When You Need DisplayPort
If you're running 1440p at 144Hz or anything above 1080p, DisplayPort is the simplest path. A basic DisplayPort 1.2 cable handles 144Hz at 1080p without issue. For 1440p at 144Hz, you'll want DisplayPort 1.4 to stay comfortable within bandwidth limits.
Most 144Hz monitors ship with a DisplayPort cable in the box. Use that one unless it's physically damaged. Aftermarket cables work fine too, as long as they're rated for the spec you need.
When HDMI Can Work
HDMI 2.0 can handle 144Hz at 1080p. Some monitors will let you push 1440p at 144Hz over HDMI 2.0, but often at reduced timings or chroma subsampling. It won't always be a clean signal.
If you want 144Hz at 1440p or 4K, HDMI 2.1 is the only HDMI spec that delivers it natively and reliably. Both your cable and your devices need to support HDMI 2.1 for this to work.
Cables That Won't Cut It
- HDMI cables without a printed spec rating. You can't verify what they support. Replace them.
- Old HDMI cables from before 2010. These are almost certainly HDMI 1.4 or older. 1080p at 144Hz will be a struggle even if they technically meet the spec.
- DisplayPort cables from bargain bin listings. Cheap DP cables might use fewer lanes or lower-grade shielding, causing signal drops or refresh rate caps.
- Using an adapter cable (e.g., DisplayPort to HDMI). These are typically one-directional and may not carry the signal you expect.
Step 3: Enable 144Hz in Windows Display Settings
Now that you've confirmed the hardware side is good, it's time to tell Windows to use 144Hz. The steps differ slightly between Windows 10 and Windows 11, so use whichever matches your setup.
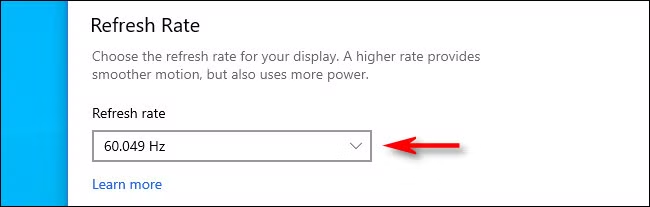
Windows 11 Path
- Right-click on the desktop background.
- Click "Display settings."
- Scroll down and click "Advanced display."
- Under "Choose a display," pick the correct monitor if you have more than one.
- Look for "Choose a refresh rate" and click the dropdown.
- Select "144Hz" from the list.
Windows will apply the change immediately. Your screen might flicker for a second. That's normal.
Windows 10 Path
- Right-click the desktop.
- Select "Display settings."
- Scroll to the bottom and click "Advanced display settings."
- Click "Display adapter properties for Display 1" (or whichever number matches your monitor).
- In the new window, go to the "Monitor" tab.
- Under "Screen refresh rate," open the dropdown and select 144Hz.
- Click Apply, then OK.
If the dropdown only shows 60Hz, stop here and check the troubleshooting section below. Forcing a refresh rate your hardware can't handle won't end well.
Step 4: Set It in Your GPU Control Panel
Windows settings should be enough, but sometimes the GPU driver has its own refresh rate override that takes priority. If Windows won't let you select 144Hz or the option appears but doesn't stick, set it from your GPU software instead.
NVIDIA Control Panel
- Right-click the desktop and open "NVIDIA Control Panel."
- Under "Display" in the left sidebar, click "Change resolution."
- Select the correct display if multiple monitors are listed.
- On the right, find the "Refresh rate" dropdown and choose 144Hz.
- Click "Apply."
You can also do this under "Adjust desktop size and position" if the resolution page doesn't show the option clearly.
AMD Radeon Software
- Right-click the desktop and open "AMD Radeon Software."
- Click the gear icon in the top-right for Settings.
- Go to the "Display" tab.
- Find "Refresh Rate" and set it to 144Hz.
AMD's interface changes with driver updates, but the display section is consistent across versions. If you don't see the option, update your drivers first.
Intel Graphics Command Center
- Open the "Intel Graphics Command Center" app (search for it in the Start menu).
- Go to "Display" in the left panel.
- Under "Resolution & Refresh Rate," select 144Hz from the refresh rate dropdown.
This applies mostly to integrated graphics setups or monitors connected through Intel-based outputs.
Step 5: Check Your Monitor's On-Screen Display (OSD)
Some monitors require you to enable high refresh rate mode from the physical menu on the monitor itself, independent of Windows or GPU settings. It's a step most people miss entirely.
- Press the joystick or buttons on your monitor to open the on-screen display menu.
- Look for settings labeled "Refresh Rate," "Overclocking," "Response Rate," or similar.
- Some ASUS and Acer monitors use the term "Overclock" to unlock refresh rates above their base spec.
- Set the refresh rate to 144Hz or the maximum available if prompted.
Not every monitor needs this. Many apply the refresh rate automatically once they receive a 144Hz signal from the GPU. But if you've set everything in Windows correctly and still see 60fps in games or tests, the OSD is the last place to check.
In some cases, the OSD menu may also expose a hidden "144Hz" toggle that unlocks the maximum refresh rate on certain multi-mode panels.
Step 6: Verify You're Actually Running at 144Hz
Having 144Hz selected in settings doesn't guarantee it's actually being delivered to the panel. Always confirm with a real test.
- Open your web browser.
- Go to testufo.com.
- The site displays your current refresh rate at the top of the screen.
- It should read "144Hz" (or very close to it).
You can also check in Windows by going back to Settings > System > Advanced display and looking next to the refresh rate selection. It should display the active refresh rate. For those running driver overlays, NVIDIA's Frame View or AMD's performance metrics can also confirm the output Hz from the GPU side.
If the test shows 60Hz despite all settings indicating 144Hz, your game or application might be overriding it. Most games have a display or video settings menu where you can manually select the refresh rate or switch to fullscreen mode. Fullscreen mode almost always respects Windows' setting, while borderless windowed can sometimes snap back to the Windows desktop rate.
Common Reasons 144Hz Is Still Missing
If you've been through every step above and 144Hz still won't show up, work through these one by one.
Wrong Port on the Monitor
Double-check which physical port your cable is plugged into. On many monitors, only one or two inputs support the maximum refresh rate. The other ports might be limited to 60Hz or 120Hz.
Your monitor's manual or spec sheet tells you which is which. Swapping from HDMI 1.4 to DisplayPort often solves this instantly. For example, a typical 240Hz-capable display might restrict HDMI 2.0 to 144Hz while letting DisplayPort 1.4 reach the full 240Hz.
Consult your spec sheet to confirm the actual bandwidth per port.
Laptop Routing Through Integrated GPU
Some laptops have their video output ports wired directly to the integrated GPU, bypassing the NVIDIA or AMD chip entirely. The dedicated GPU renders frames, but the Intel hardware outputs them, and it might not support 144Hz. This is especially common on laptops with USB-C DisplayPort Alt Mode outputs.
In many hybrid-graphics models, only the HDMI port is directly linked to the dGPU, while USB-C DisplayPort goes through the integrated graphics. Check your laptop's technical manual for port-to-GPU routing information.
A possible workaround is using the HDMI port directly instead of USB-C, if available and wired to the dedicated GPU. Laptop manufacturers rarely advertise this detail on product pages, so you may need to consult technical documentation or support forums for your specific model.
Outdated or Clean-Installed GPU Drivers
If you recently updated Windows or did a fresh install, you might be running the Microsoft Basic Display Adapter driver. That generic driver doesn't expose advanced refresh rate options.
- Open Device Manager.
- Expand "Display adapters."
- If you see "Microsoft Basic Display Adapter," you need to install your GPU's actual driver.
Download the latest driver directly from NVIDIA's, AMD's, or Intel's website. Don't rely on Windows Update to handle this. In some cases, using DDU (Display Driver Uninstaller) in Safe Mode can completely remove old driver remnants that block the correct driver install.
Resolution Too High for Your Cable
1080p at 144Hz needs less bandwidth than 1440p at 144Hz, which needs far less than 444Hz. If you're running a high resolution on a cable that can't handle it, Windows simply won't expose 144Hz as an option. Try temporarily dropping to 1080p and checking if 144Hz appears.
If it does, you've found a cable or port bandwidth limitation. Upgrading to a higher-spec cable or switching to DisplayPort often resolves this immediately.
Multiple Monitor Conflict
Running two monitors with different refresh rates can occasionally cause Windows to lock both to the lower rate, especially in borderless windowed mode. This behavior varies by GPU driver version and game engine. If you have a 60Hz secondary monitor, try disconnecting it temporarily to see if 144Hz becomes available on the primary.
For those who rely on dual displays, enabling "Highest available" in the per-monitor refresh rate settings can prevent the system from forcing both panels to the lowest common denominator.
60Hz vs. 144Hz: What You'll Actually Notice
The difference isn't subtle once you see it. Higher refresh rates deliver several noticeable improvements.
Motion clarity. In fast-paced games, moving objects appear sharper. Camera pans stay readable.
Input lag. The time between your mouse movement and what appears on screen drops. This matters most in competitive shooters.
Desktop smoothness. Even moving windows around, scrolling web pages, or dragging text feels more responsive. Your eyes adjust quickly. Going back to 60Hz after spending time at 144Hz feels sluggish, even though you may not have consciously noticed the smoothness before.
For competitive FPS or rhythm games, higher refresh rates provide a genuine advantage. For general productivity or video playback, the benefit is comfort more than performance. Most video content is still 24fps or 30fps, so a higher refresh rate won't make Netflix look like a soap opera.
Expert Tips Most Guides Skip
Don't Trust the Box, Check the Spec Sheet
Marketing says "144Hz!" on the box. The fine print might say "144Hz on DisplayPort only." Always verify per-port specs. Some monitors advertise 144Hz as an overclocked rate that must be enabled in the monitor's OSD, not just in Windows.
If your monitor's spec sheet says "DP up to 144Hz; HDMI1 up to 120Hz; HDMI2 up to 60Hz," you need to be plugged into the DisplayPort, not either HDMI socket.
The EDID Override Fix When Nothing Else Works
Sometimes the monitor sends incorrect EDID data to Windows, telling it that 64Hz or 60Hz is the maximum. The EDID contains timing information that the OS uses to decide what's "safe." When that data is corrupted or incomplete, high refresh rates disappear completely. Custom Resolution Utility (CRU) can override this.
Add a detailed resolution with the correct timing for 144Hz at your native display resolution. Restart the driver or reboot, and 144Hz should appear in Windows. Proceed with caution, as entering impossible timings can cause a temporary "no signal" screen.
Most modern monitors will simply reject invalid timings and revert to the previous working mode after a timeout.
Fullscreen vs. Windowed Mode Matters
Windows' refresh rate setting primarily applies to fullscreen applications. Some games running in borderless windowed mode respect the desktop setting. Others don't, and will run at whatever refresh rate the game engine defaults to, which can be 60Hz.
If your game isn't using 144Hz despite the Windows setting, switch to fullscreen exclusive mode in the game's video settings. Another trick: set your desktop to 144Hz first and then launch the game, as certain engines inherit the current display mode for borderless windows.
Frequently Asked Questions
Does HDMI support 144Hz?
Yes, but only HDMI 2.0 and above at 1080p reliably. HDMI 2.1 supports 144Hz at 1440p and 4K. For 1440p 144Hz, DisplayPort remains the simpler choice.
Older HDMI 1.4 cables may hit 144Hz at 720p but often cap at 120Hz for 1080p due to bandwidth limits.
How do I know if my monitor is actually 144Hz?
Use testufo.com in your browser. It reports your current refresh rate directly. Windows settings can show 144Hz while the actual output remains 60Hz if something in the chain is misconfigured.
Another way: enable the refresh rate overlay in your GPU driver (NVIDIA FrameView or AMD Performance Metrics On Screen) to verify the output in real time.
Why is 144Hz not showing in Windows display settings?
Usually a cable, port, or driver issue. Verify your cable supports the bandwidth for 144Hz at your resolution. Update your GPU drivers.
Check your monitor's per-port specifications. Also, some KVM switches or docking stations strip out higher refresh rates by design, so check those if you have them in the loop.
Does changing refresh rate affect resolution?
No. Refresh rate and resolution are independent settings. However, higher resolutions consume more bandwidth.
A cable that supports 144Hz at 1080p might not have enough bandwidth for 144Hz at 1440p. In such cases, you'll need to lower the resolution to unlock the 144Hz option, or upgrade to a cable with greater data throughput.
Can integrated graphics run 144Hz?
Often yes. Intel integrated graphics from recent generations support 144Hz over DisplayPort. Over HDMI, support is more limited and varies by generation.
Always check your specific CPU's specifications. For stable 144 Hz performance in demanding applications, a discrete GPU is still recommended, but for desktop use and light gaming, modern Intel Xe Graphics can easily drive a 144Hz display over DP.
Is 144Hz good for gaming?
Higher refresh rates benefit fast-paced competitive games significantly. For single-player or cinematic titles, 60Hz or 120Hz is often sufficient. The jump from 60Hz to 144Hz is far more noticeable than 144Hz to 240Hz.
In esports titles, every frame counts, so keeping the refresh rate at the max your monitor supports can give you a slight reaction-time edge.

Similar Posts