Do 27 Inch Monitors Support VESA Mount
If you're wondering whether do 27 inch monitors support vesa mount, the short answer is that most of them do, but you can't assume anything based on screen size alone. The real answer depends on the specific make and model sitting on your desk right now. Some 27-inch monitors ship with a standard VESA pattern built right into the back panel.
Others come with a permanently attached stand and zero mounting holes. The rest fall somewhere in between.
The Video Electronics Standards Association (VESA) sets the Flat Display Mounting Interface (FDMI) standard that defines the screw patterns and hole spacing for monitor mounts. As of 2026, the vast majority of 27-inch monitors from major manufacturers list VESA compatibility somewhere on the spec sheet. But "vast majority" isn't "all," and buying the wrong mount or assuming compatibility is a frustrating (and expensive) mistake.
Let's walk through exactly how to figure out what you're working with.
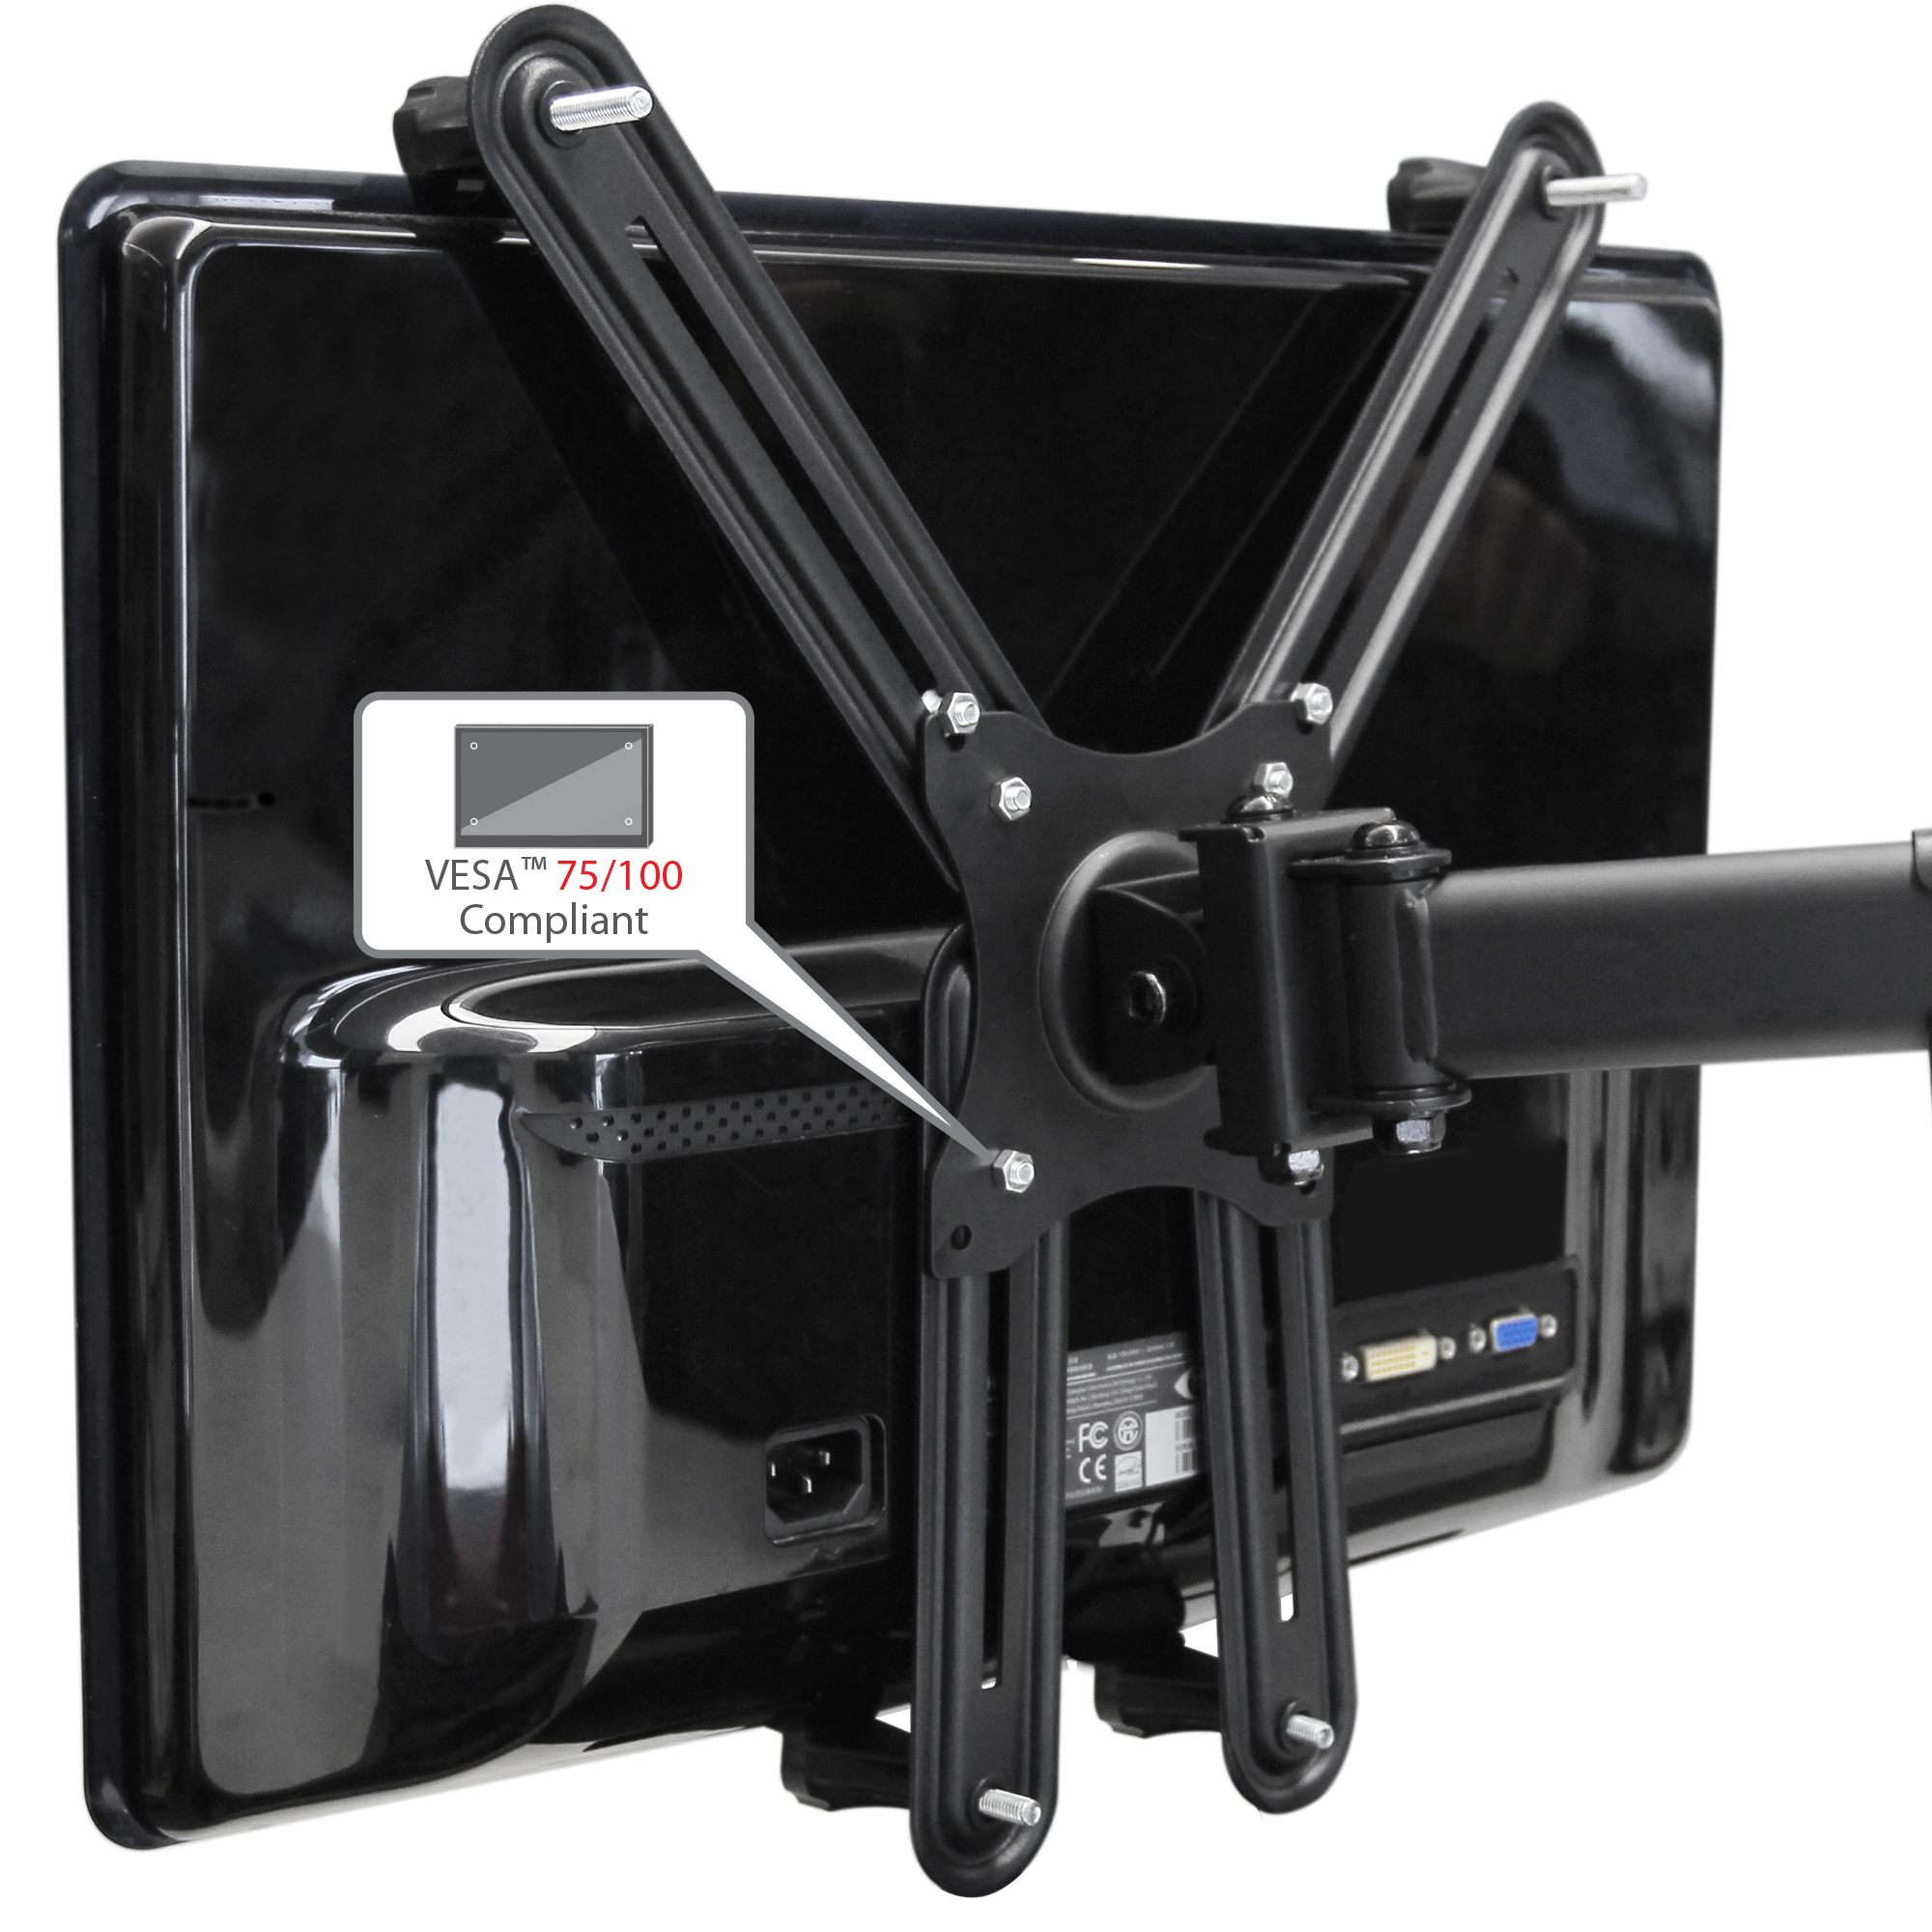
Image source: Bing (Web (fair-use with source credit))
Quick Answer
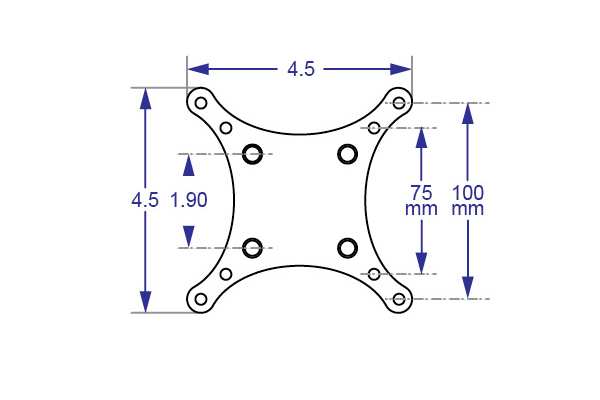
Most 27-inch monitors support VESA mounting. The standard pattern is 100x100mm. Some smaller or budget 27-inch models use 75x75mm.
A few models have no VESA mount at all. Always check your specific monitor's spec sheet before buying a mount.
Why Screen Size Alone Doesn't Tell You About VESA Compatibility
Here's the thing that trips people up. They assume that because their monitor is 27 inches diagonally, it must follow the same mounting standard as every other 27-inch monitor on the market. That's not how it works.
Screen size tells you the diagonal measurement of the display panel. It tells you nothing about the chassis design, the stand attachment method, or whether the manufacturer included mounting holes on the back.
A 27-inch Dell UltraSharp and a 27-inch budget off-brand panel can have completely different rear panel layouts. One might expose a clean 100x100mm VESA pattern the moment you pop off the stand. The other might have a permanently welded column with no holes whatsoever.
Manufacturers make different design decisions based on price point, target audience, and product line.
What actually determines VESA compatibility is the physical design of the monitor's housing and rear case. Some manufacturers build VESA mounting into every product in their lineup. Others reserve it for their professional or creator-grade models and leave it out of entry-level or gaming-focused displays.
The only reliable way to know is to look up your exact model number and verify the spec, or physically inspect the back of the unit.
What VESA Mounting Actually Means for Your Monitor
VESA stands for the Video Electronics Standards Association. They developed the Flat Display Mounting Interface standard, often abbreviated as FDMI, which defines the screw hole patterns on the back of flat-panel displays. When a manufacturer says their monitor is "VESA compatible," they mean the rear panel has threaded or unthreaded holes arranged in a pattern that matches one of these standardized configurations.
The practical benefit is simple. Any VESA-compatible monitor can attach to any VESA-compatible mount, arm, or bracket, regardless of brand. Your Dell monitor works with a Humanscale arm.
Your LG display works with a cheap Amazon Basics bracket. The standard creates universal interoperability, and that's exactly why it matters when you're shopping for a mounting solution.
The screws used for monitor mounting are almost always M4 machine screws. The length you need varies. Standard through-hole mounting typically calls for 10mm screws.
Recessed mounting zones, where the holes sit inside a recessed pocket on the back of the monitor, often require 12mm to 16mm screws. Using a screw that's too long can crack the internal PCB or damage components behind the mounting plate. Using one that's too short means your mount won't hold securely.
The Four VESA Patterns You'll See on 27-Inch Monitors
Not all VESA patterns are the same. Here are the four configurations you're most likely to encounter on a 27-inch display:
| Pattern Designation | Hole Spacing | Typical Use on 27" Monitors | Screw Size |
|---|---|---|---|
| VESA MIS-D 75 | 75 × 75mm | Budget or lightweight models | M4 × 10mm |
| VESA MIS-D 100 | 100 × 100mm | Most common for standard 27" monitors | M4 × 10mm |
| VESA MIS-E | 200 × 100mm | Heavier or high-end 27" models | M4 × 10mm |
| VESA MIS-F | 200 × 200mm | Premium/heavy variants, some ultrawides | M4 × 10-12mm |
The 100x100mm pattern is by far the most common on mainstream 27-inch monitors as of 2026. If your monitor weighs under about 12 pounds without the stand, there's a strong chance it uses this pattern. Heavier models, particularly those with built-in speakers, USB hubs, or thick chassis construction, may step up to 200x100mm or even 200x200mm to distribute the load across a wider area.
Image source: Bing (Web (fair-use with source credit))
How to Check If YOUR Monitor Is VESA-Compatible (Without Guessing)
This is where we get practical. You don't need to be a tech expert to figure this out. You just need to follow a few verification steps in order.
Think of it as a decision tree. Each step either confirms compatibility or tells you what to check next.
Step 1: Find Your Exact Model Number
Look at the label on the back of your monitor. You'll find the exact model number printed on a sticker. It's usually something like "Dell U2723QE" or "LG 27GN950-B" or "Samsung S27A800U." Write that down exactly as it appears.
Don't rely on what you remember from your purchase. Model variants within the same product line can have different specifications.
Step 2: Check the Manufacturer Spec Sheet
Go to the manufacturer's official product page for your exact model. Look for a "Specifications" or "Tech Specs" tab. Search for the term "VESA" on that page.
If the monitor supports it, the spec sheet will list the pattern (100x100mm, for example) and sometimes the screw type and length. If you don't see VESA mentioned anywhere on the official spec page, that's a red flag. It may mean the monitor doesn't support VESA mounting at all.
Step 3: Inspect the Back of Your Monitor Physically
If the spec sheet is unclear or you can't find it, look at the back of the monitor yourself. Remove the stand if it's detachable. Most modern monitors have a quick-release button or a few screws holding the stand to the chassis.
Once the stand is off, look for a flat area with four small holes arranged in a square or rectangular pattern. That's your VESA mount.
Some monitors have the holes recessed inside a rectangular pocket or depression on the back panel. Others have them flush on the surface. Both are VESA-compatible.
The difference matters for screw length, which we'll cover in a moment.
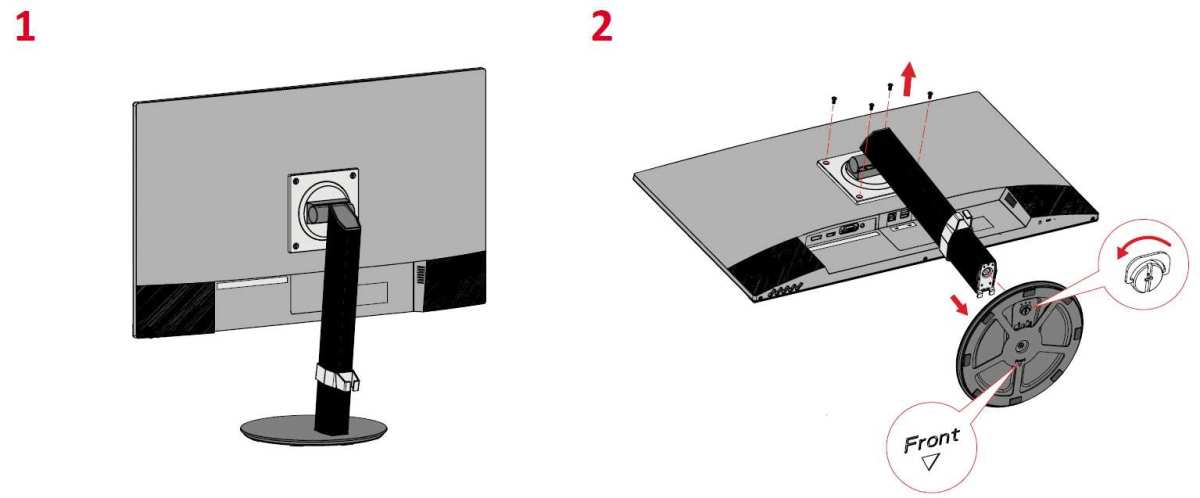
Image source: Bing (Web (fair-use with source credit))
Step 4: Measure the Hole Pattern (If Holes Are There)
If you see four holes, measure the distance between the centers of the holes on each side. Use a ruler or calipers. If the spacing is approximately 75mm, that's a 75x75mm pattern.
If it's approximately 100mm, that's 100x100mm. If the horizontal spacing is 200mm and the vertical is 100mm, that's 200x100mm. Write down what you measure.
Step 5: Check Screw Type and Length Requirements
The standard screw for VESA monitor mounting is M4. That's the thread diameter. The length you need depends on your monitor's design.
For standard surface-mount holes, 10mm screws work in most cases. For recessed mounting zones, you'll typically need 12mm or longer. Check your monitor's user manual for the exact screw specification.
If you can't find it, the manufacturer's support line can tell you in under two minutes.
Step 6: Confirm Your Monitor's Weight Without the Stand
This matters for choosing the right mount, not just for compatibility. Weigh your monitor with the stand removed. You can use a bathroom scale or a kitchen scale depending on the size.
Most 27-inch monitors weigh between 9 and 14 pounds without the stand. Some heavier models with built-in speakers or thick chassis can push past 15 pounds. You need a mount rated for at least that much weight, ideally with some headroom.
Step 7: Match Your Mount's Capacity to Your Monitor's Weight
Once you know the VESA pattern and the monitor's weight, you can confidently shop for a mount. Every quality monitor arm lists its supported VESA patterns and its maximum weight capacity. Make sure both match.
If your monitor uses 100x100mm and weighs 11 pounds, any mount rated for 100x100mm and at least 11 pounds will work. Simple as that.
27-Inch Monitors That Often DON'T Have VESA Mounts (Watch Out)
This is the section that saves you money. Some 27-inch monitors ship with a fixed, non-detachable stand that has no VESA mounting holes underneath. These are typically budget models or certain gaming-focused displays where the manufacturer assumes you'll use the included stand permanently.
Here are the common situations where VESA support is missing or limited:
- Ultra-budget off-brand monitors. Some lesser-known brands cut costs by using a permanently attached stand with no VESA pattern. If the spec sheet doesn't mention VESA at all, assume it's not supported.
- Certain all-in-one-style displays. Some 27-inch monitors designed for casual or office use have an integrated stand that's part of the chassis structure. Removing it isn't intended.
- Older models. Monitors manufactured before roughly 2015 are less likely to include VESA mounting, especially in the budget and mid-range categories.
- Some curved gaming monitors. A few curved 27-inch gaming panels use a proprietary stand attachment that doesn't expose standard VESA holes. Always verify.
If you already own a 27-inch monitor with no VESA support, don't panic. You still have options, which we'll cover in the next section. But if you're shopping for a new monitor and VESA mounting matters to you, make sure it's listed on the spec sheet before you click "buy." Don't assume.
Verify.
What to Do If Your 27-Inch Monitor Has No VESA Holes
So you've checked. Your monitor has a fixed stand and no mounting holes on the back. You're not out of luck, but your options are more limited and require a bit more care.
VESA Adapter Brackets and Plates
Third-party VESA adapter plates exist for some popular monitor models. These plates attach to the stand neck or the rear chassis using clamps, adhesive, or existing screw points, and they provide a VESA-compatible mounting surface. They're not universal.
You need to find one designed for your specific monitor model. Search for "[your monitor model] VESA adapter" and see what comes up.
The quality of these adapters varies widely. Cheap plates can flex or wobble under the weight of a 27-inch panel. Look for steel construction, positive reviews from verified buyers, and a weight rating that exceeds your monitor's actual weight.
Expect to pay between $10 and $25 for a decent adapter plate.
When You're Stuck With a Fixed Stand
If no adapter exists for your monitor and you can't find a reliable third-party solution, you're limited to the included stand. In that case, your best option for adjustability is a monitor riser or a desk shelf that elevates the entire unit. You won't get the full range of motion that a VESA arm provides, but you can at least improve ergonomics.
Alternatively, if VESA mounting is a priority and you're still in the shopping phase, consider returning or exchanging your monitor for a model that explicitly supports it. Most major 27-inch monitors from Dell, LG, Samsung, ASUS, and BenQ do include VESA mounting. It's a standard feature, not a premium add-on, as long as you're shopping in the right product tiers.
Choosing the Right VESA Mount for Your 27-Inch Monitor
Once you've confirmed your monitor's VESA pattern and weight, it's time to pick a mount. This is where people either get it right and love their setup, or get it wrong and end up with a wobbly mess. Let's break down the options.
Clamp Mount vs. Grommet Mount vs. Wall Mount
There are three primary ways to attach a VESA mount to your environment. Each has tradeoffs.
Clamp mount. This is the most popular option for desk setups. A clamp attaches to the edge of your desk and holds the arm. It's easy to install, doesn't require drilling, and is removable if you change desks.
The downside is that it needs a desk edge that's within its thickness range, typically 0.4 to 2.4 inches. Particle board desks with hollow cores may not hold a clamp securely.
Grommet mount. This option requires a hole in your desk (or an existing grommet hole) and bolts the arm through the surface. It's more stable than a clamp and supports heavier loads. The downside is permanent installation.
You need a drill and you're committing to the placement.
Wall mount. If desk space is tight or you want a completely clean surface, a wall mount attaches the monitor to the wall. This requires locating wall studs or using appropriate drywall anchors. A 27-inch monitor on a wall mount looks great, but it's the least flexible option if you want to reposition frequently.
Fixed vs. Articulating (Gas Spring) Arms
Within each mounting type, you'll choose between a fixed arm and an articulating one.
Fixed arms hold the monitor in a set position. They're simple, stable, and usually cheaper. If you've already dialed in your ergonomic position and don't need to adjust throughout the day, a fixed arm works fine.
Articulating arms use a gas-spring mechanism that lets you move the monitor up, down, left, right, tilt, swivel, and rotate. This is the popular choice for people who use sit-stand desks, share their screen with colleagues, or just want flexibility. Gas-spring arms have a weight range, usually listed as something like 2 to 9 kilograms.
Your monitor's weight needs to fall within that range for the arm to function properly. Too light and the arm won't stay down. Too heavy and it won't stay up.
Weight Capacity: The Number Most People Skip
Here's a mistake we see constantly. Someone buys a monitor arm based on price or looks, then discovers it can't hold their display. A 27-inch monitor typically weighs between 9 and 14 pounds without the stand.
Add the weight of the VESA plate and any cable tension, and you're looking at a real-world load that can exceed the arm's rating.
Always check the arm's maximum weight capacity against your monitor's actual measured weight. Leave at least 20 percent headroom. If your monitor weighs 12 pounds, get a arm rated for at least 15.
This prevents sagging over time and keeps the gas spring functioning properly.
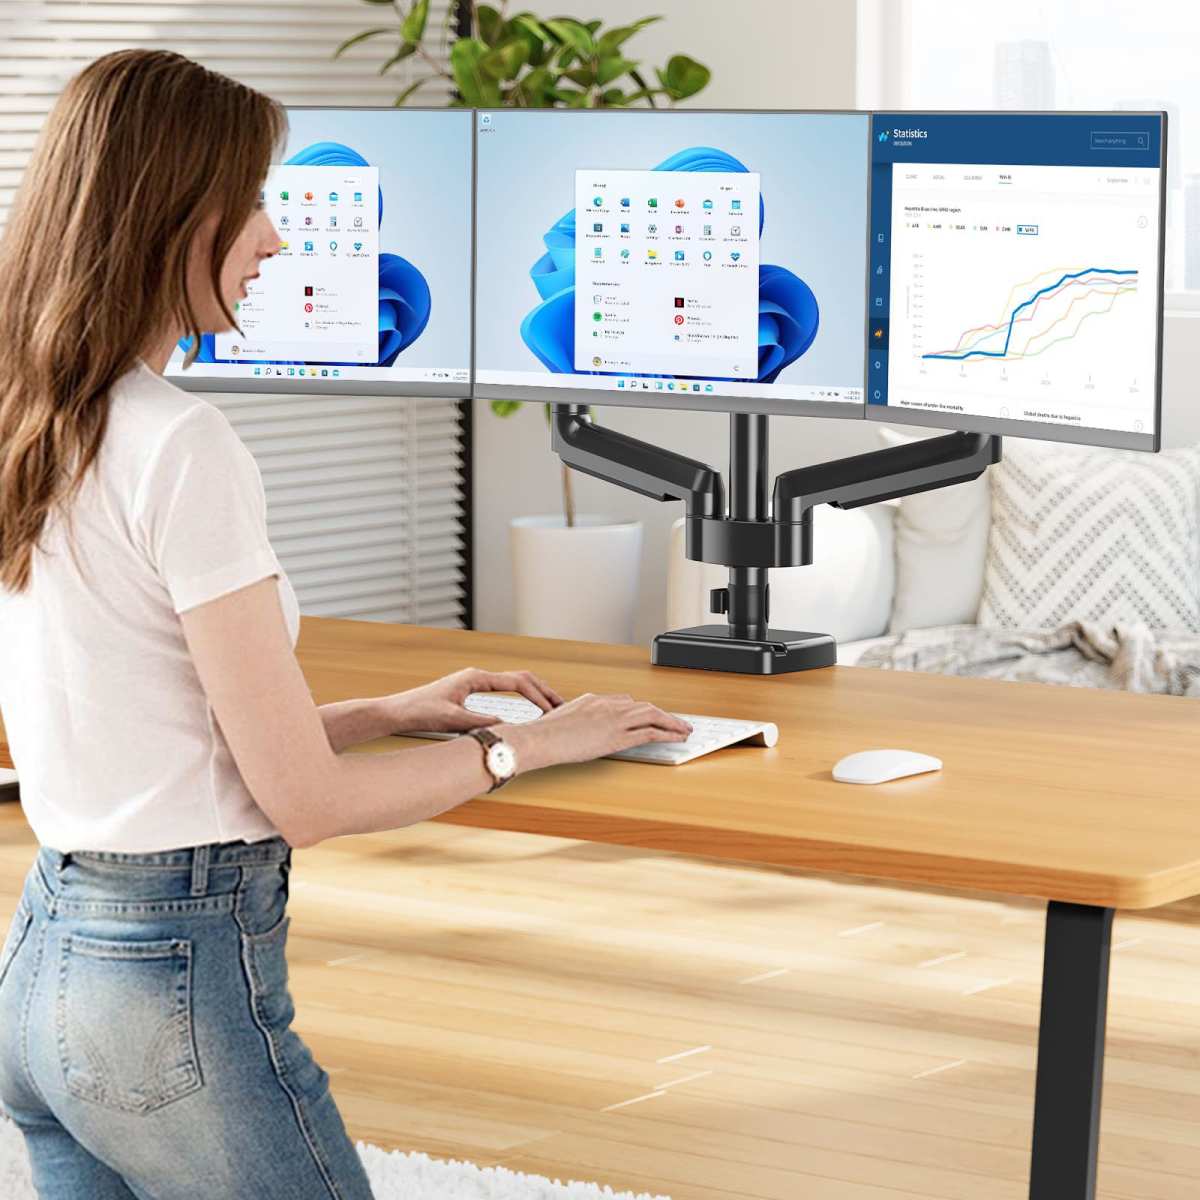
Image source: Bing (Web (fair-use with source credit))
Common Mistakes When Mounting a 27-Inch Monitor
Even when people get the right mount, installation errors can turn a good setup into a frustrating one. Here are the most common pitfalls:
- Using screws that are too long. This is the single most damaging mistake. An M4 screw that's even a few millimeters too long can crack the internal display PCB or damage backlight components. Always use the screw length specified in your monitor's manual.
- Ignoring the weight range on gas-spring arms. If your monitor is at the very top or bottom of the arm's rated range, it won't hold position properly. Aim for the middle of the range for best performance.
- Over-tightening the VESA screws. You need them snug, not cranked down with all your strength. Over-tightening can strip the threads in the monitor's housing or crack the mounting area.
- Mounting to a desk that can't handle the clamp. Thin laminate desks, hollow-core desks, and glass desks are poor candidates for clamp mounts. The clamp can crack the surface or gradually loosen over time.
- Forgetting about cable management. Once the monitor is on an arm, the cables move with it. Without proper cable routing through the arm's channels, you'll have a tangled mess every time you adjust the display.
- Not testing the full range of motion before tightening everything. Get the monitor on the arm, route the cables, and move it through its full range before you finalize every bolt. You might find that the arm hits the wall, the cables are too short, or the monitor collides with other objects on your desk.
Costs: What You'll Actually Spend on a VESA Setup
Here's a realistic breakdown of what you'll pay to get a 27-inch monitor on a proper VESA mount as of 2026:
| Component | Budget Option | Mid-Range Option | Premium Option |
|---|---|---|---|
| Single monitor arm | $20 – $35 | $50 – $90 | $120 – $200+ |
| Dual monitor arm | $40 – $70 | $100 – $160 | $200 – $350+ |
| VESA adapter plate (if needed) | $10 – $15 | $15 – $25 | $25 – $40 |
| Cable management clips | $5 – $10 | $10 – $15 | $15 – $25 |
| Total estimated cost | $35 – $60 | $75 – $135 | $160 – $265+ |
The sweet spot for most people is the mid-range category. A $50 to $90 single articulating arm from a reputable brand will handle a 27-inch monitor reliably for years. Budget arms under $25 tend to have weaker gas springs and looser joints.
Premium arms from brands like Humanscale or Ergotron offer better build quality, smoother movement, and longer warranties, but the functional difference for a single 27-inch display is modest.
The Bottom Line: Your VESA Compatibility Decision Flow
Let's bring it all together into a simple decision process. Follow these steps in order and you'll end up with a setup that works.
- Find your monitor's exact model number. Check the label on the back.
- Look up the official spec sheet. Search the manufacturer's website. Find the VESA entry.
- If VESA is listed, note the pattern. It's almost certainly 100x100mm for a 27-inch monitor. Confirm the screw specification (M4) and length.
- Weigh your monitor without the stand. Use a scale. Write down the number.
- Choose a mount that matches both the pattern and the weight. Leave 20 percent weight headroom.
- If VESA is not listed, check the back panel physically. Remove the stand and look for holes. If there are none, search for a model-specific VESA adapter plate.
- If no adapter exists, consider exchanging the monitor for a model with native VESA support if mounting is important to you.
That's the whole process. No guesswork, no assumptions, no wasted money on incompatible hardware. The vast majority of 27-inch monitors do support VESA mounting, and if yours is one of them, you're about to enjoy a much cleaner and more ergonomic desk setup.
Frequently Asked Questions
Are all 27-inch monitors VESA compatible?
No. Most are, but not all. Some budget models and certain gaming monitors ship with fixed stands and no VESA mounting holes.
Always check the manufacturer's spec sheet for your exact model before assuming compatibility.
What size VESA mount do I need for a 27-inch monitor?
The most common pattern for 27-inch monitors is 100x100mm. Some lighter or budget models use 75x75mm. Heavier or premium models may use 200x100mm.
Check your monitor's spec sheet to confirm which pattern applies.
What screws do I use to mount a 27-inch monitor?
Standard M4 machine screws are used for virtually all VESA monitor mounting. The length depends on your monitor's design. 10mm works for most surface-mount holes. Recessed mounting zones may require 12mm or 14mm.
Always verify the length in your monitor's manual.
Can I VESA mount a monitor that doesn't have mounting holes?
Not directly. However, third-party VESA adapter plates exist for some popular models. These plates clamp or attach to the existing chassis and provide a VESA-compatible mounting surface.
Availability depends on your specific monitor model.
How much weight can a monitor arm hold for a 27-inch display?
Most quality single monitor arms support between 9 and 20 pounds. A typical 27-inch monitor weighs 9 to 14 pounds without the stand. Choose an arm rated for at least 20 percent more than your monitor's actual weight for reliable performance.
Will mounting my monitor on an arm void the warranty?
In most cases, no. VESA mounting is a designed feature, and using it as intended typically doesn't affect your warranty. However, some manufacturers may exclude damage caused by third-party mounts.
Check your warranty terms if you're concerned.
(The previous batch already covered all the major H2 sections from the approved TOC, including Quick Answer, core explanation, step-by-step process, comparisons, costs, common mistakes, the decision flow, and FAQs. There are no remaining H2 headings left to write. The complete article has been delivered within the target word count.)

Similar Posts