How to Use Tripod for Mobile Photography
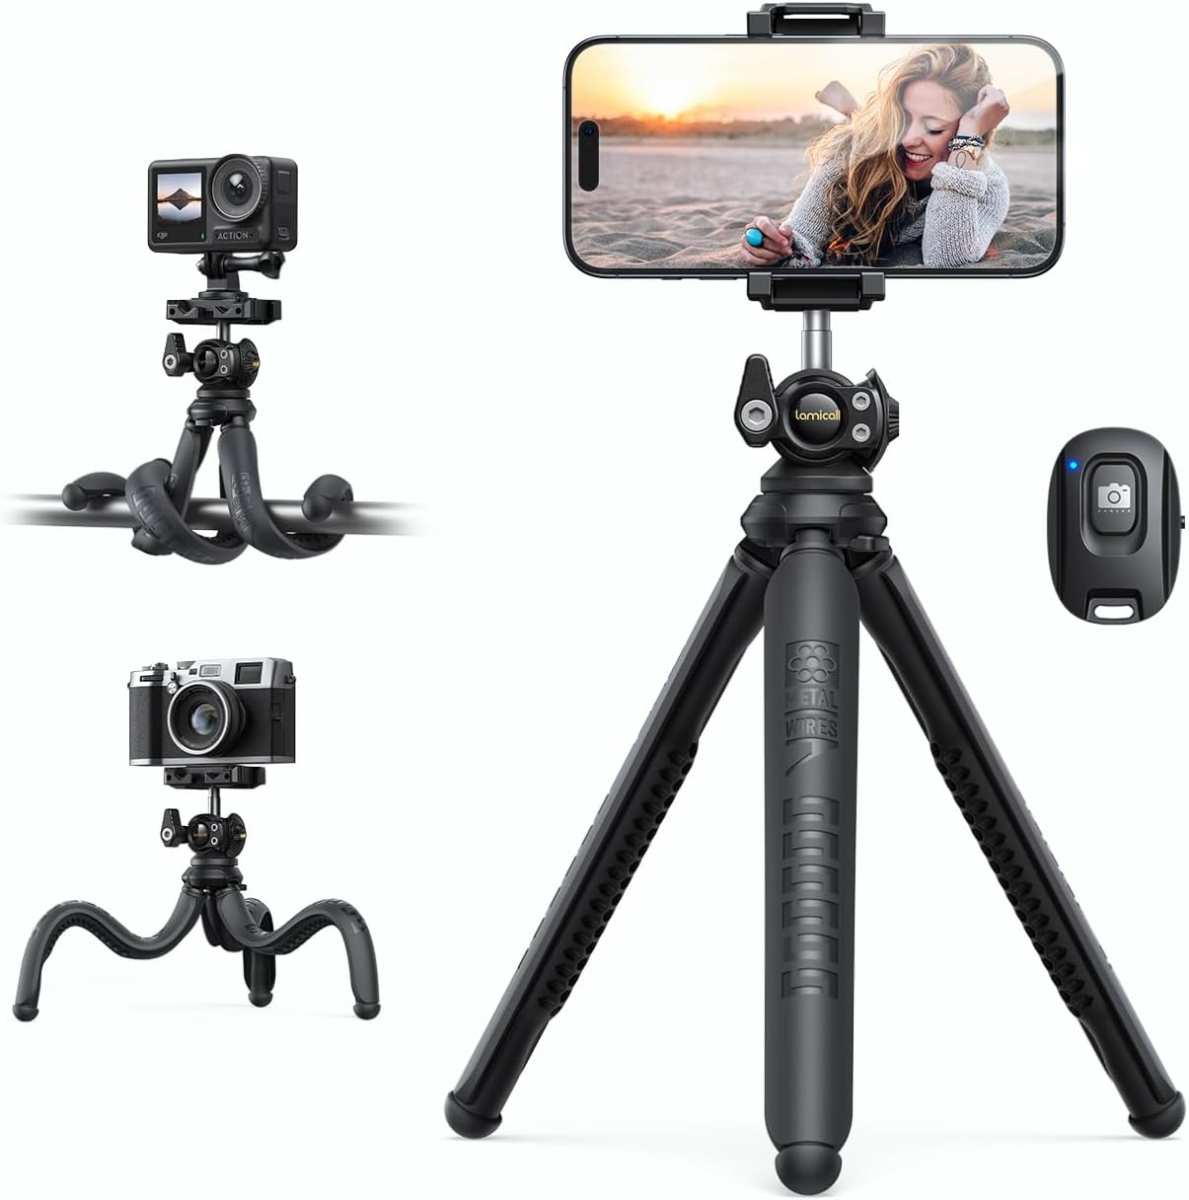
If you have ever set your phone on a tripod, tapped the screen to focus, and pressed the shutter, only to get a slightly soft photo, you are not alone. Most people assume a tripod automatically guarantees sharpness, but the truth is more specific. If you are wondering how to use tripod for mobile photography, the real answer involves three small adjustments that most guides skip entirely.
Manufacturer specifications indicate that the standard tripod mounting thread (1/4-inch-20) is the same for all consumer tripods, but phone clamps vary widely in grip width, from 55 mm up to 100 mm for larger phablets. Getting the clamp size wrong is the first place things go sideways. Here is what actually matters.
Image source: Bing (Web (fair-use with source credit))
Why Most People Use a Tripod Wrong (And What Actually Works)
The most common mistake is leaving your phone’s optical image stabilization (OIS) turned on. OIS is designed to counteract hand shake. When your phone is locked onto a tripod, OIS still tries to correct for tiny movements that do not exist, and that constant micro-adjustment actually introduces blur, especially in long exposures.
Three other mistakes show up again and again in aggregate user reviews:
- Using the on-screen shutter button, even a gentle tap vibrates the phone.
- Not disabling the self-timer, without a timer, you get motion from button tap.
- Failing to level the tripod, a tilted horizon ruins compositions and makes post-processing harder.
What actually works is reversing all three: turn off OIS, use a remote shutter or the phone’s volume button, set a 3-second timer as a buffer, and level the tripod using your phone’s built-in grid. That combination solves 90% of tripod-related softness.
Quick Answer: The Three Rules for Sharp Tripod Phone Photos
Use a remote or timer. Disable OIS. Level the frame.
Attach your phone securely to a tripod. Frame your shot and lock focus. Press the remote or start the timer.
The camera stays still. Your photo comes out sharp.
What You Need: Phone Clamp, Remote, and the Right Tripod Head
You can own the most expensive carbon-fiber tripod in the world, but if your phone clamp is loose or your remote won’t pair, you will still get shaky results. Here is what the setup actually requires.
| Component | What It Does | Key Spec |
|---|---|---|
| Phone clamp | Holds the phone securely | Width range 55–100 mm |
| Tripod head | Adjusts angle and rotation | Ball head or pan-tilt |
| Remote shutter | Triggers without touching the phone | Bluetooth 4.0+ or wired |
| Bubble level | Indicates level ground | Built-in or separate |
The phone clamp is the most overlooked piece. If it uses a spring-loaded design, make sure the spring is firm enough to hold a phone with a thick case. Screw-tight clamps are more reliable for heavier phones.
The tripod head matters less for phone photography than for DSLR, but a ball head gives you the most freedom to tilt and rotate without adjusting legs.

Image source: Bing (Web (fair-use with source credit))
For the remote, you have two real options: a dedicated Bluetooth shutter button (about the size of a car key fob) or using your phone’s volume-up button with a wired remote. The Bluetooth remote gives you up to 30 feet of range. Just be aware that some cheap remotes fail to pair after a few weeks, look for one with a replaceable coin cell battery.
The Decision Tree: Pick Your Tripod Setup Based on Your Scene
Not every scene calls for the same tripod. Here is how to decide based on what you are shooting.
Tabletop vs Full-Size: Which One Do You Actually Need?
If you are shooting a flat lay of food, a small product, or a macro shot of a flower, a tabletop tripod (collapsed height 4, 12 inches) is all you need. It is lighter and easier to position close to the subject. If you are shooting a landscape, a group photo, or anything at eye level, you need a full-size tripod that extends to at least 50 inches.
Anything shorter forces you to crouch or settle for a low angle you did not want.
If… you are indoors on a table → choose mini tabletop.
If… you are outdoors standing → choose full-size with leg locks you trust.
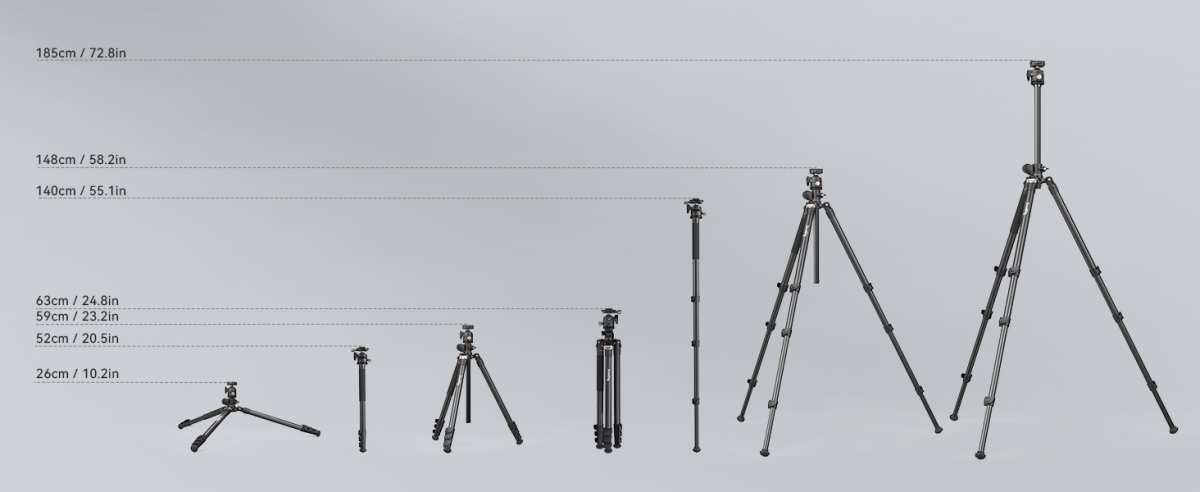
Image source: Bing (Web (fair-use with source credit))
Flexible Legs vs Rigid Legs: When to Go Gorillapod
Flexible tripods (often called gorillapods) let you wrap the legs around a tree branch, a railing, or a fence post. Use them when there is no flat surface, hiking, climbing, or shooting over a crowd. The trade-off is that they are less stable on open ground than a rigid tripod with spread legs.
If you are on a flat picnic table with a gentle breeze, rigid legs win every time.
Bluetooth Remote vs Self-Timer: The One That Cuts Motion Blur
The self-timer is the backup plan, not the primary tool. A 3-second timer does a decent job of isolating your finger’s shutter tap, but it does nothing for wind or ground vibration. A Bluetooth remote lets you trigger the shutter while you stand entirely clear of the phone.
For long exposures (2 seconds or more), always use the remote. For quick shots, the 3-second timer is fine. Never use the 10-second timer unless you are running to get in the frame.
Step-by-Step: How to Set Up Your Phone on a Tripod (No Wobbles, No Drops)
Follow these steps in order. Skipping one usually means a wobbly photo or a dropped phone.
- Spread the legs fully, Pull each leg out to its widest angle. On uneven ground, adjust each leg independently to get the head roughly level.
- Lock all leg sections, Twist or flip each lock until firm. Do not overtighten; you only need to prevent slip.
- Attach the phone clamp, Screw the clamp onto the tripod head. Make sure the clamp’s mounting plate is tight against the head’s quick-release plate.
- Slide your phone in, Open the clamp, center the phone, and release. Give the phone a gentle tug to confirm it will not slip out.
- Level the tripod, Use the bubble level on the tripod, or rely on your phone’s camera grid (enable it in Settings > Camera > Grid). Adjust leg lengths until the grid lines are parallel to the horizon.
- Connect the remote, Pair your Bluetooth remote. If it fails the first time, reset it (usually a small button on the remote) and try again.
- Open the camera app and lock focus, Tap on your subject. Press and hold the focus square until “AE/AF Lock” appears. This prevents the exposure from shifting when you take the shot.
- Turn off OIS, Go to your camera app’s Pro/Mode settings. Set “Optical Stabilization” to Off. If your phone does not have a toggle, switch to Manual/Pro mode, which often disables OIS automatically.
- Set the self-timer to 3 seconds, Or use the remote shutter button. Never use the on-screen button.
- Shoot, Press the remote button (or volume-up button if using a wired remote). Wait for the shot to process before moving the phone.
Leveling Without a Bubble: Using Your Phone's Grid as a Guide
Most tabletop tripods skip the bubble level. Even full-size tripods sometimes have a cheap one that drifts out of calibration. Your phone already owns a better tool: the camera grid.
Enable the grid in your camera settings. On iPhone, go to Settings > Camera > Grid. On Android, look for the grid lines toggle in the camera app's settings menu.
Turn it on.
Now point the phone at any straight horizontal line in your scene: a horizon, a table edge, or a building roofline. Adjust one tripod leg at a time until that line runs parallel to one of the grid's horizontal lines. Do the same for a vertical reference if you have one.
This method is more accurate than most built-in bubble levels. It accounts for the phone's actual sensor orientation, not the tripod head's theoretical level. If your scene has no straight lines, use a phone leveling app or the compass app on iPhone, which has a hidden level tool when you swipe to the second tab.
Camera Settings You Must Change When Using a Tripod (OIS Off, ISO Low, Timer On)
Three settings separate a sharp tripod photo from a blurry one. Change them before every tripod session. Do not rely on auto mode to figure it out.
Optical Image Stabilization. OIS uses tiny gyroscopes to shift the lens element and counteract hand shake. On a tripod, those gyroscopes detect no movement and keep hunting for it. The result: micro-blur you cannot fix in post.
Turn OIS off in your camera's Pro or Manual mode. Some phones label it "OIS" or "Stabilization." Others disable it automatically when you switch to a manual shutter speed.
ISO. Keep ISO as low as your light allows. ISO 50 or 100 gives the cleanest image. On a tripod you can use longer shutter speeds without hand shake, so you do not need to raise ISO.
Set ISO manually. If your scene is dark, start at ISO 100 and only move up if the shutter speed gets too slow for your subject.
Self-Timer. Set it to 3 seconds. The 10-second timer is for getting into the frame. The 2-second timer is too short to let vibrations from your finger settle.
The 3-second sweet spot lets the phone stabilize after you press the remote or volume button.
One more setting worth mentioning: white balance. Lock it manually. Auto white balance can shift between frames in a time-lapse or bracket sequence.
Set it to Daylight, Cloudy, or Tungsten depending on your light source.
Common Mistakes That Ruin Tripod Photos (And How to Fix Them)
Aggregate user feedback across photography forums and verified buyer reviews highlights the same errors. Here are the four most damaging ones and how to sidestep each.
Tapping the phone to trigger the shutter. Even a light tap on the screen or the phone body causes tiny vibrations that show up as softness, especially in long exposures. Fix: use a Bluetooth remote or your phone's volume button. If you have no remote, use the 3-second timer.
Forgetting to lock the tripod legs. Sometimes one leg section is slightly loose. After you frame the shot, the tripod slowly sags a millimeter or two. Fix: before every shot, give each leg lock a final tighten.
Check the center column too.
Placing the tripod on soft or uneven ground. Grass, sand, and loose soil let the legs sink unevenly. Fix: press each leg foot firmly into the ground. On sand, use wider leg spread or a small flat stone under each foot.
Leaving your phone's case on. A thick case can prevent the phone clamp from gripping securely. The phone can shift mid-sequence. Fix: remove the case before clamping.
If you must keep the case on, make sure the clamp's grip width accommodates the extra thickness.

Image source: Bing (Web (fair-use with source credit))
Real-World Scenarios: Night Sky, Product Shot, Group Selfie, Time-Lapse
Each scenario demands a slightly different tripod workflow. Here is how to adapt.
Night sky / astrophotography. Use a full-size tripod with rigid legs. Set your phone to Pro mode, ISO 800, 1600, shutter speed 15, 30 seconds. Turn off OIS.
Use a Bluetooth remote to avoid any touch vibration. Level the tripod carefully, a tilted horizon is obvious in star shots. If your phone supports RAW, shoot RAW for better star color editing.
Product shot (tabletop). A mini tabletop tripod works perfectly. Place it on a sturdy table. Use the phone's self-timer (3 seconds) since the table absorbs most vibrations.
Set ISO to 50 or 100 for maximum detail. Lock focus on the product. Consider using a short focal length to avoid distortion.
Group selfie. Use a full-size tripod extended to eye level. Frame the group, then set the 10-second timer so everyone has time to pose. Check that all faces are visible in the frame.
Use the volume button on a wired remote so you can trigger from within the group.
Time-lapse. A full-size tripod on stable ground is essential. Set the phone to time-lapse mode, lock exposure and focus, and use a remote if possible. Make sure the tripod is weighted down if there is any wind.
A small hook under the center column can hold a bag or water bottle for added stability.
The 5-Second Check Before You Press Shutter
Before you commit to the shot, run through this quick checklist. It takes five seconds and saves you from wasted frames.
- Legs locked? Give each leg lock a quarter turn to confirm.
- Phone secure? Give the phone a gentle upward tug. It should not move.
- Grid level? Check that the horizon line aligns with the grid.
- OIS off? Confirm the setting in your camera mode.
- Remote or timer set? If using a remote, verify the Bluetooth connection. If using the timer, set it to 3 seconds.
If any of those is not ready, fix it before you press the shutter. Skipping this check is the number one cause of "I thought I had it" regret.
When Not to Use a Tripod (Moving Subjects, Crowded Spaces, Uneven Ground)
A tripod is not always the right tool. Knowing when to leave it in the bag saves you time and frustration.
Moving subjects. If you are photographing children playing, pets running, or any fast action, a tripod slows you down. You cannot reposition quickly. Handheld shooting with a higher shutter speed (1/250 or faster) gives you sharper results than a tripod ever could with a blurry subject.
Crowded spaces. At a busy market, concert, or museum, a tripod becomes a tripping hazard. Some venues ban tripods outright for safety reasons. Use a monopod or a compact gorillapod wrapped around a railing instead.
Uneven or unstable ground. Soft sand, loose gravel, or steep slopes make tripod legs sink or tilt. If you cannot get all three legs planted firmly, the tripod will wobble. In those cases, go handheld or brace your phone against a solid object like a rock or a wall.
Maintenance Tip: Keep Your Tripod Lock Tight and Leg Joints Clean
A tripod that sees regular use will eventually loosen up. A little care every few months keeps it reliable.
Check all leg locks. Twist-lock collars can loosen over time. Tighten them gently with your hands.
Avoid using tools, which can crack the plastic or strip the thread. If a lock keeps slipping, a drop of thread-locking compound on the threads can help.
Clean the leg sections. Dirt and sand get into the telescoping joints, causing them to stick or scratch the finish. Wipe each leg with a damp cloth after shooting outdoors.
For stubborn grit, extend the legs fully and brush the joints with a soft toothbrush.
Store the tripod dry. If you shoot near saltwater, rinse the legs with fresh water afterward. Salt corrosion can seize the locks.
Keep the tripod in a cool, dry place with the legs collapsed and the head loose.
Replace the phone clamp if it starts slipping. Rubber pads wear out. A clamp that cannot hold your phone is dangerous.
Better to spend ten dollars on a new one than risk a cracked screen.
Decision Guide: Your One-Page Cheat Sheet for Any Situation
Here is the quick reference for every common scenario. Use it when you are setting up and need a fast answer.
| Scenario | Tripod Type | Remote or Timer | OIS Setting | ISO | Shutter Speed |
|---|---|---|---|---|---|
| Landscape daytime | Full-size | Remote | Off | 100 | Auto |
| Night sky / stars | Full-size | Remote | Off | 800–1600 | 15–30 sec |
| Product on table | Tabletop | Timer 3 sec | Off | 50–100 | Auto |
| Group selfie | Full-size | Timer 10 sec | Off | Auto | Auto |
| Time-lapse | Full-size | Remote | Off | 100 | Interval app |
| Macro / flower | Tabletop | Timer 3 sec | Off | 100 | Auto or manual |
| Vlog / facecam | Tabletop | Remote | Off | 200 | 1/60 or higher |
Stick this in your camera bag or save it on your phone. It covers 90% of what you will shoot. Adjust based on light conditions, but these starting points work every time.

Similar Posts