How to Test HDR on Monitor
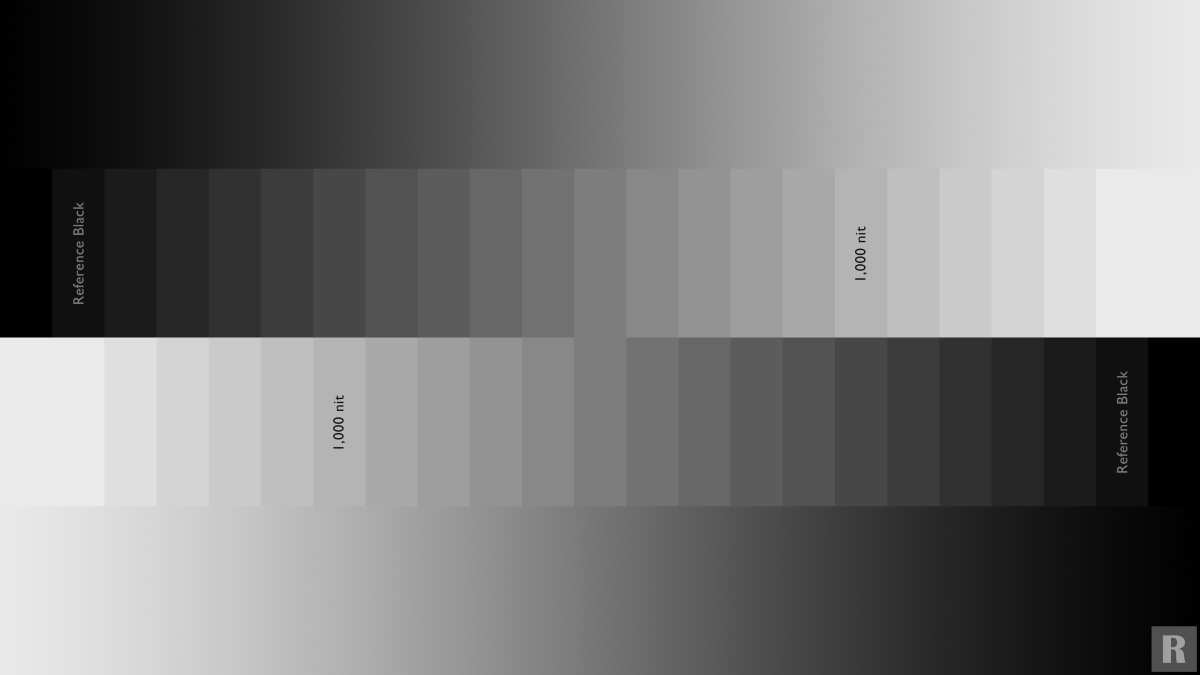
Image source: Bing (Web (fair-use with source credit))
Learning how to test HDR on monitor hardware correctly tells you whether your display actually delivers meaningful high-dynamic-range performance or just wears the label. A monitor can carry an HDR badge and still look barely different from SDR once you put it through a proper evaluation.
DisplayHDR certification tiers define minimum performance benchmarks. VESA's standard creates clear thresholds for resolution, color, luminance, and bit depth. Run a structured test to find out whether your monitor hits those numbers in practice.
Quick Answer
Enable HDR in your monitor's OSD first, then toggle it on in your operating system's display settings. Confirm the signal chain is actually carrying an HDR feed. Use test patterns to evaluate black levels, peak brightness, and tone mapping.
Verify results with known HDR content.
Is Your Monitor Actually Displaying HDR?
Here's the uncomfortable truth. Plenty of monitors ship with "HDR support" that amounts to little more than accepting an HDR signal and doing a mediocre job with it. VESA's DisplayHDR certification tries to separate the real from the marketing fluff, but even that has gaps.
DisplayHDR 400, the entry-level tier, requires only 400 nits of peak brightness and doesn't mandate local dimming. Many monitors meeting that spec produce HDR that looks indistinguishable from SDR.
True HDR performance depends on a combination of factors working together: peak brightness that sustains, deep black levels, wide color gamut coverage, and competent tone mapping. Missing any one of those pieces, and you get a compromised experience. The grayscale ramp above shows what proper tonal gradation looks like.
Real HDR should display distinct steps from deep black to bright white without crushing or clipping.
Test every piece independently rather than trusting a single spec sheet number. That's how you avoid paying for capability you never actually receive.
What You Need Before You Start Testing
Your Monitor's Real HDR Capability
Pull up your monitor's actual specification sheet, not the marketing page. The specs that matter for HDR testing include peak brightness in nits, native bit depth, local dimming zone count if applicable, and the specific HDR formats the panel supports. DisplayHDR tier certification gives you a baseline, but it's a minimum standard, not a guarantee of quality.
A monitor rated at DisplayHDR 1000 with full-array local dimming and 10-bit native color will test very differently from one rated at DisplayHDR 400 with 8-bit FRC and edge-lit backlighting. Know exactly what you're working with before you start.
Cable and Port Requirements
HDR at high resolutions and refresh rates demands real bandwidth. HDMI 2.0 tops out at 18 Gbps. That limits you to 4K HDR at 60 Hz with chroma subsampling in many cases.
HDMI 2.1 provides 48 Gbps. DisplayPort 1.4 with Display Stream Compression handles 4K HDR at higher refresh rates. DisplayPort 2.0 pushes even further.
Use a cable rated for your interface Generation. Many HDR signal problems trace back to cables that don't actually meet the bandwidth rating printed on the jacket. A cable that came bundled with a monitor is adequate for basic testing, but for high-refresh HDR at 4K, verify the cable specification independently.
GPU and Operating System Readership
Both NVIDIA and AMD expose HDR toggles in their driver software. Windows 10 supports HDR through the Display Settings panel but handles it inconsistently at the desktop level. Windows 11 improved this and added Auto HDR for SDR content.
Each operating system manages the HDR signal chain differently.
Confirm your GPU supports HDR output over the specific port you're using. Intel integrated graphics gained capable HDR handling with 11th-gen processors and later. Check your driver version, as HDR behavior has changed across driver releases for all three GPU vendors.
The Quick Check: Does Windows (or macOS) See Your Monitor as HDR-Ready?
Start by verifying your operating system recognizes the monitor's HDR capability at all. If this step fails, nothing after it will work.
Windows 10/11 HDR Signal Detection
Open Settings, then Display, and look for the HDR toggle under the Brightness and Color section in Windows 11, or under HDR and Advanced Color Settings in Windows 10. If you don't see the toggle, your system doesn't detect an HDR-capable display on that output. That's a signal chain problem, not a monitor problem.
The screenshot below resembles the Windows HDR toggle tile in the Display settings panel.

Image source: Wikimedia Commons / Dietmar Rabich (CC BY-SA)
A missing toggle typically means one of three things. The cable doesn't carry enough bandwidth. The GPU driver isn't configured for HDR on that output.
Or the monitor's EDID isn't reporting HDR capability correctly. Rule those out before suspecting the monitor itself.
How to Verify the Full Signal Chain Is Working
Once the toggle appears, switch it on and confirm the desktop actually transitions to an HDR signal. The Windows HD Color settings panel should show "HDR: Yes" under the display information. On NVIDIA hardware, the NVIDIA Control Panel should also reflect the active HDR state.
Verify the signal at the hardware level. In your monitor's OSD, look for an information panel that reports the incoming signal format. You should see "4K 60Hz HDR" or "4K 120Hz HDR" when the feature is active.
If the OSD reports an SDR signal even with the Windows toggle on, suspect a cable or driver issue.
Why the HDR Toggle Might Be Missing
If the toggle is absent after checking the obvious causes, investigate the EDID communication between your monitor and GPU. Some monitors require you to explicitly enable HDR in the monitor's own OSD menu before the EDID flags the capability to the operating system. Check for settings called "HDMI UHD Color," "Enhanced Format," "HDR Mode," or similar wording.
On laptops with hybrid graphics, HDR might only be available through specific outputs wired to the discrete GPU. A USB-C to DisplayPort connection may behave differently than a direct HDMI connection.
Step-by-Step: How to Test HDR on Your Monitor Properly
Step 1: Enable HDR in Your Monitor's OSD First
Before touching any operating system or driver setting, open your monitor's On-Screen Display and locate the HDR-related option. This might be generic or format-specific. Either way, enable it.
Many monitors won't expose HDR capability to the GPU until the OSD setting is active. Skip this step and you'll spend an hour troubleshooting a problem that didn't exist.
Note any settings that become locked or grayed out once HDR activates. This is normal on many monitors. Some panels lock brightness, gamma presets, or color temperature adjustments in HDR mode.
Record those restrictions so you know what you can and cannot adjust during testing.
Step 2: Turn On HDR in Your Operating System
With the monitor OSD HDR enabled, switch on the HDR toggle in Windows Display Settings. On Windows 11, the toggle sits on the main Display page. On Windows 10, you may need to click "Windows HD Color" and turn on "Play HDR games and apps" separately.
The screen likely flickers briefly as the operating system switches from SDR to HDR signal output. If it doesn't, the toggle might not be taking effect. Verify through your monitor's OSD information panel.
For NVIDIA users, open the NVIDIA Control Panel after enabling Windows HDR. Confirm that the output color format is set to RGB or YCbCr444, the output color depth shows 10 bpc where supported, and the dynamic range is set to "Full" rather than "Limited."
For AMD users, open AMD Software and verify that HDR is enabled under the Display tab. Intel users should open the Intel Graphics Command Center and toggle on HDR under the Display settings.
Step 3: Verify You're Actually Getting an HDR Signal
This is where most people get fooled. The toggle is on, the monitor says HDR, but the actual performance hasn't changed. Here's how to confirm a real HDR signal is present and being processed correctly.
Open a known HDR video on YouTube or another streaming source. Windows system sounds and desktop colors should look slightly different than in SDR mode. Open the Windows HDR Calibration app, a free tool from the Microsoft Store that Microsoft released to address exactly this verification gap.
The app walks you through adjustments for peak brightness, saturation, and black level. It also confirms the system recognizes your display as HDR-capable. If the calibration app won't launch or shows no HDR display detected, the signal chain has a problem upstream.
Step 4: Display Test Patterns and Evaluate Visually
Test patterns reveal what general content hides. A proper HDR test pattern set should validate multiple performance dimensions.
For black level assessment, use a pattern that displays near-black gradients from zero to about 5 percent brightness. On a monitor with good HDR, you should see distinct visible steps across that range without crushing into a single black blob or washing out into gray. For peak brightness, a full-screen white window at 100 percent should hit the panel's rated nits.
A sustained white window reveals whether the monitor maintains its brightness rating. Many monitors peak for a fraction of a second then throttle down due to thermal limits.
For color, BT.2020 test patterns show how well the monitor maps wide-gamut content. The color checker pattern helps assess skin tone rendering under HDR tone mapping. These enable quick evaluation of how well a monitor maps colors in the wider HDR space.
Step 5: Start With Real HDR Content
Test patterns tell you what the monitor can theoretically do. Real content tells you what it actually does in practice.
For gaming, titles with built-in HDR calibration screens work well. Many recent releases include them. Look for in-game settings that let you set peak brightness nits and UI paper white luminance independently.
Set the peak brightness slider to match your monitor's sustained real-world number, not its one-second peak spec.
For video, use HDR content you know well. Netflix titles like Our Planet or Formula 1: Drive to Survive are mastered standards. YouTube HDR uploads from verified channels provide free, consistent reference material.
Apple TV+ delivers streaming HDR with Dolby Vision where your monitor supports it.
Pay attention to specific visual cues. Bright highlights in dark scenes should pop without blooming into surrounding shadow areas. Sunlit scenes should feel uncomfortably bright at times, that's exactly what HDR is supposed to do.
Skin tones should retain natural saturation rather than shifting toward orange or pink. Metal and glass should show specular reflections that feel genuinely intense compared to diffuse surfaces nearby.
A common problem is the washed-out HDR look.
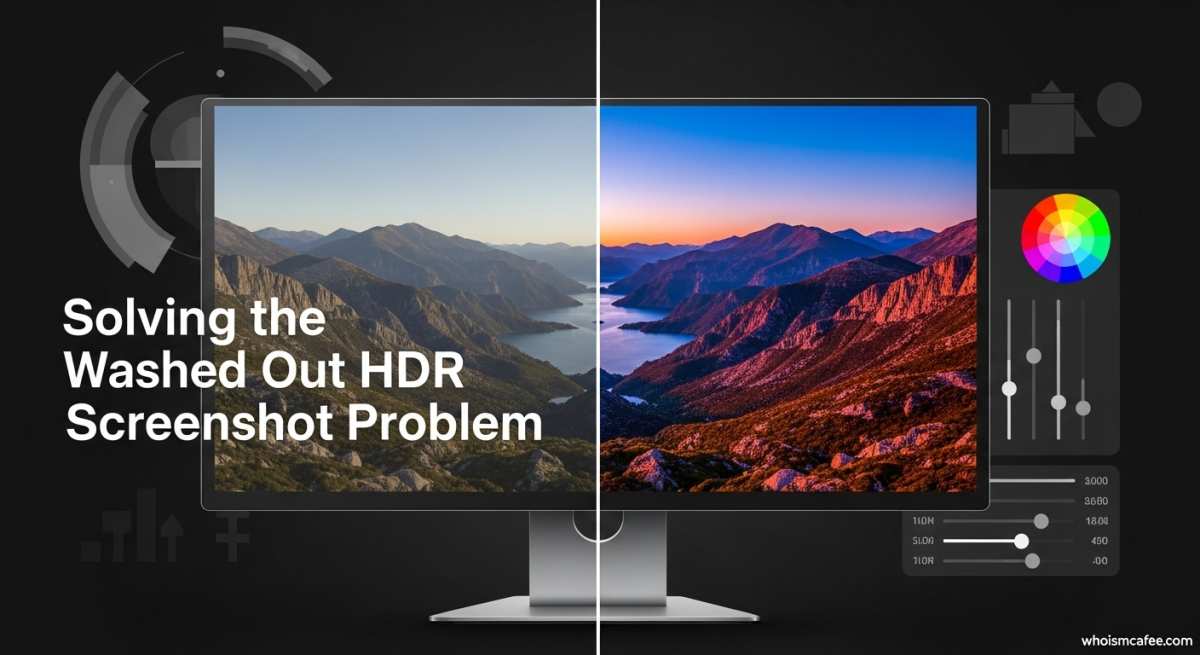
If content appears washed out immediately after enabling HDR, that typically signals EOTF tracking issues where the monitor is applying the wrong electro-optical transfer function to the incoming signal. This creates a flat, low-contrast appearance that makes HDR look worse than SDR.
If the image looks correct in HDR video but wrong on the desktop, that's a separate Windows desktop composition issue. The operating system's SDR content brightness slider in the HDR settings panel controls how SDR content renders within an HDR signal. Adjust that slider to taste, typically between 30 and 60 for most monitors.
Step 6: Measure With a Colorimeter
Visual assessment catches obvious problems, but measurement tools quantify performance. A colorimeter or spectrophotometer placed on the screen surface gives you objective data for peak brightness, black level, color gamut coverage, and EOTF tracking accuracy.
The Calibrite Display Plus HL and X-Rite i1Display Pro are common instruments for this work. The Calibrite Display Pro HL and i1Display Pro Plus offer higher brightness ceiling support for modern HDR panels. Software options include Calibrite Profiler, DisplayCAL, and Calman.
DisplayCAL is free and open source, though its HDR measurement workflow requires some familiarity with the software.
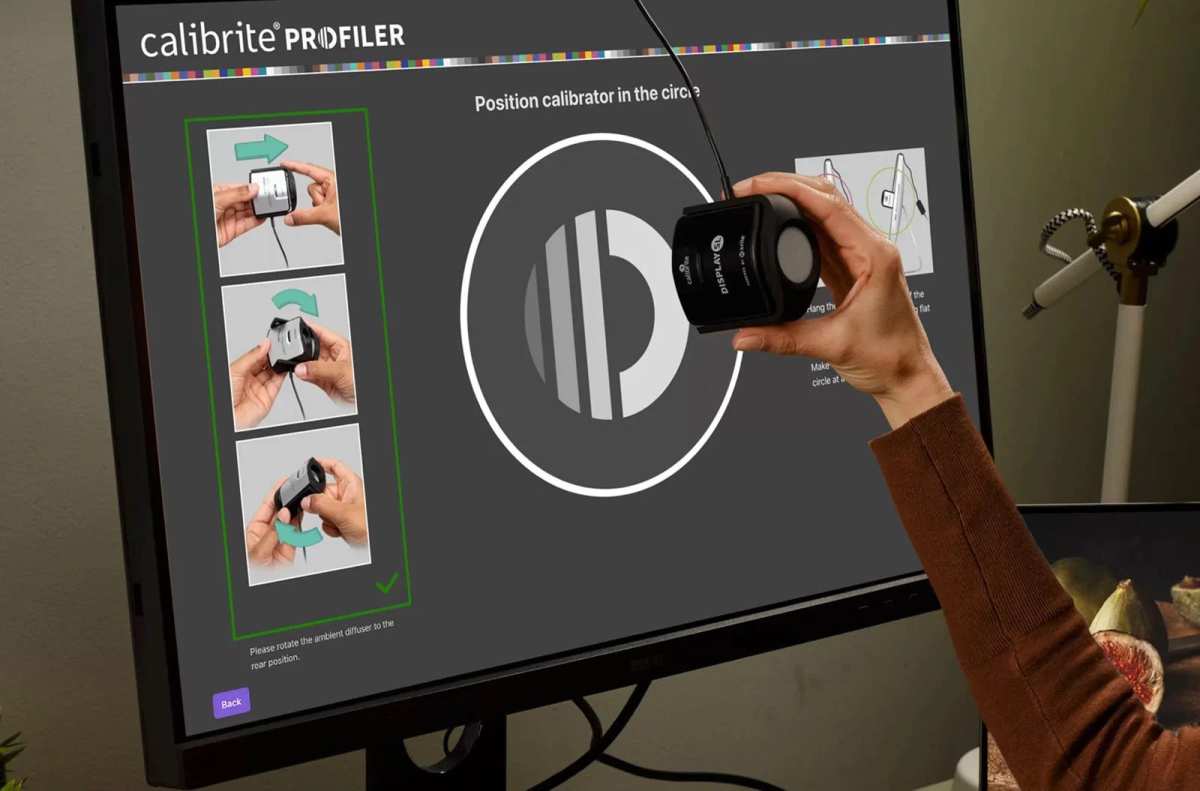
Image source: Bing (Web (fair-use with source credit))
Measure peak brightness using a full-screen white window displayed for at least 30 seconds. This captures sustained brightness rather than a momentary peak. Measure black level using a full-screen black window in a darkened room.
Calculate the contrast ratio from those two numbers. Measure color gamut coverage using a BT.2020 or DCI-P3 test pattern set. The software reports coverage percentage and volume separately.
Coverage tells you how much of the target gamut the monitor reaches. Volume tells you how far beyond or short of the target it extends.
Compare your measured values against the monitor's published specifications. A gap of 10 to 15 percent is common. A gap of 30 percent or more suggests either a unit variance problem or inflated manufacturer claims.
What to Look For: The Visual Signs of Real HDR vs. Fake HDR
Peak Brightness
Can you actually see the difference in highlights? Real HDR brightness should feel intense. Specular reflections on metal, direct sunlight, and light sources should draw your eye the way they do in real life.
If HDR highlights look only marginally brighter than SDR, the monitor likely can't sustain enough luminance to create the perceptual impact HDR demands.
Black Levels
Are blacks deep or crushed? Good HDR maintains shadow detail while keeping blacks genuinely dark. On a monitor with local dimming, dark scenes should show inky blacks with visible detail in the shadows around them.
On edge-lit panels without local dimming, blacks often appear grayish in HDR mode because the backlight is fully active. That's a hardware limitation, not a calibration problem.
Color Volume
Do colors look richer or just oversaturated? HDR's wider color gamut should add depth and variety to colors, not make everything look neon. Skin tones are the most reliable reference.
They should look natural with more visible variation between lit and shadowed areas. Oversaturated reds and greens that look cartoonish indicate poor tone mapping or gamut management.
Tone Mapping
Are bright scenes balanced or blown out? Tone mapping is the process of fitting HDR content's luminance range into the monitor's actual capability. Good tone mapping preserves detail in both highlights and shadows simultaneously.
Poor tone mapping clips highlights to pure white or crushes shadows to black. This is where many budget HDR monitors fail most visibly.
Local Dimming
Helpful or distracting? Full-array local dimming with enough zones can dramatically improve HDR contrast. But aggressive dimming algorithms create blooming, where bright objects on dark backgrounds show visible halos.
Test with white text on a black background and a small white cursor moving across a dark scene. Noticeable blooming or zone transition artifacts mean the dimming algorithm needs tuning or the zone count is too low for the panel size.
Common Problems and How to Fix Them
Everything Looks Washed Out With HDR On
This is the single most common complaint. The fix depends on the cause. If the desktop looks washed out but HDR content looks correct, adjust the SDR content brightness slider in Windows HDR settings.
If everything looks washed out including HDR content, check that the monitor is actually in HDR mode via its OSD and that the GPU is outputting a 10-bit signal. Also verify the monitor's EOTF setting. Some monitors offer multiple HDR modes like "HDR Movie," "HDR Game," or "HDR Vivid." Try each one.
They use different tone mapping curves.
HDR Works in Games But Not in Video Playback
This usually points to a browser or player configuration issue. Most web browsers require specific flags or settings to pass HDR to the display. Chrome on Windows supports HDR video but requires the operating system HDR toggle to be active.
Edge has better native HDR support. For local video playback, use a player that supports HDR passthrough. MPC-HC with madVR and VLC with proper output settings both work.
Verify the video file actually contains HDR metadata. Not every 4K video is HDR.
Your Monitor Switches to HDR and Locks Your Settings
Many monitors lock brightness, color temperature, and gamma presets when HDR mode is active. This is by design on most panels. HDR content is mastered to specific luminance targets, so user adjustment would break the intended rendering.
If the monitor locks settings you need access to, check for a firmware update. Some manufacturers have added more flexibility to HDR mode through updates.
No Visible Difference Between HDR On and Off
If you can't see a difference, the monitor's HDR implementation likely isn't delivering meaningful performance. DisplayHDR 400 monitors without local dimming often fall into this category. The panel accepts an HDR signal but can't produce the contrast or brightness range that makes HDR perceptually distinct.
In that case, leave HDR off. A good SDR image on a capable panel looks better than a mediocre HDR image on a monitor that can't back up the signal.
HDR Testing Tools Worth Using
Free Built-In Tools
The Windows HDR Calibration app is the single most useful free tool available. It creates a custom color profile that improves HDR rendering on your specific display. Download it from the Microsoft Store.
Run it every time you change monitors or update GPU drivers. The app's three-step process adjusts black level, peak brightness, and color saturation. It takes about two minutes.
Third-Party Test Patterns and Software
The HDR Pattern Suite and AVS HD 709 provide downloadable test patterns for evaluating HDR performance. DisplayCAL offers free, open-source measurement and profiling software with HDR evaluation capabilities. For a quick web-based check, the HDR test pages on the Lagom LCD monitor test site provide useful patterns for assessing black level, white saturation, and gradient handling.
Colorimeters and Spectrophotometers for Objective Measurement
For those who want hard data, a colorimeter is the practical tool. The Calibrite Display Plus HL handles sustained brightness measurements up to 2,000 nits. The X-Rite i1Display Pro and i1Display Pro Plus cover similar ranges.
Spectrophotometers like the X-Rite i1Pro 2 offer higher accuracy but slower measurement speeds. Pair either instrument with Calman, Calibrite Profiler, or DisplayCAL software to generate performance reports.
SDR vs. HDR on Your Monitor: When to Use Each
Leave HDR On All the Time, or Toggle It Contextually?
This depends on your monitor and your tolerance for desktop-level SDR rendering compromises. On monitors with good HDR implementations and competent SDR-in-HDR tone mapping, leaving HDR active works well. On most monitors, SDR content looks slightly off when the system is in HDR mode.
Colors may shift, brightness may feel inconsistent, and text rendering can appear softer.
The practical approach for most users is to toggle HDR on when consuming HDR content and off for everything else. Windows 11 makes this easier with the Auto HDR feature for games, but manual toggling remains the most reliable method for consistent results.
The Windows Desktop HDR Problem
Windows has historically handled the desktop composition layer poorly in HDR mode. The desktop itself is SDR content mapped into an HDR signal space. How well that mapping works depends on the SDR content brightness slider and the monitor's tone mapping engine.
Windows 11 improved this significantly compared to Windows 10, but it's still not perfect. Expect some compromise in desktop appearance when HDR is active.
Auto HDR on Windows 11
Windows 11's Auto HDR feature takes SDR game rendering and expands it into an HDR-like signal. The results vary dramatically by title. Some games look noticeably better with more visible detail in highlights and shadows.
Others look worse with shifted colors and blown-out whites. Test it per game. The feature is toggleable on a per-display basis in the Windows HDR settings panel.
It works best on monitors with decent HDR hardware behind it. On a DisplayHDR 400 panel, Auto HDR often adds little value.
Common Mistakes People Make When Testing HDR
Testing HDR without controlling ambient lighting. Room brightness dramatically affects perceived contrast. A monitor that looks impressive in a dark room may look flat under bright overhead lights.
Test in the environment where you actually use the display.
Judging HDR by a single content type. A monitor might handle HDR gaming well but struggle with HDR video due to different metadata formats. Test across multiple content types before drawing conclusions.
Comparing HDR to SDR with different brightness settings. If the SDR image is set to maximum brightness and the HDR image is at default, the comparison isn't fair. Match brightness levels or at least acknowledge the variable.
Ignoring the monitor's HDR mode selection. Many monitors offer multiple HDR presets with different tone mapping behaviors. Testing only one preset gives an incomplete picture.
Cycle through all available HDR modes and note which produces the most accurate and pleasing result.
Expecting OLED-level performance from a mid-range LCD. HDR performance varies enormously across panel technologies. A $400 Mini-LED monitor and a $1,200 OLED will both claim HDR support, but the experience differs fundamentally.
Set expectations based on the actual hardware.
Frequently Asked Questions
Can I test HDR without a colorimeter?
Yes. The Windows HDR Calibration app, free test pattern suites, and known HDR content provide enough information to evaluate whether your monitor's HDR is functional and reasonably accurate. A colorimeter adds precision but isn't required for a basic assessment.
Why does my monitor look worse with HDR enabled?
Most likely the monitor's HDR hardware can't deliver the performance the signal demands. Budget HDR monitors often accept the signal but lack the peak brightness, contrast, or color volume to render it convincingly. In that case, SDR will look better.
Does HDR work through all monitor inputs?
Not necessarily. Some monitors only support HDR over specific ports. HDMI 2.1 might carry HDR while HDMI 2.0 on the same monitor does not.
DisplayPort and USB-C alt mode may have different HDR capabilities. Check your monitor's manual for per-port HDR support.
How do I know if my HDR is working correctly?
Use the Windows HDR Calibration app as a baseline check. Then evaluate with known HDR content. Look for visible highlight detail, deep blacks with shadow retention, and natural color saturation.
If those elements are present and distinct from SDR, your HDR is functioning properly.
Should I use the monitor's HDR mode or the game's HDR setting?
Use both. Enable HDR in the monitor OSD and the operating system first. Then use the in-game HDR calibration to match the game's tone mapping to your monitor's specific capabilities.
The in-game settings control how the content is mastered to your display. The system settings control the signal delivery.
HDR Testing Tools Worth Using
Free Built-In Tools
The Windows HDR Calibration app is the single most useful free tool available. It creates a custom color profile that improves HDR rendering on your specific display. Download it from the Microsoft Store.
Run it every time you change monitors or update GPU drivers. The app's three-step process adjusts black level, peak brightness, and color saturation. It takes about two minutes.
Third-Party Test Patterns and Software
The HDR Pattern Suite and AVS HD 709 provide downloadable test patterns for evaluating HDR performance. DisplayCAL offers free, open-source measurement and profiling software with HDR evaluation capabilities. For a quick web-based check, the HDR test pages on the Lagom LCD monitor test site provide useful patterns for assessing black level, white saturation, and gradient handling.
Colorimeters and Spectrophotometers for Objective Measurement
For those who want hard data, a colorimeter is the practical tool. The Calibrite Display Plus HL handles sustained brightness measurements up to 2,000 nits. The X-Rite i1Display Pro and i1Display Pro Plus cover similar ranges.
Spectrophotometers like the X-Rite i1Pro 2 offer higher accuracy but slower measurement speeds. Pair either instrument with Calman, Calibrite Profiler, or DisplayCAL software to generate performance reports.
SDR vs. HDR on Your Monitor: When to Use Each
Leave HDR On All the Time, or Toggle It Contextually?
This depends on your monitor and your tolerance for desktop-level SDR rendering compromises. On monitors with good HDR implementations and competent SDR-in-HDR tone mapping, leaving HDR active works well. On most monitors, SDR content looks slightly off when the system is in HDR mode.
Colors may shift, brightness may feel inconsistent, and text rendering can appear softer.
The practical approach for most users is to toggle HDR on when consuming HDR content and off for everything else. Windows 11 makes this easier with the Auto HDR feature for games, but manual toggling remains the most reliable method for consistent results.
The Windows Desktop HDR Problem
Windows has historically handled the desktop composition layer poorly in HDR mode. The desktop itself is SDR content mapped into an HDR signal space. How well that mapping works depends on the SDR content brightness slider and the monitor's tone mapping engine.
Windows 11 improved this significantly compared to Windows 10, but it's still not perfect. Expect some compromise in desktop appearance when HDR is active.
Auto HDR on Windows 11
Windows 11's Auto HDR feature takes SDR game rendering and expands it into an HDR-like signal. The results vary dramatically by title. Some games look noticeably better with more visible detail in highlights and shadows.
Others look worse with shifted colors and blown-out whites. Test it per game. The feature is toggleable on a per-display basis in the Windows HDR settings panel.
It works best on monitors with decent HDR hardware behind it. On a DisplayHDR 400 panel, Auto HDR often adds little value.
Common Mistakes People Make When Testing HDR
Testing HDR without controlling ambient lighting. Room brightness dramatically affects perceived contrast. A monitor that looks impressive in a dark room may look flat under bright overhead lights.
Test in the environment where you actually use the display.
Judging HDR by a single content type. A monitor might handle HDR gaming well but struggle with HDR video due to different metadata formats. Test across multiple content types before drawing conclusions.
Comparing HDR to SDR with different brightness settings. If the SDR image is set to maximum brightness and the HDR image is at default, the comparison isn't fair. Match brightness levels or at least acknowledge the variable.
Ignoring the monitor's HDR mode selection. Many monitors offer multiple HDR presets with different tone mapping behaviors. Testing only one preset gives an incomplete picture.
Cycle through all available HDR modes and note which produces the most accurate and pleasing result.
Expecting OLED-level performance from a mid-range LCD. HDR performance varies enormously across panel technologies. A $400 Mini-LED monitor and a $1,200 OLED will both claim HDR support, but the experience differs fundamentally.
Set expectations based on the actual hardware.
Frequently Asked Questions
Can I test HDR without a colorimeter?
Yes. The Windows HDR Calibration app, free test pattern suites, and known HDR content provide enough information to evaluate whether your monitor's HDR is functional and reasonably accurate. A colorimeter adds precision but isn't required for a basic assessment.
Why does my monitor look worse with HDR enabled?
Most likely the monitor's HDR hardware can't deliver the performance the signal demands. Budget HDR monitors often accept the signal but lack the peak brightness, contrast, or color volume to render it convincingly. In that case, SDR will look better.
Does HDR work through all monitor inputs?
Not necessarily. Some monitors only support HDR over specific ports. HDMI 2.1 might carry HDR while HDMI 2.0 on the same monitor does not.
DisplayPort and USB-C alt mode may have different HDR capabilities. Check your monitor's manual for per-port HDR support.
How do I know if my HDR is working correctly?
Use the Windows HDR Calibration app as a baseline check. Then evaluate with known HDR content. Look for visible highlight detail, deep blacks with shadow retention, and natural color saturation.
If those elements are present and distinct from SDR, your HDR is functioning properly.
Should I use the monitor's HDR mode or the game's HDR setting?
Use both. Enable HDR in the monitor OSD and the operating system first. Then use the in-game HDR calibration to match the game's tone mapping to your monitor's specific capabilities.
The in-game settings control how the content is mastered to your display. The system settings control the signal delivery.
Final Verdict: Is Your Monitor's HDR Actually Worth Using?
After running through the full testing workflow, you'll know exactly where your monitor stands. The answer isn't always what the spec sheet promises.
If your monitor hits DisplayHDR 1000 or higher with full-array local dimming and native 10-bit color, HDR likely looks meaningfully better than SDR in tested content. You're getting genuine performance. Leave HDR on for supported content and enjoy it.
If your monitor is DisplayHDR 400 or 600 without local dimming, the honest assessment is that HDR probably doesn't deliver enough visual improvement to justify the desktop compromises. Toggle it on for specific HDR content when you want to, but don't feel bad about running SDR as your daily driver. That's a perfectly reasonable setup.
The middle ground, DisplayHDR 600 to 1000 with some local dimming, is where context matters most. Test with your actual content. If HDR gaming and video look noticeably better and the desktop trade-offs don't bother you, keep it active.
If not, use it selectively.
The only wrong answer is never testing at all and assuming the marketing specs reflect reality. Now you've got a structured process to find out for yourself, with the right tools and the right expectations for your hardware tier.

Similar Posts