How to Setup Dual Monitors on Windows 11
Figuring out how to setup dual monitors on Windows 11 should take about ten minutes, but it turns into an hour of head-scratching the moment something doesn't work as expected. Maybe your second screen stays black. Maybe Windows sees both monitors but they're arranged all wrong.
Or maybe you're not even sure what cable to use in the first place.
The good news is that the process is straightforward once you know what you're working with. We'll walk through the physical connection, the Windows settings, the troubleshooting steps for when things go sideways, and how to dial everything in so it actually feels right on your desk.
Quick Answer
Connect your second monitor to your PC using HDMI, DisplayPort, or USB-C. Turn on the monitor and select the correct input source. Open Settings > System > Display on Windows 11.
Click "Detect" if the monitor doesn't appear automatically. Arrange the displays, choose Extend or Duplicate, and set resolution and refresh rate per monitor.
Why Your Second Monitor Might Not Be Working (And How to Fix It)
Most dual monitor issues come down to one of four things. The cable, the port, the driver, or a Windows setting that needs a nudge. Before we get into the full setup process, let's clear the air on the most common headaches.
Here's what we see most often:
- No signal on the second monitor. Usually a cable issue or the wrong input source selected on the monitor itself. Monitors don't always auto-switch.
- Windows doesn't see the monitor at all. This points to a driver problem, a bad cable, or a port that doesn't carry video (not all USB-C ports do).
- The monitor shows up but at the wrong resolution. Often happens when Windows falls back to a generic driver or the cable can't handle the bandwidth.
- The mouse gets "lost" between screens. This is an arrangement issue in Display Settings. The virtual layout doesn't match your physical desk layout.
If you're already stuck on one of these, don't worry. We'll cover each scenario in the troubleshooting section below. For now, let's start with the hardware side of things.
What You Actually Need: Cables, Ports, and Hardware That Matter
Before you buy anything or dig through your cable drawer, take thirty seconds to check what you actually have. This one step saves most of the confusion.
Check Your PC's Output Ports
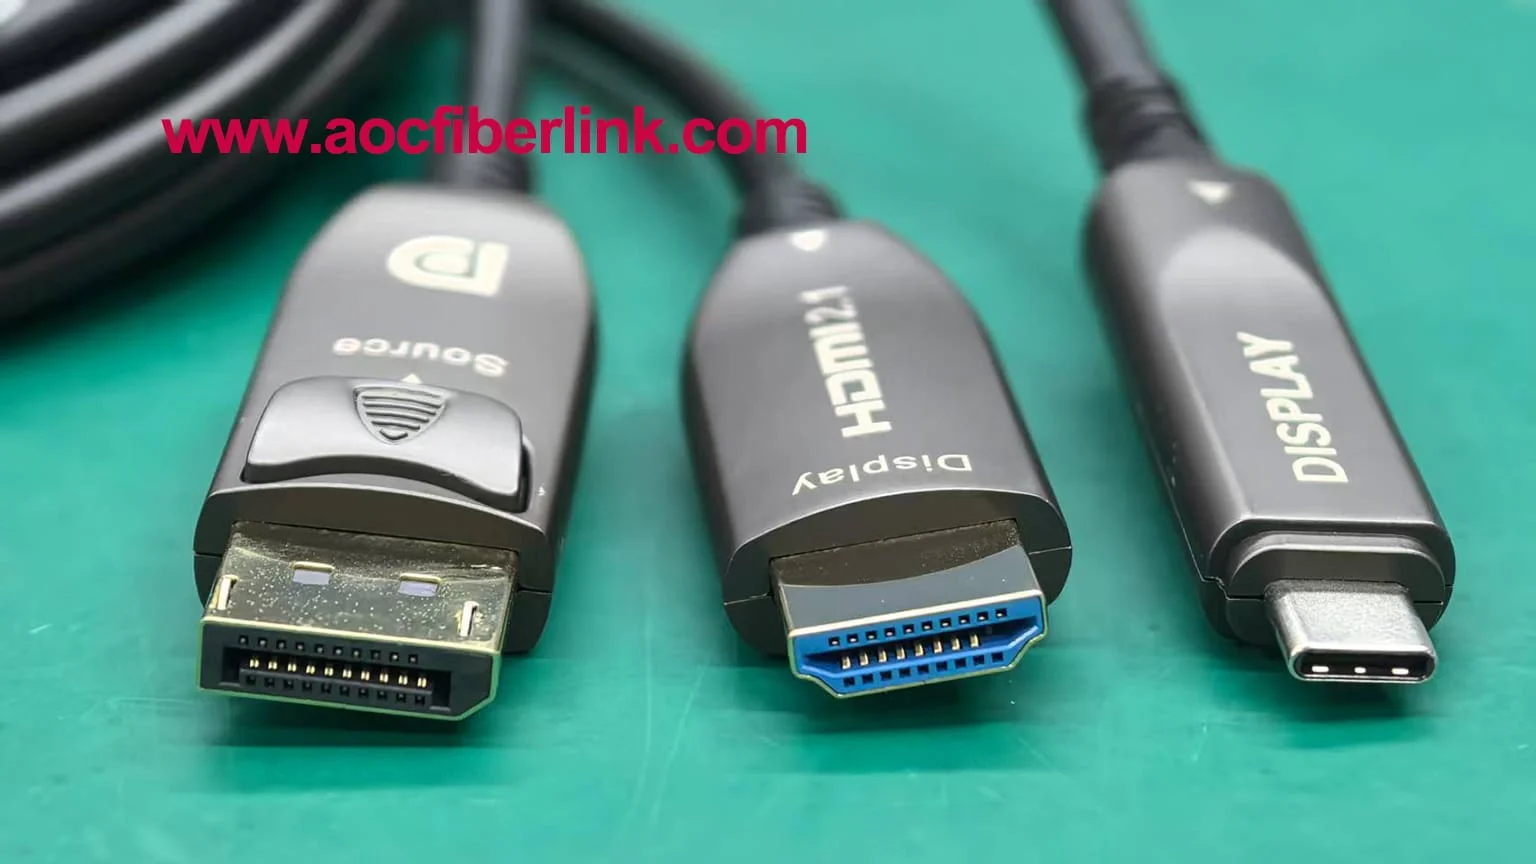
Look at the back of your desktop or the sides of your laptop. You're looking for one of these:
| Port Shape | What It's Called | Max Resolution (Typical) | Notes |
|---|---|---|---|
| Trapezoid, 19 pins | HDMI | 4K @ 60Hz (HDMI 2.0) | Most common. Found on nearly every laptop and desktop. |
| Rectangle with one corner cut, 20 pins | DisplayPort | 4K @ 120Hz (DP 1.4) | Preferred for high refresh rates. Common on desktop GPUs. |
| Small oval, symmetrical | USB-C (with DisplayPort Alt Mode) | 4K @ 60Hz or higher | Found on laptops. Not all USB-C ports support video. |
| Rectangular, flat with a notch | Thunderbolt 3/4 | 4K @ 60Hz+ | Uses USB-C connector. Supports video and docking stations. |
Check Your Monitor's Input Ports
Now look at the back of your monitor. Most modern monitors have at least HDMI and DisplayPort. Budget models might only have HDMI or even VGA (the old blue connector).
If your monitor and PC don't share a port type, you'll need an adapter or a different cable.
Which Cable Should You Use?
Here's the simple priority list:
- DisplayPort if both your PC and monitor have it. Best for high refresh rates and high resolution.
- HDMI if DisplayPort isn't available. Works great for 4K at 60Hz with a certified HDMI 2.0 or 2.1 cable.
- USB-C to HDMI or DisplayPort if your laptop only has USB-C. Make sure the port supports video output (look for a lightning bolt or "DP" symbol next to it).
- Docking station if you want a single-cable solution for a laptop. Plug the dock into your PC, then connect both monitors to the dock.
A Quick Note on Adapters and Dongles
If you're using a USB-C hub or a DisplayLink adapter, know that these work differently than a direct GPU connection. DisplayLink adapters use software to drive the display, which adds a small CPU overhead. They're fine for office work and browsing.
They're not ideal for gaming or color-critical work.
For most people, a direct cable connection from the GPU to the monitor is the way to go. Adapters are a fallback, not a first choice.

Image source: Wikimedia Commons / Emoryy (CC BY-SA)
Step-by-Step: Setting Up Your Dual Monitor Configuration
Here's where we put it all together. Follow these steps in order and you'll have both screens running in no time.
Connecting the Monitor Physically
- Turn off your PC. Not strictly necessary, but it prevents handshake issues with some monitors.
- Connect the cable to your PC's video output. Use the best available port per the table above.
- Connect the other end to your monitor.
- Power on the monitor first. Then power on your PC.
- Select the correct input source on the monitor. Use the monitor's on-screen display (OSD) menu or a physical button. If you're using HDMI, make sure it's set to HDMI, not DisplayPort or VGA.
Windows 11 will usually detect the second monitor within a few seconds of booting up. If it does, you'll see your desktop extended or duplicated on the new screen. If not, don't panic.
We'll fix that in the troubleshooting section.
Configuring Display Settings in Windows 11
Once both monitors are connected and powered on, it's time to configure them.
- Right-click on your desktop background.
- Select "Display settings" from the context menu.
- You'll see a diagram with two rectangles labeled "1" and "2." If one is grayed out or missing, click the "Detect" button.
- Click on each rectangle to select it, then adjust the settings below for that specific monitor.
Here are the key settings you'll want to configure:
- Display resolution. Set each monitor to its native resolution. For a 1080p monitor, that's 1920 x 1080. For 1440p, it's 2560 x 1440. For 4K, it's 3840 x 2160.
- Scale and layout. If text looks tiny on a high-resolution monitor, bump the scaling up. 125% or 150% is common on 4K displays.
- Refresh rate. Found under "Advanced display settings." Set it to the maximum your monitor supports. 60Hz is standard. 120Hz, 144Hz, or higher is common on gaming monitors.
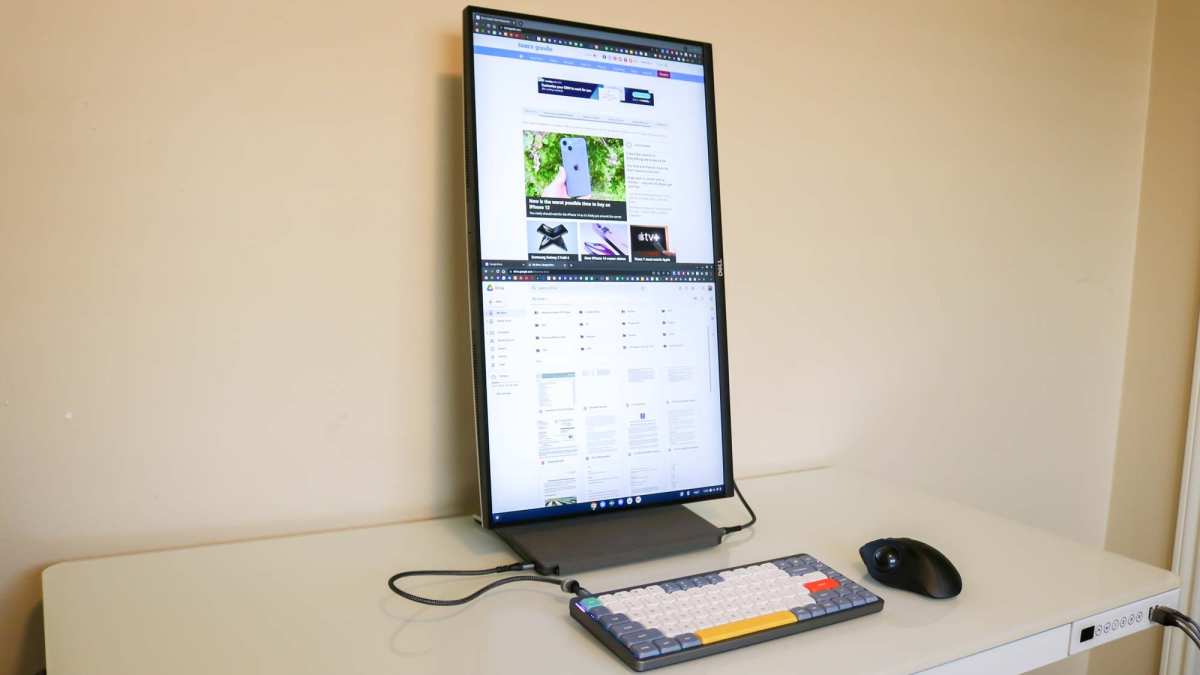
- Orientation. Landscape is default. Portrait is useful for reading long documents or coding.
Setting the Right Display Mode with Windows + P
There's a faster way to switch between display modes without digging into settings.
Press Windows key + P on your keyboard. A sidebar will appear on the right with four options:
- PC screen only. Only your primary monitor is active.
- Duplicate. Both monitors show the same thing. Useful for presentations.
- Extend. Your desktop spans both monitors. This is what most people want for productivity.
- Second screen only. Only the external monitor is active. Useful if you're using a laptop with the lid closed.
For a dual monitor productivity setup, choose Extend. This gives you independent screen space on each display.
Arranging Your Monitors to Match Your Desk
This is the step most people skip, and it's the reason your mouse feels "wrong" when moving between screens.
In Display Settings, you'll see two numbered rectangles. These represent your monitors, but they don't automatically know where each one sits on your desk. You need to drag them to match your physical layout.
If your second monitor is to the left of your primary, drag rectangle 2 to the left of rectangle 1. If it's above, drag it above. The edges that touch in the diagram are where your mouse will transition between screens.
This matters more than you'd think. Get it wrong and your mouse will hit an invisible wall when you try to move it in a direction that should work. Get it right and moving between screens feels completely natural.
You can also set which monitor is your main display. This is where your taskbar icons appear and where new apps will open by default. Check the box labeled "Make this my main display" on the monitor you want as your primary.
Image source: Bing (Web (fair-use with source credit))
When Windows Won't Detect the Second Monitor
This is where most people get stuck. You've plugged everything in, the monitor is on, but Windows acts like nothing is there. Let's work through this systematically.
Check the Obvious Stuff First
Before we go deep, rule out the simple stuff:
- Is the monitor powered on? Check for a power LED.
- Is the correct input selected on the monitor? Cycle through inputs using the monitor's buttons.
- Is the cable fully seated? Push both ends in firmly. HDMI cables especially can feel connected when they're not.
- Try a different cable. Cables fail more often than people think.
- Try a different port on your PC if one is available.
Force-Detect the Display
If the basics check out, go to Settings > System > Display and click the "Detect" button. This tells Windows to actively scan for connected displays. Sometimes a monitor just needs this nudge.
Update or Reinstall Your Graphics Driver
An outdated or corrupted graphics driver is one of the most common reasons a second monitor won't be recognized.
Here's how to fix it:
- Open Device Manager. Right-click the Start button and select it from the menu.
- Expand "Display adapters."
- Right-click your GPU (NVIDIA, AMD, Intel, or a combination).
- Select "Update driver" and choose "Search automatically for drivers."
- If that doesn't help, go to your GPU manufacturer's website and download the latest driver directly: , NVIDIA: nvidia.com/drivers
, AMD: amd.com/en/support
, Intel: intel.com/content/www/us/en/download-center
After installing a new driver, restart your PC. This resolves detection issues more often than you'd expect.
Troubleshoot Cable and Port Issues
If you're using a USB-C connection, confirm that your port actually supports video output. Many USB-C ports on laptops are data-only. Look for a DisplayPort symbol or a lightning bolt icon next to the port.
Check your laptop manufacturer's specifications if you're unsure.
If you're using a docking station or USB hub, try connecting the monitor directly to your PC first. This isolates whether the problem is the dock or the monitor itself.
For DisplayLink adapters, make you've installed the DisplayLink software from the manufacturer's website. These adapters won't work without their driver.
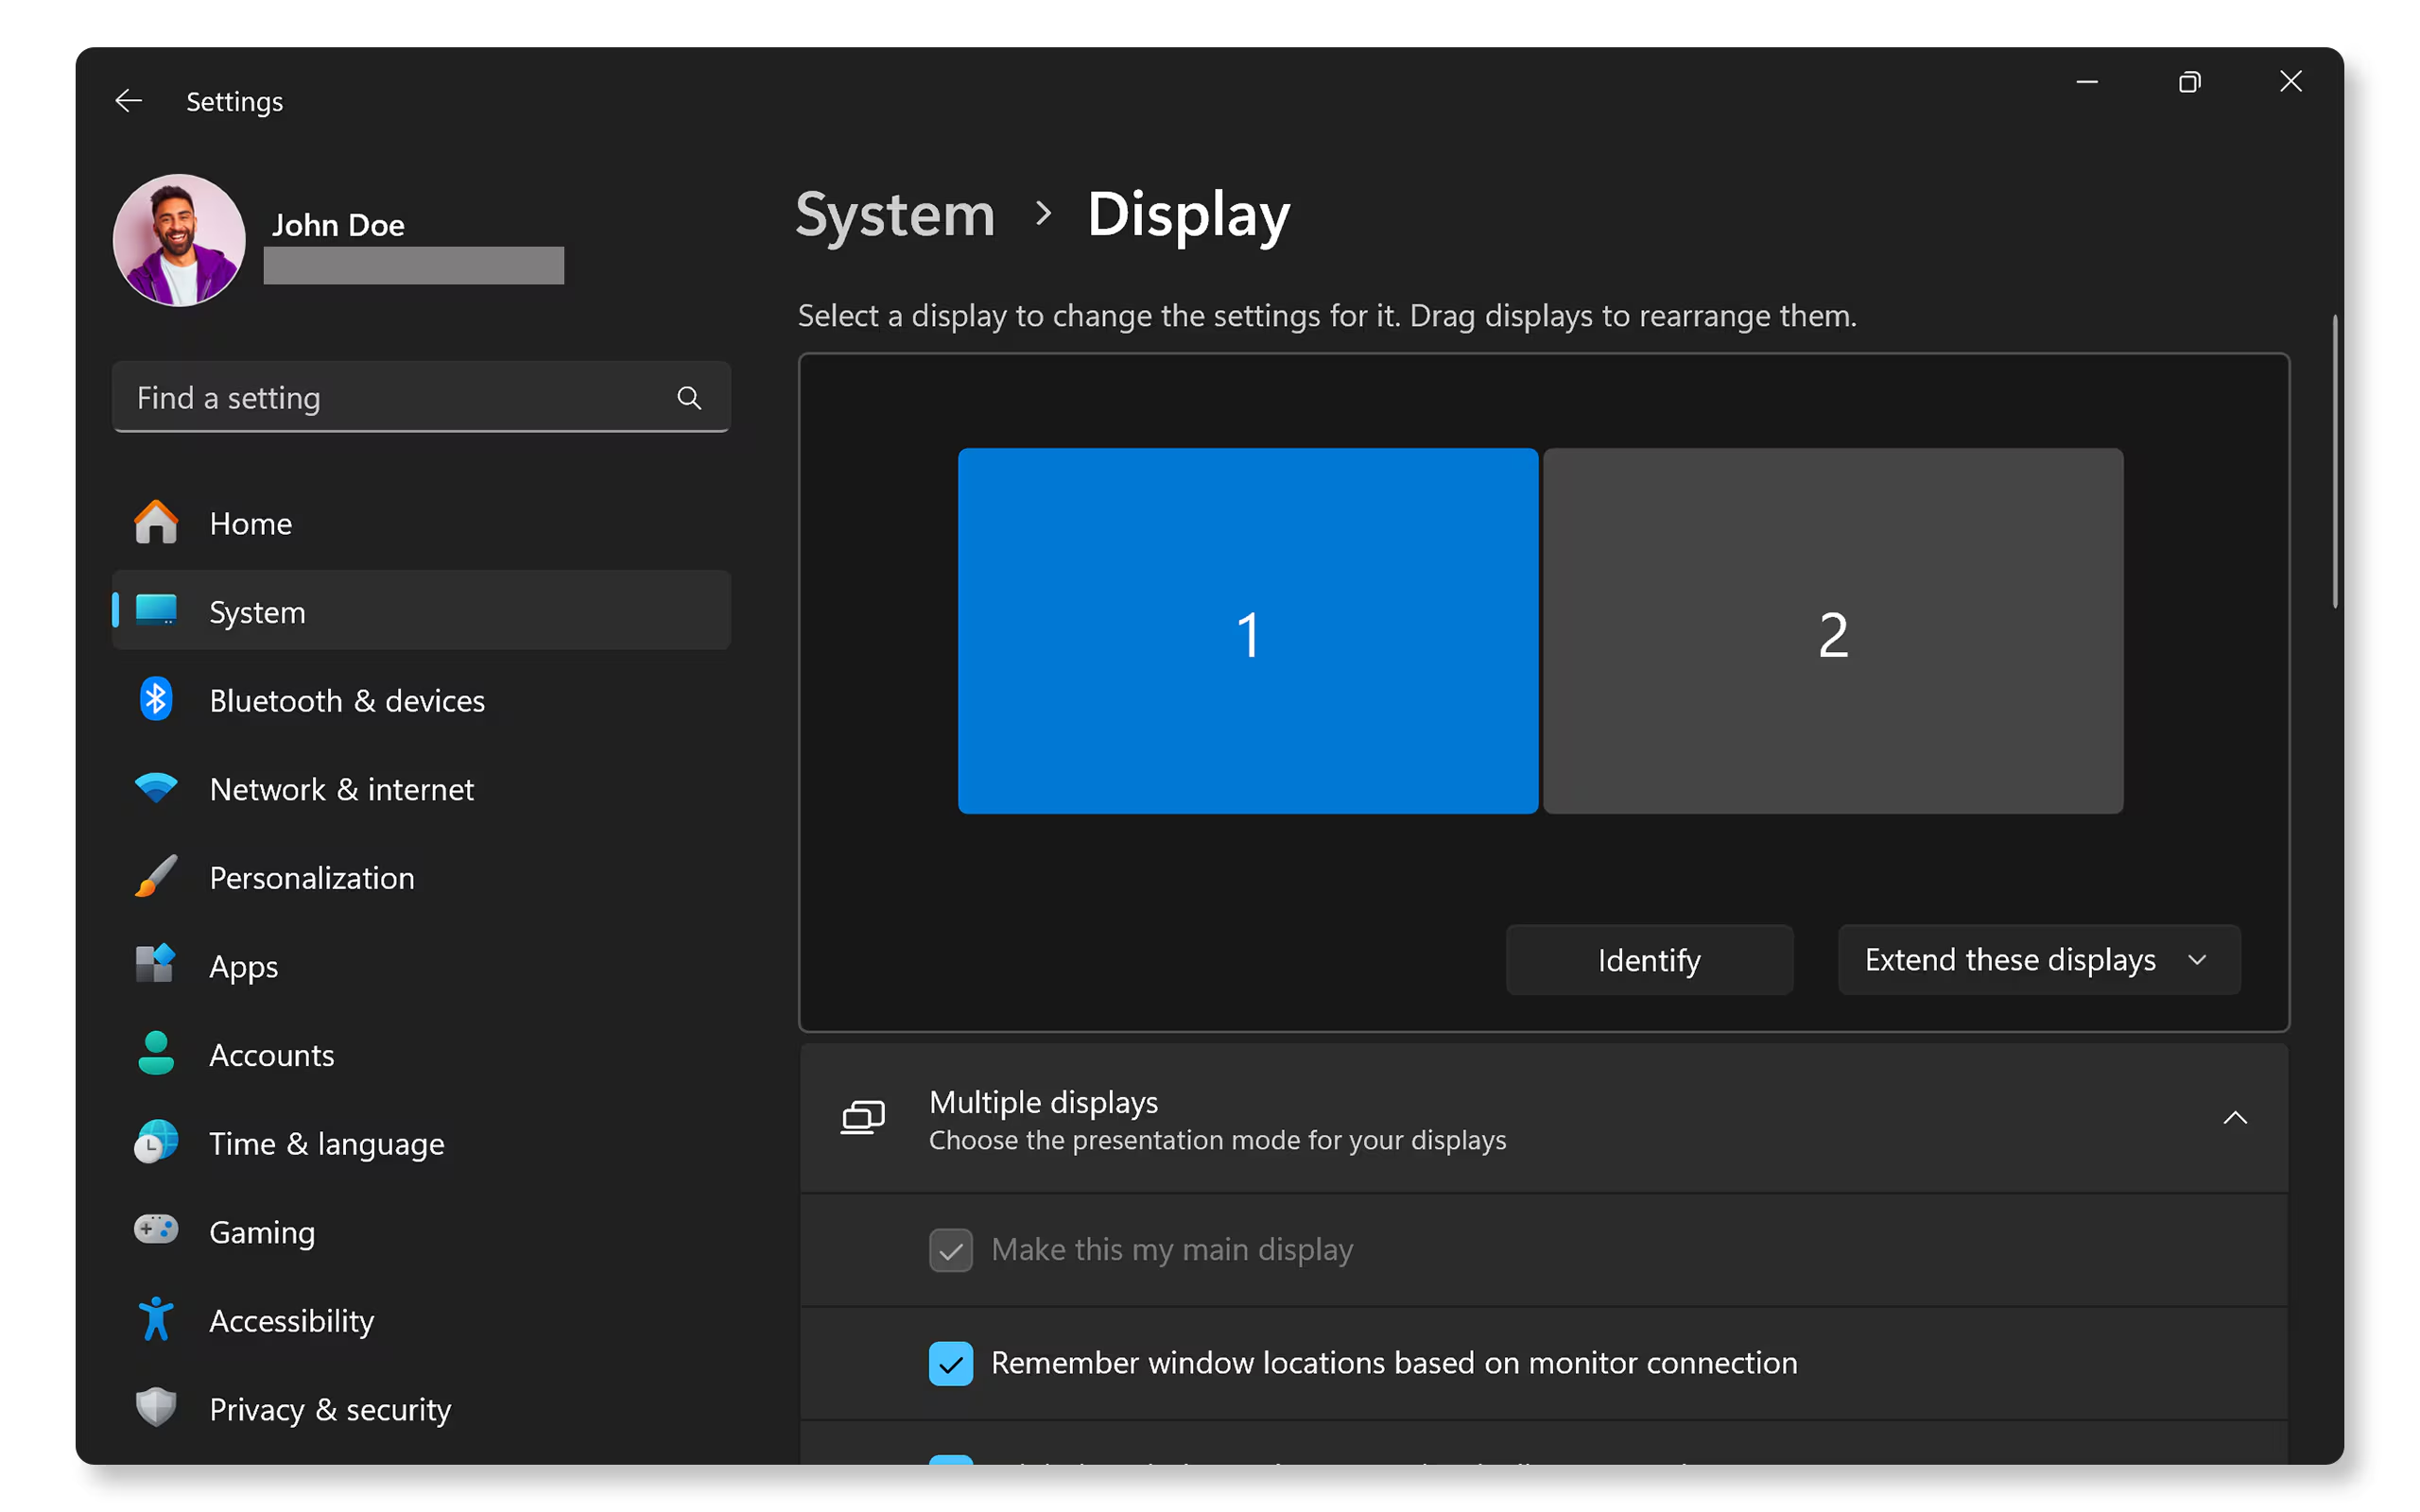
Image source: Bing (Web (fair-use with source credit))
Making It Feel Right: Resolution, Scaling, and Refresh Rate Per Monitor
Getting both monitors to show an image is step one. Making them look good is where the real setup work happens.
Resolution: Always Use Native
Every LCD monitor has a native resolution. That's the resolution where every pixel the GPU outputs maps exactly to one physical pixel on the screen. Use anything else and the image looks blurry because the monitor has to interpolate.
Set each monitor to its native resolution in Display Settings. If you're not sure what it is, check the monitor's manual or look up the model number. Common native resolutions:
- 24-inch budget monitors: 1920 x 1080 (Full HD)
- 27-inch productivity monitors: 2560 x 1440 (QHD)
- 27-32 inch premium monitors: 3840 x 2160 (4K UHD)
Scaling: Fixing Tiny Text on High-Res Screens
If you're running a 4K monitor at 27 inches, everything will look razor-sharp but impossibly small at 100% scaling. Bump it up to 150% and Windows will render UI elements larger while keeping text crisp.
Here's the catch. If you're running two monitors with different resolutions and scaling levels, things can get weird. A 1080p monitor at 100% scaling next to a 4K monitor at 150% scaling will have windows that look comically large or small when you drag them between screens.
Windows 11 handles this better than older versions, but it's still not perfect. The best experience comes from running two monitors with similar pixel density. Either both at the same resolution and size, or both at similar PPI (pixels per inch).
Refresh Rate: Don't Leave Performance on the Table
Many monitors support refresh rates higher than 60Hz, but Windows sometimes defaults to 60Hz even when the monitor can do 120Hz, 144Hz, or more.
To check and change this:
- Go to Settings > System > Display.
- Click on the monitor you want to adjust.
- Click "Advanced display settings" at the bottom.
- Look for "Refresh rate" and select the highest available value.
This makes everything on screen feel smoother. Mouse movement, scrolling, window dragging. It's one of those things you don't notice until you see it, and then you can't go back.
Matching Your Setup to Your Work: Best Configurations by Use Case
Not every dual monitor setup should look the same. Here's how to think about it based on what you actually do.
For Office and Productivity Work
Setup: Two monitors in landscape mode. One primary, one extended to the side.
Settings: Extend mode. 100-125% scaling. 60Hz is fine.
Why it works: Email and calendar on one screen. Documents, spreadsheets, or browsers on the other. You stop alt-tabbing constantly and your workflow gets noticeably faster.
For Developers and Coders
Setup: Primary monitor in landscape for your IDE. Secondary monitor in portrait for documentation, terminal output, or logs.
Settings: Extend mode. Portrait monitor set to 90-degree rotation in Display Settings.
Why it works: Portrait orientation shows more lines of code or more of a webpage at once. Less scrolling means less context-switching in your head.
For Creative Work (Photo, Video, Design)
Setup: High-resolution monitors with good color accuracy. Ideally both are the same model for consistent color.
Settings: Extend mode. Color-calibrate each monitor using Windows Color Management or a hardware calibrator. Match brightness and color temperature between displays.
Why it works: Timeline on one screen, preview on the other. Or tools and panels on one screen, canvas on the other. Consistent color between monitors means what you see is what you get.
For Laptop Users Who Want a Desktop Experience
Setup: Laptop screen as secondary. External monitor as primary. Laptop on a stand or docked.
Settings: "Second screen only" mode if you want to close the laptop and use only the external monitor. Or Extend if you want both.
Pro tip: If you close the laptop lid and the external monitor goes black, check your power settings. Go to Control Panel > Power Options > Choose what closing the lid does and set it to "Do nothing" when plugged in.
Common Mistakes That Waste Your Time
After covering hundreds of support threads and user reports, these are the mistakes we see over and over:
- Using the wrong USB-C cable. Not all USB-C cables support video. Some are charging-only. Check the cable specs or use the one that came with your device.
- Plugging the monitor into the motherboard instead of the GPU. If your desktop has a dedicated graphics card, the video ports on the motherboard are often disabled. Always plug your monitor into the GPU's ports (the lower set of ports on the back of a desktop).
- Forgetting to select the right input on the monitor. The monitor doesn't always auto-detect. Manually switch to HDMI, DisplayPort, or USB-C in the monitor's menu.
- Running mismatched resolutions without adjusting scaling. A 4K and 1080p monitor side by side will have wildly different UI sizes. Adjust scaling per monitor to compensate.
- Ignoring the refresh rate. Your 144Hz gaming monitor is running at 60Hz until you manually change it in Advanced Display Settings.
- Not updating GPU drivers. Windows Update doesn't always give you the latest graphics driver. Get it from the manufacturer.
Pro Tips Most Guides Don't Mention
These are the small things that make a dual monitor setup go from "working" to "this is great."
- Use different wallpapers per monitor. Right-click an image in File Explorer and choose "Set as desktop background" for a specific monitor. Helps you visually distinguish screens.
- Snap layouts work per monitor. Hover over the maximize button on any window and Windows 11 will show you snap options for that specific screen. Great for organizing two or three windows on one monitor.
- Taskbar on both monitors. Go to Settings > Personalization > Taskbar > Taskbar behaviors and enable "When using multiple displays, show my taskbars on all taskbars." You can choose whether buttons appear on the taskbar where the window is open or on all taskbars.
- Night light per monitor. You can set different night light schedules or intensities if one monitor is closer to your eyes or used more at night.
- GPU control panel for advanced settings. NVIDIA Control Panel and AMD Radeon Software offer multi-display options that Windows doesn't expose. Things like bezel correction, color adjustment per display, and Surround/Eyefinity for gaming across multiple screens.
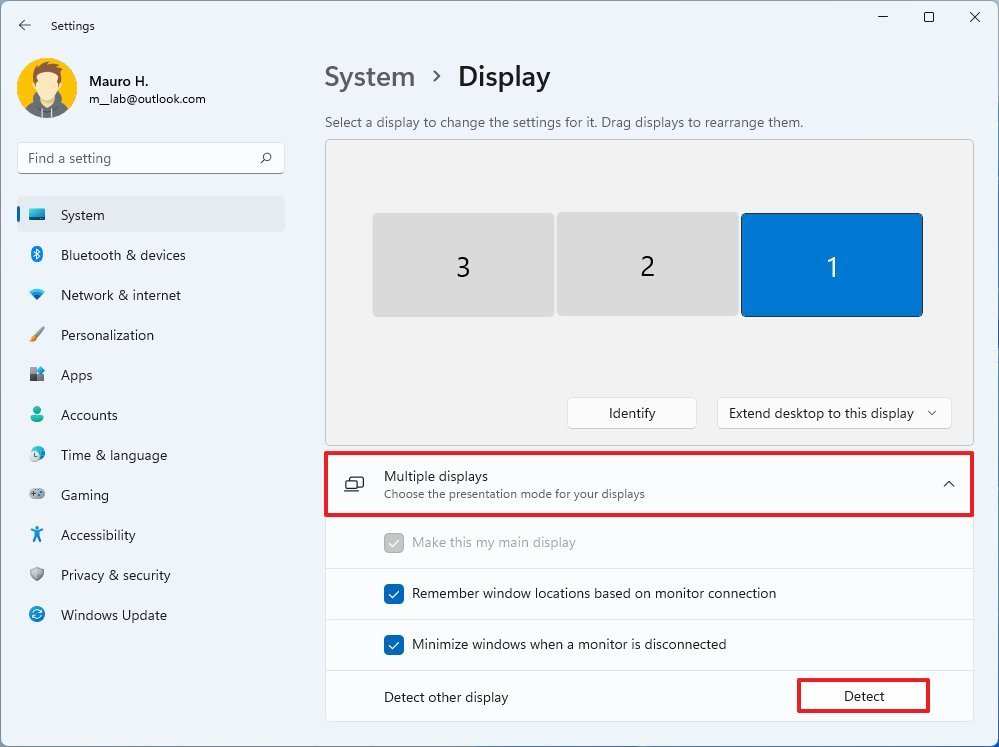
Image source: Bing (Web (fair-use with source credit))
Frequently Asked Questions
How long does it take to set up dual monitors on Windows 11?
The physical connection takes about two minutes. Configuring settings in Windows takes another five to ten minutes. If you run into detection issues, troubleshooting can add another fifteen to thirty minutes depending on the problem.
Can I use two monitors with different resolutions?
Yes. Windows 11 handles mixed resolutions well. Set each monitor to its native resolution independently and adjust scaling per monitor to make UI elements feel consistent across both screens.
Do I need a dedicated graphics card for dual monitors?
Not necessarily. Most modern integrated GPUs (Intel UHD, AMD Radeon Graphics) support at least two displays. Check your CPU and motherboard specifications.
A dedicated GPU gives you more output options and better performance for gaming or creative work.
Why is my second monitor stuck at 30Hz?
This usually means the cable or port can't handle the bandwidth for higher refresh rates at that resolution. Try a better cable (HDMI 2.0 or DisplayPort 1.2 minimum) or a different port. Also check Advanced Display Settings to confirm the refresh rate is set correctly.
Can I set up dual monitors on a laptop with only one video output?
Yes, through a USB docking station or a DisplayLink adapter. These use your CPU and USB bandwidth to drive additional displays. They work well for productivity but aren't suitable for gaming or video playback at high frame rates.
What's the difference between Duplicate and Extend mode?
Duplicate shows the same image on both monitors. Extend treats them as one continuous desktop, giving you more screen space. Duplicate is for presentations.
Extend is for productivity.
Making It Feel Right: Resolution, Scaling, and Refresh Rate Per Monitor
Getting both monitors to show an image is step one. Making them look good is where the real setup work happens.
Resolution: Always Use Native
Every LCD monitor has a native resolution. That's the resolution where every pixel the GPU outputs maps exactly to one physical pixel on the screen. Use anything else and the image looks blurry because the monitor has to interpolate.
Set each monitor to its native resolution in Display Settings. If you're not sure what it is, check the monitor's manual or look up the model number. Common native resolutions:
- 24-inch budget monitors: 1920 x 1080 (Full HD)
- 27-inch productivity monitors: 2560 x 1440 (QHD)
- 27-32 inch premium monitors: 3840 x 2160 (4K UHD)
Scaling: Fixing Tiny Text on High-Res Screens
If you're running a 4K monitor at 27 inches, everything will look razor-sharp but impossibly small at 100% scaling. Bump it up to 150% and Windows will render UI elements larger while keeping text crisp.
Here's the catch. If you're running two monitors with different resolutions and scaling levels, things can get weird. A 1080p monitor at 100% scaling next to a 4K monitor at 150% scaling will have windows that look comically large or small when you drag them between screens.
Windows 11 handles this better than older versions, but it's still not perfect. The best experience comes from running two monitors with similar pixel density. Either both at the same resolution and size, or both at similar PPI (pixels per inch).
Refresh Rate: Don't Leave Performance on the Table
Many monitors support refresh rates higher than 60Hz, but Windows sometimes defaults to 60Hz even when the monitor can do 120Hz, 144Hz, or more.
To check and change this:
- Go to Settings > System > Display.
- Click on the monitor you want to adjust.
- Click "Advanced display settings" at the bottom.
- Look for "Refresh rate" and select the highest available value.
This makes everything on screen feel smoother. Mouse movement, scrolling, window dragging. It's one of those things you don't notice until you see it, and then you can't go back.
Matching Your Setup to Your Work: Best Configurations by Use Case
Not every dual monitor setup should look the same. Here's how to think about it based on what you actually do.
For Office and Productivity Work
Setup: Two monitors in landscape mode. One primary, one extended to the side.
Settings: Extend mode. 100-125% scaling. 60Hz is fine.
Why it works: Email and calendar on one screen. Documents, spreadsheets, or browsers on the other. You stop alt-tabbing constantly and your workflow gets noticeably faster.
For Developers and Coders
Setup: Primary monitor in landscape for your IDE. Secondary monitor in portrait for documentation, terminal output, or logs.
Settings: Extend mode. Portrait monitor set to 90-degree rotation in Display Settings.
Why it works: Portrait orientation shows more lines of code or more of a webpage at once. Less scrolling means less context-switching in your head.
For Creative Work (Photo, Video, Design)
Setup: High-resolution monitors with good color accuracy. Ideally both are the same model for consistent color.
Settings: Extend mode. Color-calibrate each monitor using Windows Color Management or a hardware calibrator. Match brightness and color temperature between displays.
Why it works: Timeline on one screen, preview on the other. Or tools and panels on one screen, canvas on the other. Consistent color between monitors means what you see is what you get.
For Laptop Users Who Want a Desktop Experience
Setup: Laptop screen as secondary. External monitor as primary. Laptop on a stand or docked.
Settings: "Second screen only" mode if you want to close the laptop and use only the external monitor. Or Extend if you want both.
Pro tip: If you close the laptop lid and the external monitor goes black, check your power settings. Go to Control Panel > Power Options > Choose what closing the lid does and set it to "Do nothing" when plugged in.
Common Mistakes That Waste Your Time
After covering hundreds of support threads and user reports, these are the mistakes we see over and over:
- Using the wrong USB-C cable. Not all USB-C cables support video. Some are charging-only. Check the cable specs or use the one that came with your device.
- Plugging the monitor into the motherboard instead of the GPU. If your desktop has a dedicated graphics card, the video ports on the motherboard are often disabled. Always plug your monitor into the GPU's ports (the lower set of ports on the back of a desktop).
- Forgetting to select the right input on the monitor. The monitor doesn't always auto-detect. Manually switch to HDMI, DisplayPort, or USB-C in the monitor's menu.
- Running mismatched resolutions without adjusting scaling. A 4K and 1080p monitor side by side will have wildly different UI sizes. Adjust scaling per monitor to compensate.
- Ignoring the refresh rate. Your 144Hz gaming monitor is running at 60Hz until you manually change it in Advanced Display Settings.
- Not updating GPU drivers. Windows Update doesn't always give you the latest graphics driver. Get it from the manufacturer.
Pro Tips Most Guides Don't Mention
These are the small things that make a dual monitor setup go from "working" to "this is great."
- Use different wallpapers per monitor. Right-click an image in File Explorer and choose "Set as desktop background" for a specific monitor. Helps you visually distinguish screens.
- Snap layouts work per monitor. Hover over the maximize button on any window and Windows 11 will show you snap options for that specific screen. Great for organizing two or three windows on one monitor.
- Taskbar on both monitors. Go to Settings > Personalization > Taskbar > Taskbar behaviors and enable "When using multiple displays, show my taskbars on all taskbars." You can choose whether buttons appear on the taskbar where the window is open or on all taskbars.
- Night light per monitor. You can set different night light schedules or intensities if one monitor is closer to your eyes or used more at night.
- GPU control panel for advanced settings. NVIDIA Control Panel and AMD Radeon Software offer multi-display options that Windows doesn't expose. Things like bezel correction, color adjustment per display, and Surround/Eyefinity for gaming across multiple screens.
Frequently Asked Questions
How long does it take to set up dual monitors on Windows 11?
The physical connection takes about two minutes. Configuring settings in Windows takes another five to ten minutes. If you run into detection issues, troubleshooting can add another fifteen to thirty minutes depending on the problem.
Can I use two monitors with different resolutions?
Yes. Windows 11 handles mixed resolutions well. Set each monitor to its native resolution independently and adjust scaling per monitor to make UI elements feel consistent across both screens.
Do I need a dedicated graphics card for dual monitors?
Not necessarily. Most modern integrated GPUs (Intel UHD, AMD Radeon Graphics) support at least two displays. Check your CPU and motherboard specifications.
A dedicated GPU gives you more output options and better performance for gaming or creative work.
Why is my second monitor stuck at 30Hz?
This usually means the cable or port can't handle the bandwidth for higher refresh rates at that resolution. Try a better cable (HDMI 2.0 or DisplayPort 1.2 minimum) or a different port. Also check Advanced Display Settings to confirm the refresh rate is set correctly.
Can I set up dual monitors on a laptop with only one video output?
Yes, through a USB docking station or a DisplayLink adapter. These use your CPU and USB bandwidth to drive additional displays. They work well for productivity but aren't suitable for gaming or video playback at high frame rates.
What's the difference between Duplicate and Extend mode?
Duplicate shows the same image on both monitors. Extend treats them as one continuous desktop, giving you more screen space. Duplicate is for presentations.
Extend is for productivity.

Similar Posts