How to Organize Multiple Office Monitors
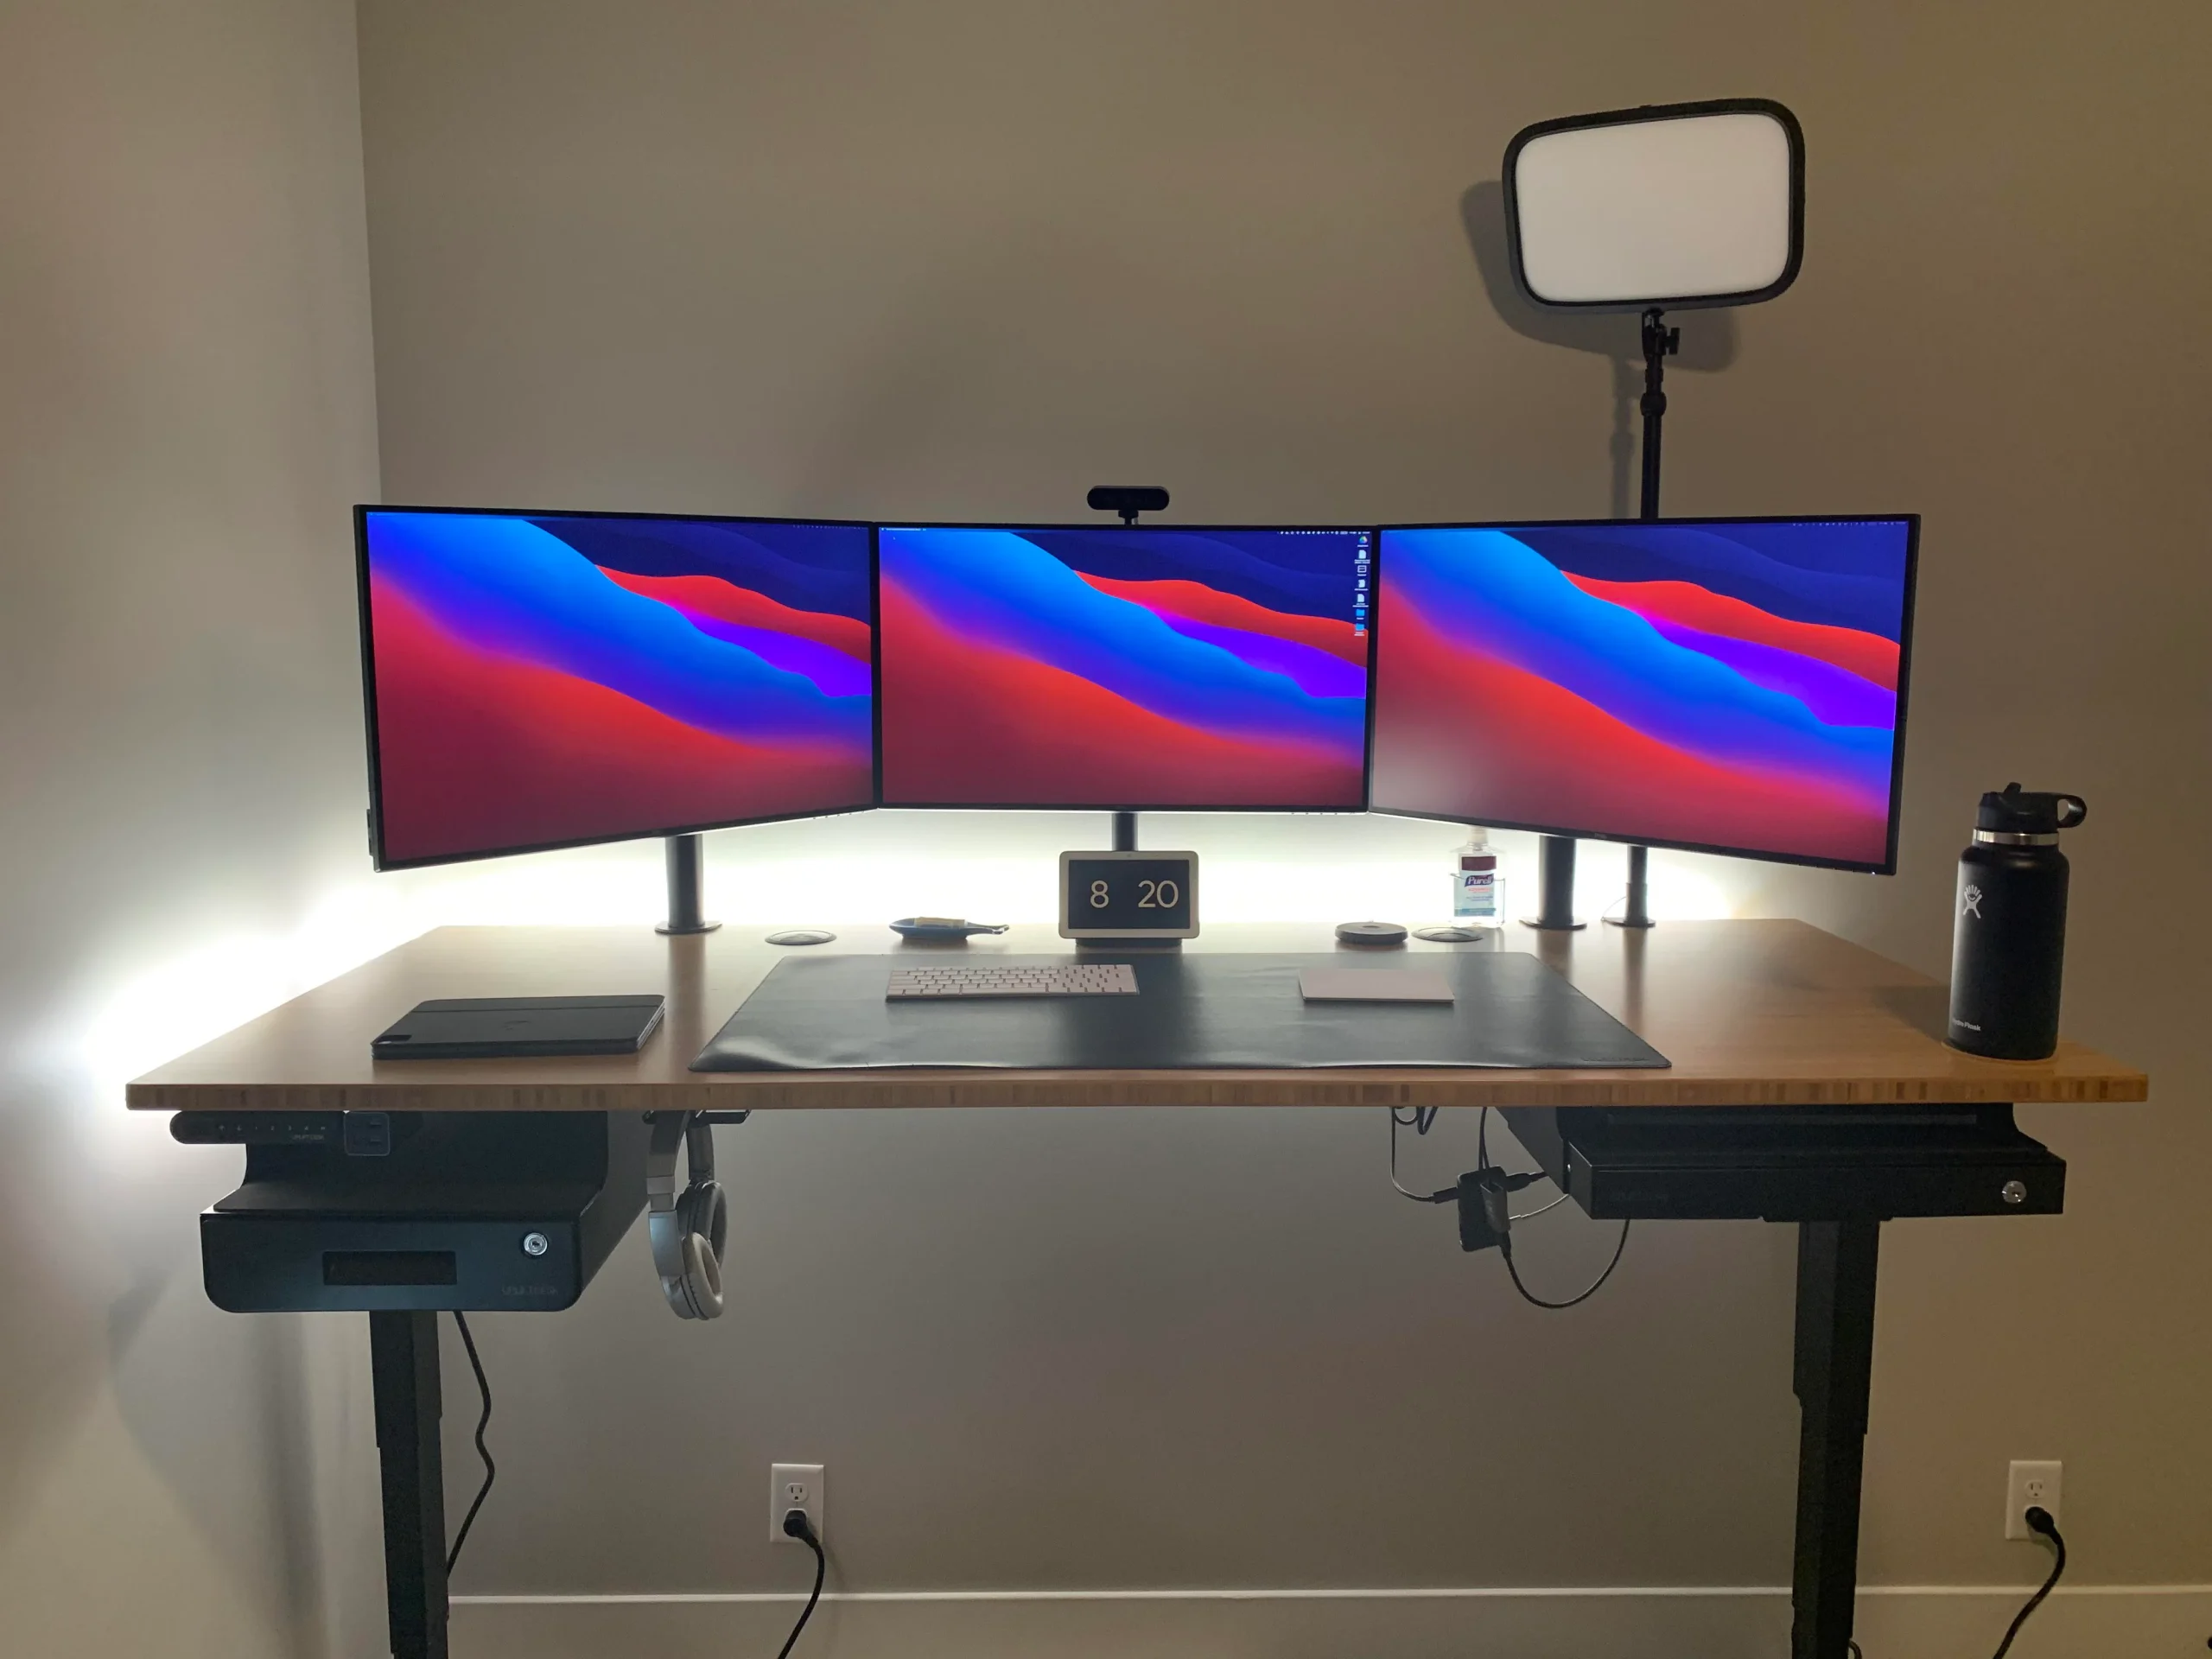
Figuring out how to organize multiple office monitors isn't just about plugging things in and hoping for the best. Most people end up with screens at weird angles, mismatched heights, and cables everywhere. Within a week they're wondering why their neck hurts and their productivity hasn't improved at all.
The fix is simpler than you'd think, but it's also more specific than most guides admit. Your ideal setup depends on your desk size, how many screens you're running, what you actually do all day, and whether those monitors are identical or a mix of different models. Research from the University of Utah found that dual monitors boosted productivity by 33% compared to single screens, but only when the layout was intentional.
Here's how to make yours work.
Quick Answer
Place your primary monitor directly in front of you at arm's length. Set the top of the screen at or just below eye level. Angle secondary monitors inward at 15-30 degrees.
Use monitor arms for flexibility and accurate height alignment. Match each display's position in your operating system to its physical arrangement.
Why Your Multi-Monitor Setup Feels Wrong (And How to Fix It)
Most bad multi-monitor setups share a few telltale symptoms. Your neck tilts up or down to see one of the screens. Your eyes strain because one monitor is significantly brighter.
The mouse "jumps" when you try to move the cursor between displays.
These problems aren't personal failings. They're layout problems with specific fixes.
The most common mistake is putting monitors flat in a straight row. That forces your head to rotate constantly and your neck to stay turned. Human necks aren't designed for that.
You wouldn't set up a driving position where you have to look sideways to see the speedometer.
Another frequent issue is stacking mismatched resolutions without fixing the scaling. A 4K 27-inch monitor next to a 1080p 24-inch monitor will make icons and text look like they belong in two different universes. Windows and macOS both handle this, but only if you configure each display individually.
Cable chaos is the third culprit. Without proper routing, you end up with a spaghetti mess that makes any adjustment a nightmare. Every time you want to reposition a monitor, you're untangling six cables first.
The 30-Second Setup Check: Does Your Current Layout Match Your Work?
Before buying anything new, look at what you've got and what you actually do all day.
Run through these questions quickly:
- Where is your primary screen. Is it directly centered on your body, or off to one side?
- How many seconds does it take to find your most-used apps across your displays?
- Does your neck feel neutral (looking straight ahead slightly down) or twisted?
- Are you duplicating the same window on multiple screens, wasting real estate?
- Could you describe your monitor layout in one sentence. "Center ultra-wide, two vertical screens flanking it" is clear. "Um, kind of a bunch of stuff" needs work.
If your first three answers felt uncertain, your current layout probably needs a rework. If your last answer was vague, that's a sign your setup grew organically instead of by design. Some of the best productivity gains come from cleaning up what you already have.
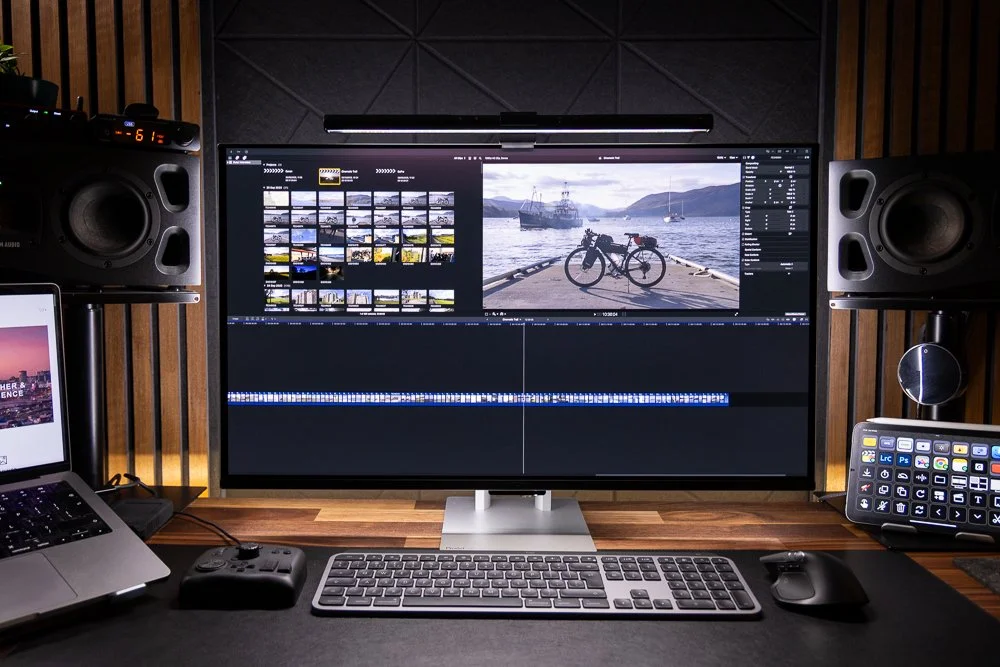
The workflow matches the job. A developer keeping code, documentation, and a terminal visible benefits from three screens at matching height. A designer calibrating a central reference monitor and using flanking tools wants color accuracy on the center.
A trader watching tickers and charts will want a wider, denser arrangement with less ergonomic perfection per screen.
What You Need to Know Before You Touch a Single Cable
Three compatibility factors determine what's physically possible in your setup. Skip these checks and you'll either waste money or end up with hardware that doesn't fit.
Desk Depth, Monitor Count, and the Viewing Distance Rule
Your desk depth dictates how many monitors you can comfortably fit and how large they can be. A standard desk that's 24 inches deep can handle two 27-inch monitors at a reasonable viewing distance. Go deeper to 30 inches and you can push a third screen into the setup without the middle one feeling like it's in your lap.
The general guideline: sit an arm's length from your primary display. That's roughly 20 to 26 inches for most people. If you can't maintain that distance without your desk being too shallow, consider smaller monitors or a single ultrawide instead of multiple flatscreens.
For three monitors across, desk width matters too. Two 27-inch screens plus a third, even at angles, typically need at least 55 inches of usable width. Measure your actual clear surface.
Don't count the area behind a monitor stand or where your keyboard tray slides in.
GPU Ports, Cables, and Why DisplayPort Beats HDMI Here
Every monitor needs one video cable connected to a discrete port on your GPU (graphics card) or laptop dock. You can't just split one output to multiple independent monitors. An HDMI splitter mirrors the same image on two screens instead of extending your desktop.
DisplayPort offers the most flexibility for multi-monitor setups. DisplayPort 1.4 with Multi-Stream Transport (MST) lets you daisy-chain compatible monitors from a single port. The first monitor connects to your PC, then the next monitor connects to the first.
This works best with business-class monitors that have DisplayPort Out ports.
HDMI works fine for single connections. But it can't daisy-chain like DisplayPort and older versions may limit your resolution or refresh rate. For a two-monitor setup with a recent GPU, one DisplayPort and one HDMI is perfectly functional.
USB-C with DisplayPort Alt Mode is common on modern laptops. A good USB-C dock will output to two or more monitors from one Thunderbolt connection. Check the dock's specific specs.
Not all USB-C hubs support dual independent displays.
Brief GPU capacity reference:
| GPU Output | 2 Monitors | 3 Monitors | 4 Monitors |
|---|---|---|---|
| Modern dedicated GPU (e.g. RTX 3060 and above) | Easy, multiple options | Comfortable, may need DP + HDMI mix | Possible, verify port count |
| Mid-range laptop integrated graphics | May work with USB-C dock | Often limited to 1-2 external | Unlikely without Thunderbolt headset |
| Apple Silicon (M2/M2 Pro/M3) | M2 base: 1 external natively | M2 Pro: up to 2, M3 base: 1 (lid open) | M2/M3 Max: up to 4 |
VESA Mounts, Weight Limits, and Desk Thickness — The Compatibility Trio
VESA mounts are the standardized hole patterns on the back of most monitors. They let you detach the stock stand and attach a monitor arm instead. The two common patterns are 75 x 75 millimeters (smaller, lighter monitors) and 100 x 100 millimeters (most 24 to 32-inch displays).
Not every monitor has a VESA mount. Some budget models and a handful of ultra-thin designs use proprietary backs. Check the spec sheet for "VESA compatible" or look for four threaded holes arranged in a square on the rear.
Every monitor arm has a weight capacity rating. An individual arm might support 6 to 35 pounds. Know your monitor's weight without the stand.
That's the number that matters, not the shipping weight.
Desk thickness determines whether a clamp mount will work. Most clamps fit desks from about 0.4 inches up to 3.5 inches thick. Solid wood, metal-frame desks, and thick particle board all work fine.
The problem is ultra-thin desks or glass tops. If your desk is a standard office surface, chances are the clamp fits.
If clamps won't work, grommet mounts drill through a hole in the desk (or use an existing cable passthrough). Wall mounts are the fallback. They need proper stud anchoring.
Don't hang a 20-pound monitor arm on drywall anchors alone.
Choosing Your Layout: The Decision Tree
Your layout should flow from what you do, not from what looked good in someone else's photo. Start with your work pattern, then pick the physical arrangement that supports it.
Decision flow to follow:
- What's the main thing you keep on screen all day? , One primary application (code editor, design tool, trading terminal) -> that display goes dead center, directly ahead
, Two equally important apps -> dual matching monitors, centered between them or one as primary with secondary angled
- How many distinct information sources do you need visible simultaneously? , 1-2 sources -> single large monitor or ultrawide
, 2-3 -> dual monitors or ultrawide + one secondary
, 4+ -> triple or quad arrangement, consider whether your GPU and desk can handle it
- Is reference material (docs, email, chat) secondary to a main workspace? , Yes -> flank the primary with secondary monitors angled inward
, No, all screens are working space -> match heights and keep them closer to flat
- Are monitors identical or mixed? , Identical group -> easier, uniform alignment, clean sight lines
, Mixed resolutions or sizes -> put highest-resolution or largest as primary center, match vertical alignment by top bezel
- Do you frequently rotate files or documents to read vertically? , Often -> add one portrait-mode display on the side
, Rarely -> keep everything landscape
That flow resolves most situations. Where it gets nuanced is the next set of common scenarios.
Single Ultrawide vs. Dual Monitors vs. Triple — Which Fits Your Work?
Each configuration has a practical tradeoff. It's not about which is objectively best. It's about which removes friction from your specific day.
Single ultrawide (34 to 38 inch, 21:9 or wider aspect ratio):
- One seamless panel, no bezel gap in the center
- Simpler setup, one cable, no alignment headache
- Good for timeline-based work (video editing, audio production)
- Downsides: window management software is almost mandatory, not as much total screen area as dual 27-inch monitors, more expensive per inch
Dual matching monitors:
- The most common productive arrangement for knowledge work
- Flexible, each display can be dedicated to one task or app group
- Affordable, standardized replacement if one fails
- The center bezel gap falls right where your nose points, which some people find annoying until they adjust
Triple monitors:
- Maximum screen real estate without going ultrawide
- Great for monitoring roles (trading, network operations, security)
- The "cockpit" effect takes desk space and depth
- Often overkill for writing, development, or design where 2-3 visible areas suffice
For most people reading this, the honest recommendation is dual 27-inch monitors. They fit a standard desk, they're affordable, and the workflow advantages over a single screen are substantial. Triple setups shine when you're literally monitoring streams of live data all day.
The Center-and-Flanking Setup (Most People's Best Beat)
Put your primary monitor directly in front of your keyboard. Center it on your body's midline. This is where your eyes should naturally land 80% of the time.
Place secondary monitors on either side, angled inward. A 15-to-30 degree bevel gives your eyes a comfortable pan between screens without requiring a full head turn. Think of it like arrow wings pointing back at you.
If you have two secondary monitors flanking one primary, the angle increases slightly. Three across in a flat row is a mistake. Always bring the outer screens in enough that you can glance at them without rotating your head past 45 degrees.
Height alignment matters here too. Match the top bezels of all monitors to the same level. This keeps your eyes at a consistent vertical plane.
Jumping your gaze up and down between screens creates the same fatigue as constantly tilting your head.
Portrait Mode: When It Helps and When It's a Gimmick
Portrait orientation genuinely helps for reading long documents, code files, chat threads, and social media feeds. Vertical space matches the shape of the content. A 27-inch monitor in portrait gives you the reading length of a roughly 16-inch-wide column, comfortable for most fonts and languages.
Portrait mode looks cool in photos. But it creates problems for video calls (squarish participant windows), widescreen media, and any application designed for landscape layout.
The practical rule: use portrait mode no more than one monitor in a setup, and only if your work is reading or writing heavy. Developers and writers benefit most. Video editors and anyone doing visual design usually hate it.
If you're going portrait, the right-hand side is the conventional location (for right-handed reading flow). You can flip this based on personal preference. The monitor arm needs to support a 90-degree rotation in its VESA plate.
Budget arms sometimes don't, so verify.
Laptop Plus External Monitors: The Docking Station Question
Laptop-based setups present one specific challenge: keeping the laptop screen useful without it becoming an awkward fourth display in the wrong position.
Option one: use the laptop as your center display, with one external monitor above or beside it. The height mismatch is the killer here. The laptop screen sits several inches below a standard external monitor.
Fix this with a laptop riser so both screens' top bezels align.
Option two: close the laptop (clamshell mode) and run fully off external monitors. This needs power delivery and a dock that handles video out. On macOS, clamshell mode requires the Mac to be connected to power and an external display.
On Windows, it's configurable in power settings.
Option three: keep the laptop off to the side as a dedicated auxiliary screen (monitoring Slack, alerts, music). This works well when the laptop's high-DPI panel makes text legible even at a smaller size.
For any multi-external-monitor laptop setup, a Thunderbolt or USB-C dock with enough video bandwidth is typically the cleanest solution. Daisy-chaining monitors via DisplayPort MST is possible too, but it requires specific monitor models and is more finicky. Docks simplify everything to one cable tug on and off the laptop.
Step-by-Step: Building Your Multi-Monitor Setup From Scratch
Here's the full sequence from unboxing to a clean, working multi-display workstation. Follow it in order and you'll avoid the re-dos that eat up an afternoon.
Step 1: Audit Your Hardware (GPU, Ports, Cables, Monitor Specs)
Before buying anything, list what you have. Write down your GPU model and count the video outputs. Note each monitor's resolution, refresh rate, and available inputs.
Check the back of every monitor for VESA mounting holes.
Match cables to ports. DisplayPort to DisplayPort where possible. HDMI as a secondary option.
Don't buy adapters until you've confirmed you actually need them. A common mistake is grabbing a DisplayPort-to-HDMI adapter when the monitor already has a native HDMI port.
Step 2: Pick Your Mounting Strategy (Arms, Stands, or Wall)
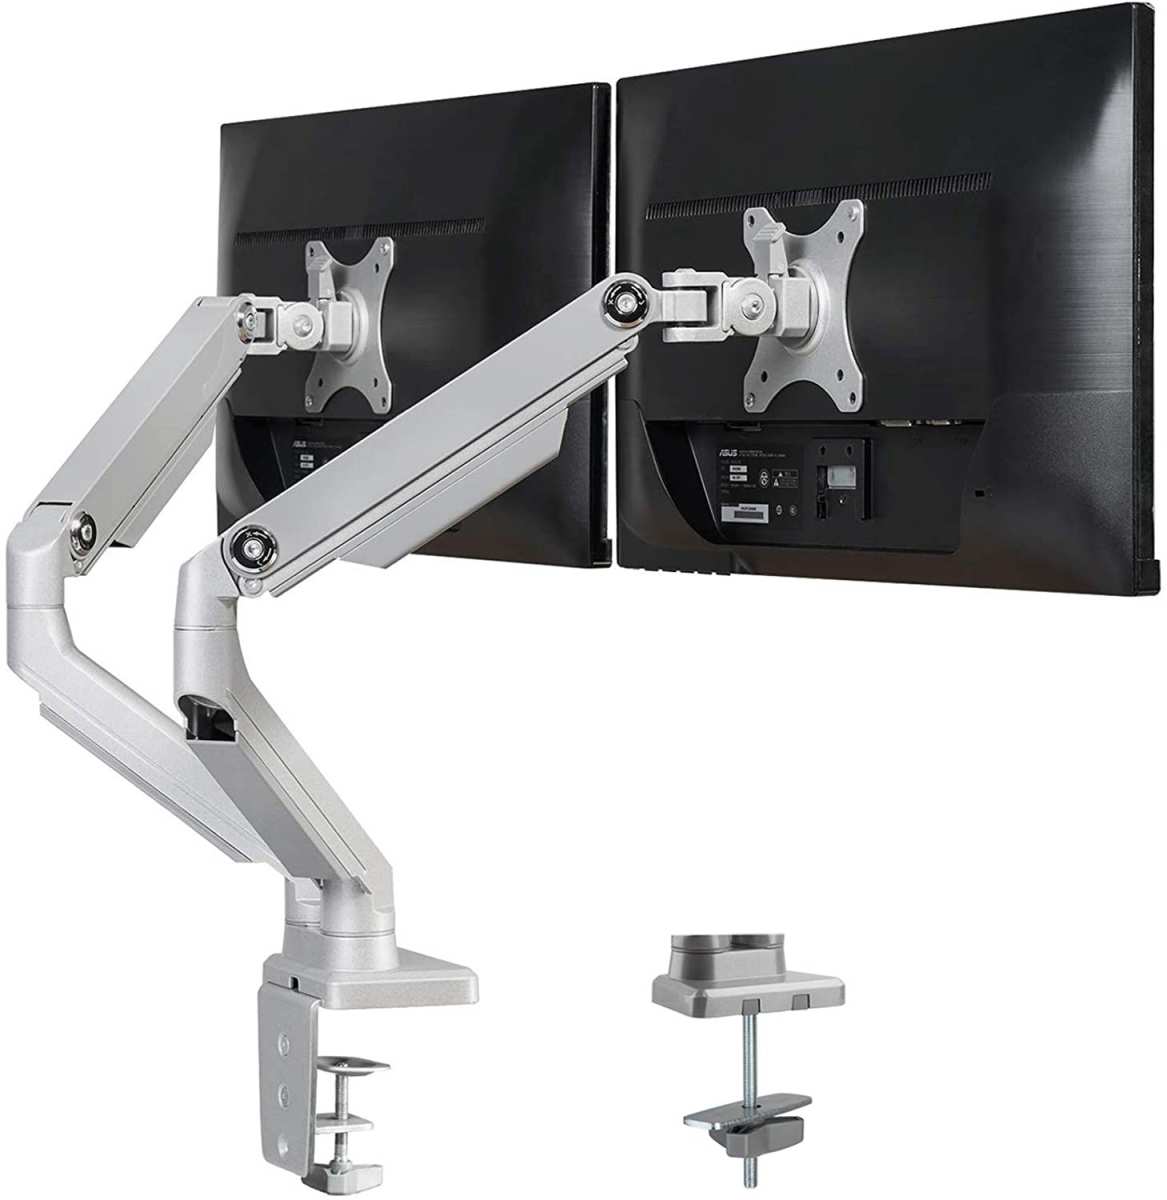
Monitor arms win on adjustability. They let you set exact height, tilt, and swivel. They also free up desk surface underneath.
Gas spring arms are the easiest to adjust on the fly. Mechanical spring arms hold position well but require a tool or knob-turn to change.
Fixed stands work if your monitors come with height-adjustable bases and you don't plan to rearrange. The downside is less flexibility. You're locked into whatever height the stand provides.
Wall mounting makes sense when the desk is shallow or when you want the monitors to float completely. It requires stud-finding and drilling. Don't skip the stud finder.
A 25-pound monitor plus arm leverages significant force on drywall anchors.
Step 3: Position and Align the Monitors Physically
Set your primary monitor first. Center it on your desk, directly in front of where your keyboard sits. The distance from your eyes to the screen should be roughly an arm's length.
For a 27-inch display, that's about 24 inches.
Add secondary monitors and angle them inward. The inner edges should be close together, almost touching bezels. This minimizes the head rotation needed to glance between screens.
Match the top bezels. This is the single most impactful alignment step. When all tops are level, your eyes move horizontally between screens without refocusing vertically.
Use a ruler or a laser level if you're being precise. Eyeballing it gets you close enough for most people.
Step 4: Configure Display Settings in Windows or macOS
Plug everything in and power up. Your operating system will detect the new displays, but the default arrangement is almost never correct.
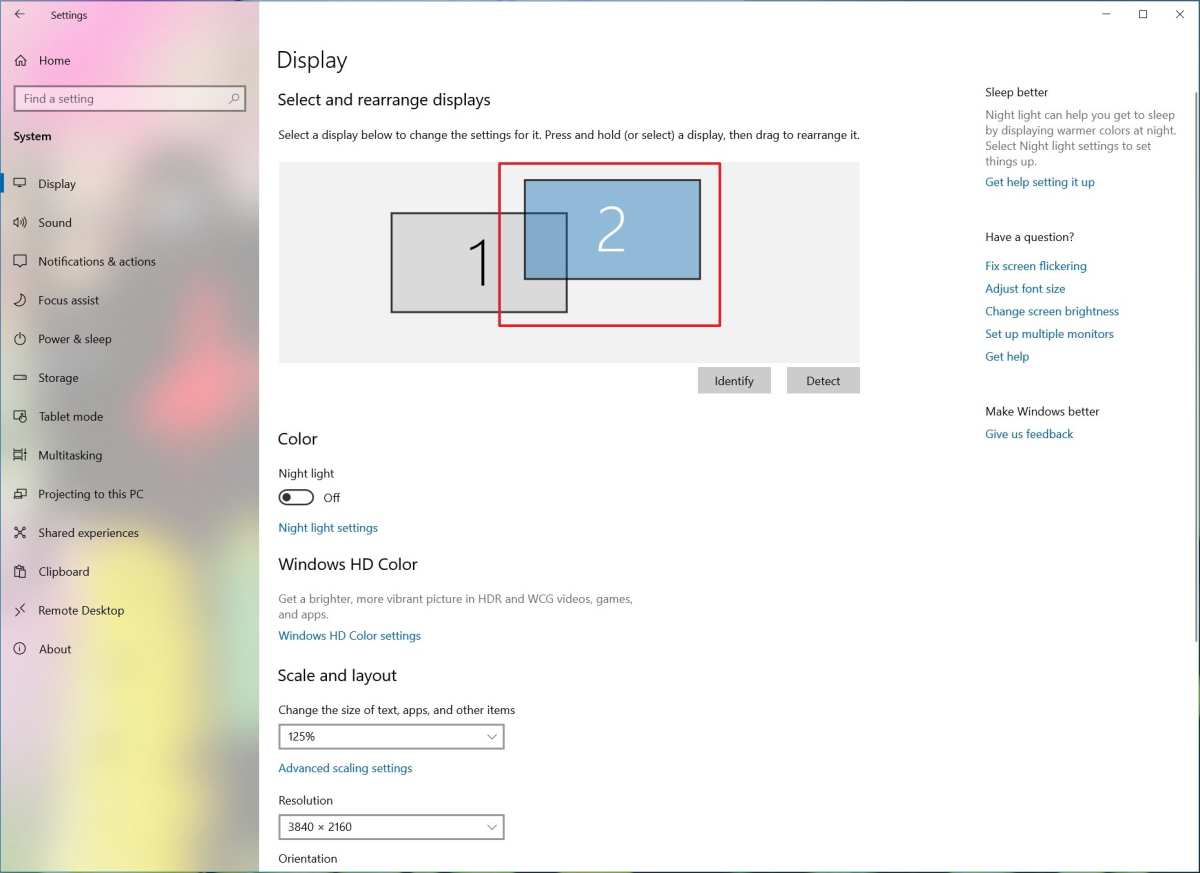
On Windows, right-click the desktop and select Display Settings. You'll see numbered rectangles representing each monitor. Drag them to match your physical layout.
Click Identify to see which number corresponds to which screen.
On macOS, go to System Settings > Displays. Click Arrangement. Drag the white menu bar to your primary monitor.
Position the display icons to match your physical setup.
Set your primary display. This is where your taskbar or dock lives, and where most apps open by default. It should be the monitor directly in front of you.
Step 5: Match Resolution, Scaling, and the On-Screen Layout Map
Set each monitor to its native resolution. A 27-inch 1440p display should run at 2560 x 1440, not 1920 x 1080. Running non-native resolution makes everything look blurry.
Scaling is where mixed setups get tricky. If one monitor is 4K and another is 1080p, Windows and macOS let you set different scaling percentages per display. Set the 4K screen to 150% and the 1080p screen to 100%.
Text and icons will appear roughly the same physical size on both.
Step 6: Cable Management and Final Ergonomic Tweaks
Route cables through the monitor arm channels if your arms have them. Use velcro ties for bundles along the desk leg. A cable tray mounted under the desk hides the excess length and power strips.
Do a final check. Sit in your normal working position. Your eyes should hit the center of the primary screen without tilting your head.
Secondary screens should be visible with a glance, not a turn. Adjust arm tension if anything drifts out of position.
The Ergonomics Most People Skip (Until Their Neck Hurts)
Ergonomic guidelines for multi-monitor setups follow the same principles as single-screen work, with a few additions for the extra displays.
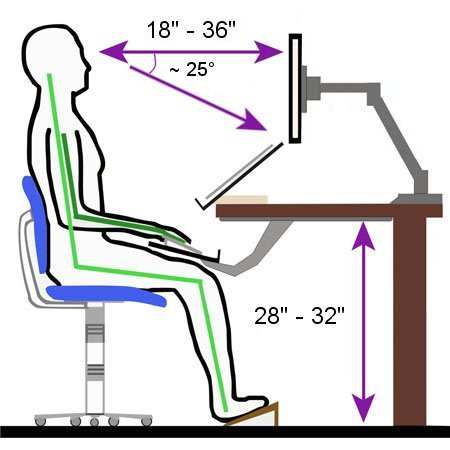
The top of your primary screen should sit at or slightly below eye level. When you look straight ahead, your gaze should land about one-third of the way down from the top edge. This keeps your neck in a neutral position.
Viewing distance matters more than people think. Too close and your eyes work harder to focus. Too far and you lean forward.
For 24 to 27-inch monitors, 20 to 26 inches is the sweet spot. Larger displays can sit slightly further back.
Angle your monitors to reduce glare. Overhead lighting and windows create reflections that force you to tilt your head or squint. Position screens perpendicular to windows rather than facing them directly.
Take breaks. The 20-20-20 rule works for multi-monitor setups too. Every 20 minutes, look at something 20 feet away for 20 seconds.
This resets your eye focus and reduces fatigue.
Mismatched Monitors: Making Different Resolutions and Sizes Work Together
Mixed monitor setups are common. Maybe you upgraded one screen and kept the old one. Maybe you grabbed a cheap secondary to pair with a nice primary.
Either way, you can make it work.
The main issue is mouse movement between screens of different resolutions. A 2560 x 1440 monitor next to a 1920 x 1080 monitor creates a "step" where the cursor hits an edge. The fix is in the display arrangement settings.
Position the rectangles so their top edges align, and accept that the bottom edges won't match. Your cursor will move smoothly across the top portion.
Scaling differences cause text and icons to appear different sizes. Set per-display scaling in Windows Display Settings or macOS Display preferences. A 4K 27-inch monitor at 150% scaling will look similar in size to a 1080p 24-inch monitor at 100%.
Color mismatch is harder to fix. Two different panel types (IPS next to TN, for example) will show different colors and viewing angles. Calibrate both using your operating system's built-in calibration tool.
For professional color work, a hardware calibrator is worth the investment.
Software Tools That Make Multi-Monitor Life Actually Smooth
Your operating system handles basic multi-monitor functionality. Third-party tools fill the gaps.
DisplayFusion (Windows): Adds a taskbar to each monitor, custom hotkeys for window snapping, and per-monitor wallpapers. The free version covers most needs. The paid version adds window snapping zones and multi-monitor screensaver control.
Magnet or Rectangle (macOS): Window snapping tools that let you drag displays to halves, thirds, or quadrants of any screen. Rectangle is free and open-source. Magnet costs a few dollars and adds drag-to-edge snapping.
Microsoft PowerToys (Windows): Includes FancyZones, a window manager that lets you create custom snap layouts on each monitor. It's free and actively maintained.
Ultramon (Windows): An older tool that adds taskbar extensions and window management. Still functional but less actively developed than DisplayFusion.
These tools solve the "how do I quickly put this window on that screen" problem. Without them, you're dragging windows across bezels manually every time.
Common Mistakes That Ruining Multi-Monitor Setups
Some mistakes show up again and again. Here's what to watch for.
Straight-line three-monitor rows. Three screens flat across force constant head rotation. Angle the outer two inward. Your neck will thank you.
Ignoring the bezel gap. A thick bezel between two monitors creates a dead zone where content gets lost. Thin-bezel monitors reduce this. If you're stuck with thick bezels, position them at the edges of your vision rather than center.
Running different refresh rates without testing. A 144Hz primary next to a 60Hz secondary can cause stuttering on the high-refresh screen in some Windows configurations. Set both to the same refresh rate if you notice issues, or update your GPU drivers.
Forgetting about the laptop screen. If you're using a laptop with external displays, decide whether the laptop screen stays open or closed. Leaving it open as a third display in the wrong position creates an ergonomic mess. Close it or position it deliberately.
Buying the cheapest monitor arm. Budget arms sag over time and don't hold position. A gas spring arm rated for your monitor's weight, from a brand with replaceable parts, pays for itself in adjustability and longevity.
Real-World Setups: What Works for Developers, Traders, Designers, and Writers
Different jobs benefit from different arrangements. Here's what tends to work in practice.
Developers: Primary 27-inch 1440p in landscape, centered. Secondary 24 to 27-inch in portrait on the right for documentation or terminal output. The portrait screen matches the shape of code files and reduces scrolling.
Traders: Three 24 to 27-inch monitors in a slight arc. All landscape, all matching resolution. The center shows the main trading platform.
Flanking screens hold charts, news feeds, and communication tools. Speed of glance matters more than perfect ergonomics here.
Designers: One color-accurate 27-inch 4K as the primary, centered. A secondary 24-inch in landscape on the left for tools and palettes. Calibrate the primary with a hardware colorimeter.
The secondary doesn't need the same accuracy.
Writers and researchers: Dual 24-inch 1080p or 1440p monitors, both landscape. One for the draft, one for reference material. Keep them at matching height and resolution.
Simplicity reduces distraction.
When to Upgrade vs. When Your Current Setup Is Good Enough
Not every setup needs a complete overhaul. Sometimes one change makes everything click.
Upgrade when:
- Your GPU can't drive the resolution or refresh rate you need
- Your monitors have different VESA patterns and you can't mount them properly
- You're using a single screen and constantly alt-tabbing between apps
- Your neck or eyes hurt after a full workday
Don't upgrade when:
- Your current layout works and you're just browsing for something better
- You have matching monitors at a comfortable height already
- The "upgrade" is a fourth monitor when you haven't maximized your current two
The honest truth: most people see the biggest jump going from one screen to two. Going from two to three offers diminishing returns unless your work specifically demands it.
Frequently Asked Questions
Can I mix different monitor sizes in a multi-monitor setup?
Yes, but match the top bezels and set per-display scaling. Put the larger or higher-resolution screen as your primary. The mismatch is manageable once you configure scaling correctly.
How far should monitors be from my eyes?
Roughly an arm's length, about 20 to 26 inches for 24 to 27-inch displays. Larger screens can sit slightly further back. If you're leaning forward to read, they're too far.
Do I need a monitor arm for a dual setup?
No, but it helps. Arms give you precise height and angle adjustment. Stock stands work if they're height-adjustable and your desk depth is sufficient.
Why does my mouse get stuck between monitors?
The on-screen layout map doesn't match your physical arrangement. Open display settings and drag the monitor rectangles to match how they're actually positioned on your desk.
Can I daisy-chain monitors with any DisplayPort cable?
No. Both monitors need to support DisplayPort MST (Multi-Stream Transport). The first monitor must have a DisplayPort Out port.
Check your monitor's spec sheet for MST support.
How do I set a primary monitor in Windows 11?
Open Settings > System > Display. Click the monitor you want as primary. Scroll down and check "Make this my main display." The taskbar and new app windows will default to that screen.
Note: The previous batch ended with "Frequently Asked Questions," which was the final section covered. There are no remaining H2 headings left from the approved TOC. The complete article has been delivered.

Similar Posts