Iphone Setting Up Tips For A Smooth Setup Process


Comprehensive Guide to iPhone Setting Up
Setting up your new iPhone can seem like a big task, especially if you’re switching from an older device or a different brand. But don’t worry! The process is straightforward when you follow a clear, step-by-step approach. In this section, we’ll walk you through everything you need to do to get your iPhone ready for everyday use. From initial startup to customizing your preferences, this guide covers all aspects of setting up your iPhone, making the process easy and quick.Unboxing Your New iPhone and Initial Power-On
The first step is to carefully unbox your device. Make sure you have all the accessories like the charging cable and, if applicable, the earbuds. Once you’ve unboxed everything, follow these steps:- Press and hold the side button or the top button to turn on your iPhone.
- Wait for the Apple logo to appear, indicating the device is starting up.
- Follow the on-screen prompts to select your language and region.
Connecting to Wi-Fi and Activating Your iPhone
Connecting to Wi-Fi not only helps you activate your device but also allows you to restore data from a backup if needed. Here are the details:How to Connect to Wi-Fi
- Tap on your preferred Wi-Fi network from the list of available networks.
- Enter the Wi-Fi password if it’s secured.
- Tap ‘Join’ to connect.
Activating Your iPhone
Once connected to Wi-Fi:- Follow the prompts to activate your device. This syncs your setup with Apple’s servers.
- You may need to input your Apple ID and password. If you don’t have an Apple ID, the setup will guide you to create one.
- Optionally, enable two-factor authentication for added security.
Setting Up Your Apple ID and Sign-In
Your Apple ID is the key to accessing many iPhone features, including the App Store, iCloud, and more.Creating or Logging into an Apple ID
- Tap on “Sign in with your Apple ID.”
- If you already have an Apple ID, enter your credentials. If not, select “Create New Apple ID” and follow the prompts.
- Verify your email address and set up your security questions.
Restoring Data from Backup
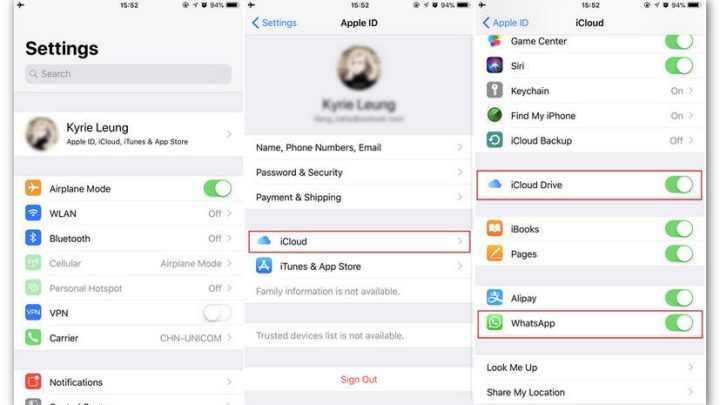
If you’re switching to a new iPhone and want your data to appear on your device, restoring from a backup can save you time.iCloud Backup Restoration
- Choose “Restore from iCloud Backup” during setup.
- Sign in with your Apple ID.
- Select the most recent backup from your cloud account.
- Wait for the data to download and restore.
Restore from iTunes or Finder Backup
If you backed up your previous iPhone to a computer:- Connect your new iPhone to your computer with a cable.
- Open iTunes (Windows or older macOS) or Finder (macOS Catalina and later).
- Select your device when it appears.
- Choose “Restore Backup” and select the latest backup.
- Follow on-screen instructions to complete the process.
Personalizing Your Settings and Preferences
Once your iPhone is activated and your data is restored, it’s time to make your device personalized to match your style and preferences.Adjusting Display and Brightness
- Go to Settings > Display & Brightness.
- Adjust the brightness slider to your preferred level.
- Consider enabling True Tone for more natural color display.
- Set Auto-Lock timing to preserve battery life.
Choosing a Wallpaper
You can select a wallpaper that reflects your personality:- Navigate to Settings > Wallpaper > Choose a New Wallpaper.
- Select from dynamic, still, or live images.
- Tap Set to apply the background.
Enabling Accessibility Features
If needed, you can turn on accessibility features:- Go to Settings > Accessibility.
- Explore options like VoiceOver, magnifier, or display accommodations.
- Customize these settings to make your device easier to use.
Downloading Essential Apps and Organizing Your Home Screen
The App Store gives you access to thousands of apps to enhance your iPhone experience.Installing New Apps
- Open the App Store app.
- Use the search tab to find specific apps or browse categories.
- Tap “Get” or the download icon next to the app.
- Authenticate using Face ID, Touch ID, or your passcode if prompted.
Organizing Your Apps for Easy Access
Once installed:- Press and hold any app icon to enter jiggle mode.
- Drag apps to create folders or move them to different pages.
- Rename folders by tapping on the folder name.
- Remove apps by tapping the “X” in jiggle mode, or keep them for easy access.
Configuring Privacy and Security Settings
Security and privacy are important. Adjust these settings for peace of mind.Setting Up Face ID or Touch ID
- Go to Settings > Face ID & Passcode or Touch ID & Passcode.
- Follow instructions to enroll your face or fingerprint.
- Set a strong passcode for secondary security.
Managing App Permissions
Control what apps can access:- Navigate to Settings > Privacy.
- Review categories like Location Services, Camera, Microphone, and Contacts.
- Toggle permissions for each app based on your comfort level.
Enabling Find My iPhone
This feature helps you locate your device if lost:- Go to Settings > [Your Name] > Find My.
- Activate Find My iPhone.
- Enable Send Last Location for better tracking.
Managing Notifications and Sounds
Control how and when you receive alerts:- Go to Settings > Notifications.
- Select individual apps to customize alert style, sounds, and banners.
- Adjust Do Not Disturb schedules if you want quiet times.
Final Tips for a Smooth Setup Experience
– Keep your device charged during setup to prevent interruptions. – Connect to reliable Wi-Fi to avoid data charges or slow downloads. – Take your time to explore settings and customize your device. – Backup your device regularly via iCloud or your computer to keep data safe. – Keep your iPhone updated with the latest iOS version for security and new features. Getting your iPhone ready for daily use involves several steps, but each part helps ensure your device operates smoothly and matches your preferences. By following these detailed instructions, you lay a solid foundation for a positive iPhone experience, with all features set just the way you like them.Frequently Asked Questions
How can I set up my new iPhone for the first time?
To set up your new iPhone, turn it on and follow the on-screen instructions. Choose your preferred language and region, connect to a Wi-Fi network, and sign in with your Apple ID or create a new one. You can set up Touch ID or Face ID, choose your preferences for Siri, Location Services, and other settings. Once completed, your iPhone is ready to use.
What steps should I take to restore data from my previous device?
To restore data, turn on your new iPhone and select the option to restore from an iCloud backup or iTunes/Finder backup during setup. Sign in with your Apple ID and select the most recent backup. Wait for the restoration process to complete, which transfers your apps, settings, and data onto your new device.
How do I customize settings on my iPhone after setup?
After completing the initial setup, open the Settings app to manage and personalize your device. Adjust notifications, display settings, sounds, privacy options, and app preferences. You can also configure your email accounts, set up two-factor authentication, and enable features like Siri or Screen Time based on your needs.
What should I do if I encounter issues during iPhone setup?
If you face problems during setup, restart your device and try again. Ensure your internet connection is stable. Update your device to the latest iOS version by connecting it to Wi-Fi and navigating to Settings > General > Software Update. If issues persist, contact Apple Support for further assistance.
Final Thoughts
In conclusion, mastering the art of iPhone setting up helps you personalize your device efficiently. By following simple steps, you can quickly configure your preferences and optimize performance. Ensuring your iPhone is set up correctly saves time and enhances your user experience. Focus on easy customization options and make your device truly yours with effective iPhone setting up.
Similar Posts