Iphone Setting Up Email Account: A Simple Step-By-Step Guide
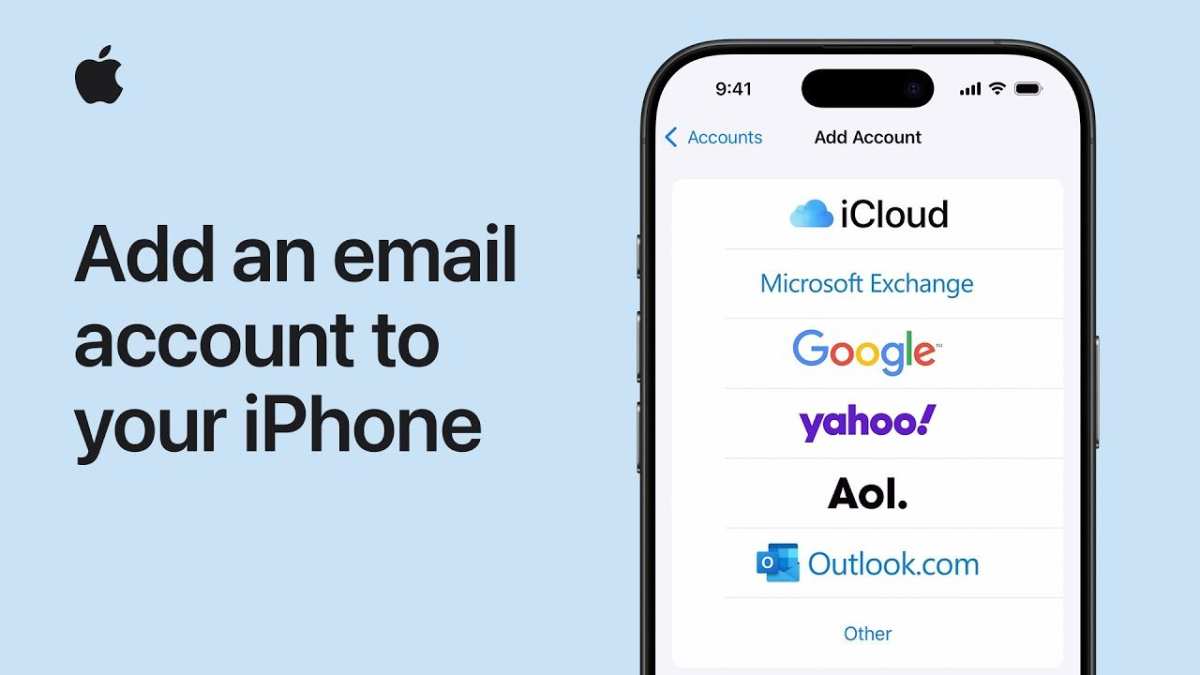
**To set up an email account on your iPhone, simply open the Settings app, select Mail, and follow the prompts.** If you’re unsure how to start with the iPhone setting up email account, this guide will walk you through the process step by step. Keeping your emails accessible on your device is straightforward once you know the right steps.
No need to worry about complicated procedures—your iPhone makes it easy to configure your email quickly. Follow these simple instructions to stay connected and manage your messages seamlessly.

Guide to Setting Up an Email Account on Your iPhone
Setting up an email account on your iPhone might seem challenging at first, but it’s actually a simple process once you know the steps. Whether you want to add your personal Gmail, work Outlook, or any other email account, this guide will walk you through every step with clear instructions and helpful tips. Let’s dive into how you can easily set up an email account on your iPhone and keep your messages organized and accessible everywhere you go.
Understanding the Basics of Email Setup on iPhone
Before you start, it’s important to understand what happens when you add an email account to your iPhone. When you set up an email, your iPhone connects to the email provider’s servers. This connection allows you to send, receive, and manage your emails directly from your iPhone without needing to open a browser or use a computer.
Here are some key points to know:
- Most popular email services like Gmail, Yahoo, Outlook, and iCloud are compatible with iPhone’s Mail app.
- You can add multiple email accounts to your iPhone, and manage them all from one app.
- When setting up, you’ll need your email address, password, and possibly some server information for manual setup.
Now, let’s explore step-by-step how to set up your email account on your iPhone.
Preparing for Email Setup
Before jumping into the setup process, gather the information you’ll need. For most email providers, your email address and password are enough. However, some accounts, especially work or enterprise accounts, might require additional details.
Here’s what you’ll need:
| Needed Information | Details |
|---|---|
| Email Address | Your full email address (e.g., yourname@gmail.com) |
| Password | The password associated with your email account |
| Server Settings (if needed) | Incoming and outgoing mail server addresses, port numbers, security type |
If you are unsure about server settings, check with your email provider or visit their official help page. Many providers have automated setup options that do most of the work for you.
How to Add an Email Account on Your iPhone
Let’s walk through the process step by step:
Using the Mail App’s Automatic Setup
Most email accounts can be added automatically through the default Mail app. Here’s how:
- Open the Settings app on your iPhone.
- Scroll down and tap on Mail.
- Tap on Accounts.
- Choose Add Account.
- Pick your email provider from the list (e.g., Gmail, Yahoo, Outlook, iCloud). If your provider isn’t listed, select Other.
- Enter your email address and tap Next.
- Input your password when prompted.
- If the information is correct, your iPhone will verify and automatically set up your account.
- Once verified, choose what data you want to sync (mail, contacts, calendars, notes).
- Tap Save to finish.
Manual Setup for Email Accounts Not Supported by Automatic Configuration
In some cases, especially with less common email providers, you might need to enter server details manually:
- Follow the steps above until you reach the Add Account screen.
- Tap on Other, then select Add Mail Account.
- Enter your name, email address, password, and a description for your account.
- Tap Next to proceed to server settings.
- Input the incoming mail server details (host name, username, password).
- Input the outgoing mail server details (host name, username, password).
- Tap Save once all details are entered correctly.
Be careful to enter the server details exactly as provided by your email service, including correct port numbers and security settings.
Understanding Common Email Server Settings
When setting up an email manually, you’ll encounter the following server settings:
Incoming Mail Server
- Host Name: Usually mail.yourprovider.com or imap.yourprovider.com
- Port: Typically 143 for IMAP, 110 for POP3
- Security: None, SSL/TLS (recommended for security)
Outgoing Mail Server
- Host Name: smtp.yourprovider.com
- Port: Usually 587 or 465
- Security: STARTTLS or SSL/TLS
Using SSL/TLS ensures your emails are encrypted and protects your information as it travels over the internet.
Managing Multiple Email Accounts on Your iPhone
You can add and manage various accounts on your device, making it easy to switch between personal and work emails. Here are some tips:
- To add multiple accounts, repeat the setup process for each email address.
- You can assign specific accounts as default for sending email by adjusting the settings.
- Use notifications and banners to stay updated with new messages from all accounts.
- Organize your emails using folders or labels if your email provider supports them.
Managing multiple accounts is straightforward, and iPhone’s Mail app keeps everything organized in one place, saving you time.
Optimizing Email Settings for Better Experience
Once your accounts are set up, you might want to customize some settings for comfort and efficiency:
Adjust Fetch New Data Settings
- Go to Settings > Mail > Accounts.
- Tap Fetch New Data.
- Choose how often your email syncs. You can opt for Push, Fetch, or Manual.
Push keeps your emails updated in real time, while Fetch allows periodic updates at selected intervals, conserving battery life.
Set Up Notification Preferences
- In Settings, tap Notifications.
- Select Mail and customize alert styles, sounds, and banner preferences.
Organize Your Mailbox
- Create folders or labels directly from your email provider’s app or website.
- Use filters to automatically sort incoming emails into specific folders.
Proper organization helps you manage your inbox efficiently and find important messages faster.
Common Troubleshooting Tips
Sometimes, setting up an email account might encounter issues, but most problems can be fixed quickly:
- Double-check your email address and password for typos.
- Ensure your internet connection is active.
- Verify server settings if doing manual setup.
- Update your iPhone to the latest iOS version.
- Remove and re-add the account if problems persist.
If you continue facing issues, contact your email provider’s support for detailed assistance.
Keeping Your Email Secure on iPhone
Safety is essential when managing email accounts. Here are some best practices:
- Use strong, unique passwords for each email account.
- Enable two-factor authentication if available.
- Regularly update your iPhone’s software and email app.
- Be cautious of suspicious emails asking for personal information.
- Avoid logging into your email on public or unsecured Wi-Fi networks.
Following these tips helps keep your email account safe and your personal information protected.
Summary
Setting up an email account on your iPhone is an easy task that can be completed in a few simple steps. Whether using automatic configuration or manual setup, you can access your emails seamlessly on the go. Remember to keep your server settings handy if needed, manage your accounts efficiently, and prioritize security. With your email now connected, you can enjoy quick access to your messages, organize your inbox, and stay connected wherever you are.
By following this detailed guide, you can confidently add any email account to your iPhone and enjoy a smooth messaging experience tailored to your needs.
Frequently Asked Questions
How can I manually add an email account to my iPhone?
To add an email account manually, open the Settings app and tap on ‘Mail’ or ‘Passwords & Accounts’ depending on your iOS version. Select ‘Add Account,’ choose your email provider, and then enter your email address and password. If the automatic setup doesn’t work, input the server details manually, which you can find from your email provider’s support page. After entering all required information, tap ‘Next’ and wait for the account to verify before saving.
What should I do if my iPhone can’t send or receive emails after setup?
If your emails aren’t working correctly, verify your internet connection first. Make sure your account details are entered correctly, including incoming and outgoing server information. Restart your iPhone and try to refresh your mailbox. If issues persist, remove the email account from your device and add it again, ensuring you have the latest iOS update installed, which can fix bugs affecting email functionality.
Can I set up multiple email accounts on my iPhone simultaneously?
Yes, you can add multiple email accounts to your iPhone. Navigate to Settings > Mail > Accounts and tap ‘Add Account.’ Follow the prompts for each email provider, whether it’s Gmail, Yahoo, Exchange, or others. After adding multiple accounts, you can choose which ones to sync mail, contacts, calendars, and notes, keeping everything easily accessible within the Mail app.
How do I update the email account settings on my iPhone?
To update your email account settings, go to Settings > Mail > Accounts and select the account you want to modify. Tap on your email address to access the account details, then update the server information, username, or password as required. Save your changes, and your iPhone will attempt to verify the new settings automatically. If verification fails, double-check the details with your email provider.
Final Thoughts
Setting up your email account on an iPhone is a simple process that keeps you connected efficiently. First, open the Settings app and select Mail, then tap Accounts. Choose Add Account and enter your email credentials.
Follow the prompts to complete the setup, ensuring your account syncs properly. Checking your email on your iPhone becomes quick and easy once configured correctly.
In summary, the process for setting up your email on an iPhone is straightforward. This iPhone setting up email account guide helps users stay organized and connected seamlessly.

Similar Posts