How To Make Swipe Screen In Android: Step-By-Step Guide

How to Make Swipe Screen in Android
Creating a swipe screen in Android can make your app feel more interactive and user-friendly. It allows users to navigate through different pages, images, or content by simply swiping their finger across the screen. Whether you’re building a simple app or a complex one, adding swipe functionality can improve user experience significantly. In this guide, we’ll walk through every step to help you incorporate swipe screens effectively into your Android app.Understanding Swipe Screens in Android
Before diving into the technical details, it’s important to understand what swipe screens are and how they work in Android. A swipe screen typically involves horizontal or vertical gestures that allow users to move between different views or pages. Android provides several components to facilitate this interaction, including ViewPager2, RecyclerView, and custom gesture detectors.What Is a Swipe Screen?
A swipe screen lets users navigate through content by swiping left, right, up, or down. Common examples include photo galleries, onboarding tutorials, and tabbed interfaces. These screens make app navigation feel smoother and more intuitive.
Why Use Swipe Screens?
- Enhance user engagement
- Make navigation easier and more natural
- Allow smooth transition between pages or content
- Create a modern and attractive user interface
Setting Up Your Android Environment
Before creating swipe screens, ensure your development environment is ready. You need Android Studio installed with the latest SDK tools. Follow these quick steps:- Download and install Android Studio from the official website
- Create a new Android project with an Empty Activity template
- Ensure your build.gradle files have the latest dependencies, especially for ViewPager2 and RecyclerView
Adding Swipe Functionality Using ViewPager2
ViewPager2 is the most recommended component for creating swipe screens in Android because it supports modern features and is easy to use. Here’s how you can implement it:Step-by-Step Guide to Using ViewPager2
- Include the dependency: Make sure you have the ViewPager2 library included in your build.gradle file:
implementation 'androidx.viewpager2:viewpager2:1.0.0'- Create a layout with ViewPager2: In your activity layout XML, add the ViewPager2 widget:
<androidx.viewpager2.widget.ViewPager2
    android:id="@+id/viewPager"
    android:layout_width="match_parent"
android:layout_height="match_parent" />- Create an Adapter: You’ll need an adapter to connect your data to the ViewPager2. You can extend RecyclerView.Adapter for this purpose.
public class MyPagerAdapter extends RecyclerView.Adapter<MyPagerAdapter.ViewHolder> {
    private List<String> data;

    public MyPagerAdapter(List<String> data) {
        this.data = data;
    }

    @Override
    public ViewHolder onCreateViewHolder(ViewGroup parent, int viewType) {
        View view = LayoutInflater.from(parent.getContext()).inflate(R.layout.page_item, parent, false);
        return new ViewHolder(view);
    }

    @Override
    public void onBindViewHolder(ViewHolder holder, int position) {
        holder.textView.setText(data.get(position));
    }

    @Override
    public int getItemCount() {
        return data.size();
    }

    public static class ViewHolder extends RecyclerView.ViewHolder {
        TextView textView;

        public ViewHolder(View itemView) {
            super(itemView);
            textView = itemView.findViewById(R.id.pageText);
        }
    }
}- Bind adapter to ViewPager2: In your activity, set the adapter like this:
ViewPager2 viewPager = findViewById(R.id.viewPager);
List<String> pages = Arrays.asList("Page 1", "Page 2", "Page 3");
MyPagerAdapter adapter = new MyPagerAdapter(pages);
viewPager.setAdapter(adapter);
Customizing the Swipe Experience
Once you’ve set up the basic swipe screen, you can customize it further to improve functionality and style.Adjusting Transition Effects
You can add animations or transformations for more appealing transitions:- Use
setPageTransformeron ViewPager2 - Create custom PageTransformer classes to apply effects like zoom, fade, or rotate
viewPager.setPageTransformer(new DepthPageTransformer());Implementing Swipe Listeners
To respond to swipe gestures, implement listeners such as:- OnPageChangeCallback: Detects when user scrolls between pages
- OnSwipeListener: Custom gesture detectors for more control
viewPager.registerOnPageChangeCallback(new ViewPager2.OnPageChangeCallback() {
    @Override
    public void onPageSelected(int position) {
        super.onPageSelected(position);
        // Do something when a new page is selected
    }
});
Adding Swipe Gestures Manually with GestureDetector
If you want to build a swipe feature outside of ViewPager2, you can use the GestureDetector class. Here’s a simple way:Implementing GestureDetector for Custom Swipe
- Create an instance of GestureDetector
- Implement the onFling() method to detect swipe direction
- Attach gesture detector to your view with an OnTouchListener
GestureDetector gestureDetector = new GestureDetector(this, new GestureDetector.SimpleOnGestureListener() {
    @Override
    public boolean onFling(MotionEvent e1, MotionEvent e2, float velocityX, float velocityY) {
        float deltaX = e2.getX() - e1.getX();
        if (Math.abs(deltaX) > SWIPE_THRESHOLD && Math.abs(velocityX) > VELOCITY_THRESHOLD) {
            if (deltaX > 0) {
                // Swipe right
            } else {
                // Swipe left
            }
            return true;
        }
        return false;
    }
});

view.setOnTouchListener((v, event) -> gestureDetector.onTouchEvent(event));
Optimizing Your Swipe Screen
To enhance the performance and usability of your swipe screen, consider these tips:Ensure Smooth and Responsive Swipes
- Use hardware acceleration where possible
- Keep your content lightweight, especially images
- Test on various devices to check responsiveness
Accessibility and User Experience
- Add visual indicators like dots or arrows to show pages
- Support swipe gestures with keyboard navigation for accessibility
- Provide options to disable swipe if needed
Common Issues and How to Fix Them
Even with careful implementation, you might run into problems. Here are some common issues and solutions:Swipes Not Detected or Too Sensitive
- Adjust gesture thresholds or sensitivity in your detector
- Make sure gesture detectors are properly attached
Performance Lags or Crashes
- Optimize your content, particularly images and layouts
- Update your dependencies to the latest versions
- Use RecyclerView efficiently for large data sets
Swiping Interferes with Other Gestures
- Manage touch event conflicts carefully
- Use requestDisallowInterceptTouchEvent() when needed
Final Tips for Creating Successful Swipe Screens in Android
– Always test your swipe gestures in different scenarios to ensure they feel natural. – Combine swipe with other navigation methods like buttons or tabs for flexibility. – Keep your app’s performance in mind and avoid overloading the UI with too much data or complex animations. By following these detailed steps, you can create engaging swipe screens that make your Android app more enjoyable and easier to navigate. Whether you use ViewPager2 for simple pages or custom gesture detectors for unique interactions, the key is to keep the user experience smooth and intuitive.Frequently Asked Questions
How can I enable swipe gestures for navigation on my Android device?
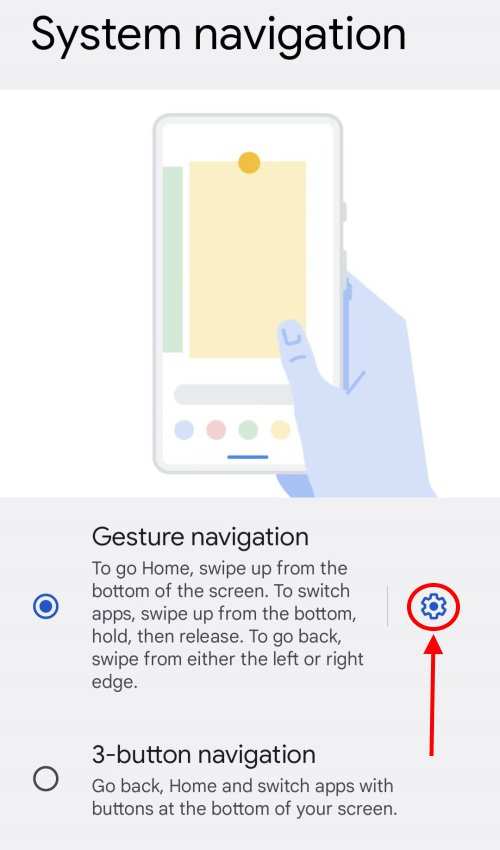
To enable swipe gestures, go to your device’s Settings. Tap on ‘System’ or ‘Gestures’ depending on your device. Look for options like ‘System navigation’ or ‘Gestures’ and select the preferred swipe navigation style such as ‘Swipe up’ or ‘Back gesture.’ Turn on the toggle for the desired gesture to start using swipe navigation instead of traditional buttons.
What steps should I follow to create a custom swipe action in an Android app?
First, add a GestureDetector to your activity or fragment to listen for touch events. Override the onTouchEvent method to pass touch events to the GestureDetector. Then, implement the onFling or onScroll method within GestureDetector.SimpleOnGestureListener to define what happens when a swipe occurs. Finally, associate the swipe action with the specific function or navigation you want to trigger, such as changing screens or updating content.
How do I set up swipe-to-refresh functionality in an Android application?
Include the SwipeRefreshLayout in your activity’s layout XML file, wrapping your main content view like a RecyclerView or ListView. In your activity code, set an OnRefreshListener for the SwipeRefreshLayout. Inside the listener, perform the refresh operation such as fetching new data. Once the refresh completes, call setRefreshing(false) to hide the loading indicator.
What tools or libraries can simplify implementing swipe features in Android apps?
Android provides built-in classes like GestureDetector and SwipeRefreshLayout to facilitate swipe features. For more advanced gestures, consider using third-party libraries such as Facebook’s Swipeable or RecyclerView’s ItemTouchHelper, which simplify implementing swipe-to-delete, swipe-to-dismiss, or other complex interactions with minimal code.
How can I detect swipe directions accurately in my Android application?
Use GestureDetector to analyze the velocity and distance of touch events. Implement the onFling method to compare the difference in X and Y coordinates from the start and end points of the gesture. If the horizontal displacement exceeds a certain threshold, determine whether it was a swipe left or right. Similarly, check vertical displacement for up or down swipes, adjusting the logic based on your app’s needs.
Final Thoughts
To make swipe screen in android, start by installing a custom launcher that supports gestures. Then, navigate to the gestures settings and assign swipe actions to your preferred apps or functions. Customize the sensitivity and appearance to fit your needs for a smoother experience. Finally, test the swipe gestures to ensure they work correctly and adjust settings as needed. By following these steps, you can easily create a personalized swipe screen on your Android device, making navigation quick and effortless.
Similar Posts