Fix Mail App Connection Insecure Error
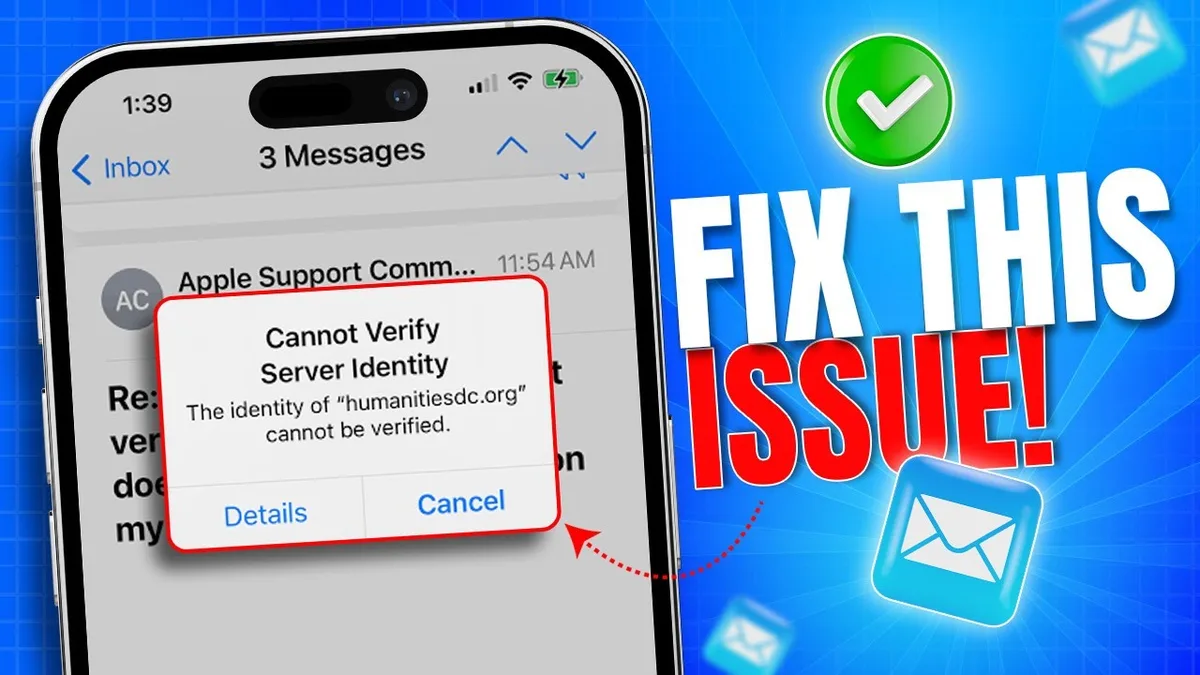
You unlock your phone to check your email and see it: "Connection insecure" or "Cannot verify server identity." That message in your mail app can feel unsettling, especially when you're just trying to read a message. Seeing a "connection insecure mail app" warning doesn't always mean your account is compromised, but it does mean something is wrong with how your phone talks to the email server.
Your mail app is checking the server's digital ID card, a Transport Layer Security (TLS) certificate, before it sends your login credentials. If that certificate looks expired, mismatched, or comes from an untrusted source, the app stops and shows you the warning. In our research, the three most common causes are an expired certificate, an outdated encryption protocol, or a server address that doesn't match the certificate's name.
Each one has a different fix, and knowing which you're dealing with determines how worried you should be.
Quick Answer
A "connection insecure" warning means your mail app cannot verify the email server's identity. Your device blocks the connection to protect your password. The fix depends on the cause: an expired certificate needs renewal, an outdated protocol needs a server upgrade, and a mismatched hostname needs corrected settings.
Never accept the warning without checking the certificate details first.
What "Connection Insecure" Actually Means in Your Mail App
Image source: YouTube / Tech Analytic 360 (YouTube thumbnail (fair-use with source credit))
Your mail app uses TLS to create an encrypted tunnel between your phone and the email server. Before that tunnel opens, the server presents a digital certificate. Think of it as a passport issued by a trusted authority.
The app checks the certificate's expiration date, the server name on it, and whether a legitimate Certificate Authority (CA) signed it.
When that check fails, the app displays the warning. It is not a guess or a glitch. It means the encrypted handshake broke down at one of three points: the certificate expired, the server uses a deprecated TLS version like TLS 1.0, or the server's hostname does not match the name on the certificate.
Apple's iOS and macOS handle this more strictly than Android devices. Apple Mail will block the connection entirely and force you to manually inspect and accept the certificate. Android mail apps like Samsung Email sometimes show a warning but allow the connection to continue with a single tap.
That difference matters for security.
Why Your Mail App Shows This Warning (And When to Worry)
The warning itself is not a sign of an attack. It is a sign that something is inconsistent. The question is whether the inconsistency comes from a misconfigured server or a malicious actor intercepting your traffic.
Scenario one: your server, your responsibility. You run your own email server on a VPS or use a small hosting provider. Your Let's Encrypt certificate expired three days ago, or you set up a self-signed certificate years ago and forgot about it. The warning is legitimate, but the threat is low.
Your credentials are still encrypted. You just need to fix the server.
Scenario two: public Wi-Fi, unknown server. You connected to free Wi-Fi at an airport or coffee shop. Your mail app tried to reach your email provider, but the server that answered presented a different certificate than expected. This is a potential man-in-the-middle (MITM) attack.
Someone on that network set up a fake server to capture your email password. Never accept the certificate. Disconnect from that network immediately.
The Three Most Common Causes of a "Connection Insecure" Error
Image source: YouTube / Rahul Random Learnings (YouTube thumbnail (fair-use with source credit))
Three root causes account for nearly all warnings. Identifying which one you face is the first step to resolving it safely.
Expired or Self-Signed SSL Certificate
This is the most common cause. Email servers need a valid SSL/TLS certificate signed by a trusted CA. If the certificate has expired, or if the server uses a self-signed certificate your device doesn't recognize, the mail app rejects the connection.
Let's Encrypt certificates expire every 90 days. If the auto-renewal process fails because a cron job stopped running, the certificate lapses without warning. The mail server keeps running, but any client that checks the certificate sees an expired date and blocks the connection.
Server Uses an Outdated Encryption Protocol (TLS 1.0 or Lower)
Image source: YouTube / SoftWiz Circle (YouTube thumbnail (fair-use with source credit))
Even if the certificate is valid, the server might use an older TLS protocol that Apple, Google, and Microsoft have all deprecated. TLS 1.0 and TLS 1.1 are no longer considered secure. Major operating system updates have dropped support for these protocols.
If your email server only advertises TLS 1.0 support, modern mail apps will refuse to connect. The National Institute of Standards and Technology (NIST) SP 800-52 Rev. 2 recommends disabling TLS 1.0 and using TLS 1.2 as a minimum. Upgrading to TLS 1.2 or TLS 1.3 is the fix.
Hostname Mismatch Between the Certificate and Server Address
The certificate's Common Name (CN) or Subject Alternative Name (SAN) must match the server address your mail app is trying to connect to. If you configured your mail app to connect to mail.yourdomain.com but the certificate was issued to server.yourdomain.com, the hostnames don't match. The mail app sees this as a red flag.
This often happens after migrating email hosting. The old certificate lists the old server name. You updated the DNS records, but the new server still presents the old certificate.
Issue a new certificate covering the correct hostname or update your mail app settings to match.
What Happens If You Tap "Details" and Accept the Certificate
Apple Mail on iOS displays the certificate details when you tap the warning. You see the expiration date, the name it was issued to, and the issuer. Tapping "Accept" adds that certificate to your device's trust store temporarily.
The Security Risk You Take by Accepting
Accepting a certificate you haven't verified is the digital equivalent of letting a stranger into your house because they have a badge that looks official. You have no way of knowing whether that certificate belongs to the real server or an impostor.
If you accept on a trusted network like your home Wi-Fi and you know the server belongs to you, the risk is manageable. The danger is accepting on a public network. A MITM attacker can present any certificate they want.
Once you accept it, your mail app sends your username and password through the attacker's server.
When It's Actually Safe to Accept
You can safely accept the certificate in exactly one scenario: you control both the server and the network, and you've verified the certificate's fingerprint through an out-of-band method. Check the SHA-256 thumbprint on the server's admin panel, then compare it to the one shown on your phone. If they match, the certificate is genuine.
If not, do not accept.
For most users, the safer approach is to fix the server configuration so the warning disappears permanently.
Step-by-Step: How to Safely Check Your Server's Certificate
Using the Mail App's Built-In Certificate Viewer
On iPhone or iPad, when the warning appears, tap "Details." You will see the server name the certificate belongs to, the CA that signed it, and the expiration date. Check the "Issued to" name against the server address you typed into your mail account settings. If they don't match, that is the problem.
If the expiration date is past, the certificate is expired.
On Android, the certificate viewer varies by app. Gmail and Samsung Email both show certificate details through Account Settings > Server Settings > Certificate.
Using OpenSSL from a Computer (For Advanced Users)

Image source: YouTube / thebotlist (YouTube thumbnail (fair-use with source credit))
If you have access to a computer, OpenSSL gives you the most detailed view. Open a terminal and run:
openssl s_client -connect mail.yourdomain.com:993 -servername mail.yourdomain.com
Replace mail.yourdomain.com with your actual server address. Port 993 is the standard port for IMAP over SSL.
Look for "Verify return code: 0 (ok)". That means the certificate is valid and trusted. Code 10 means the certificate expired.
Code 18 means the hostname doesn't match. Code 21 means the root CA is untrusted. This is the most reliable method for diagnosing the issue.
How to Fix a Legitimate "Connection Insecure" Warning
Renew or Replace an Expired Certificate
If the certificate expired, run certbot renew on your server for Let's Encrypt certificates. For paid certificates from DigiCert or Sectigo, log into your provider's dashboard, generate a new Certificate Signing Request (CSR), and install the certificate through your hosting control panel.
Upgrade Your Server's TLS Version
For Postfix, edit /etc/postfix/main.cf and set smtpd_tls_protocols = !SSLv2, !SSLv3, !TLSv1, !TLSv1.1, TLSv1.2, TLSv1.3. For Dovecot, set ssl_min_protocol = TLSv1.2 in /etc/dovecot/conf.d/10-ssl.conf. Restart both services after making changes.
Switch to OAuth 2.0 to Bypass Certificate Issues Entirely
Image source: YouTube / CodeSnippet (YouTube thumbnail (fair-use with source credit))
OAuth 2.0 replaces password-based login with a token-based system. Your mail app never sends your password. It requests a temporary access token from the provider.
Since OAuth connections use the provider's own pinned certificates, the warning disappears entirely.
Major providers like Gmail, Outlook.com, and iCloud all support OAuth. On iPhone, delete the account and re-add it, selecting "Sign in" instead of entering credentials manually.
Install a Self-Signed Certificate as a Trusted Profile on iOS
Export the certificate from your server, email it to yourself, and open it on your iPhone. Go to Settings > General > VPN & Device Management. Install the profile.
Then go to Settings > General > About > Certificate Trust Settings and enable full trust. This eliminates the warning for that specific server.
When the Warning Is a Real Security Threat
Man-in-the-Middle Attacks on Public Wi-Fi
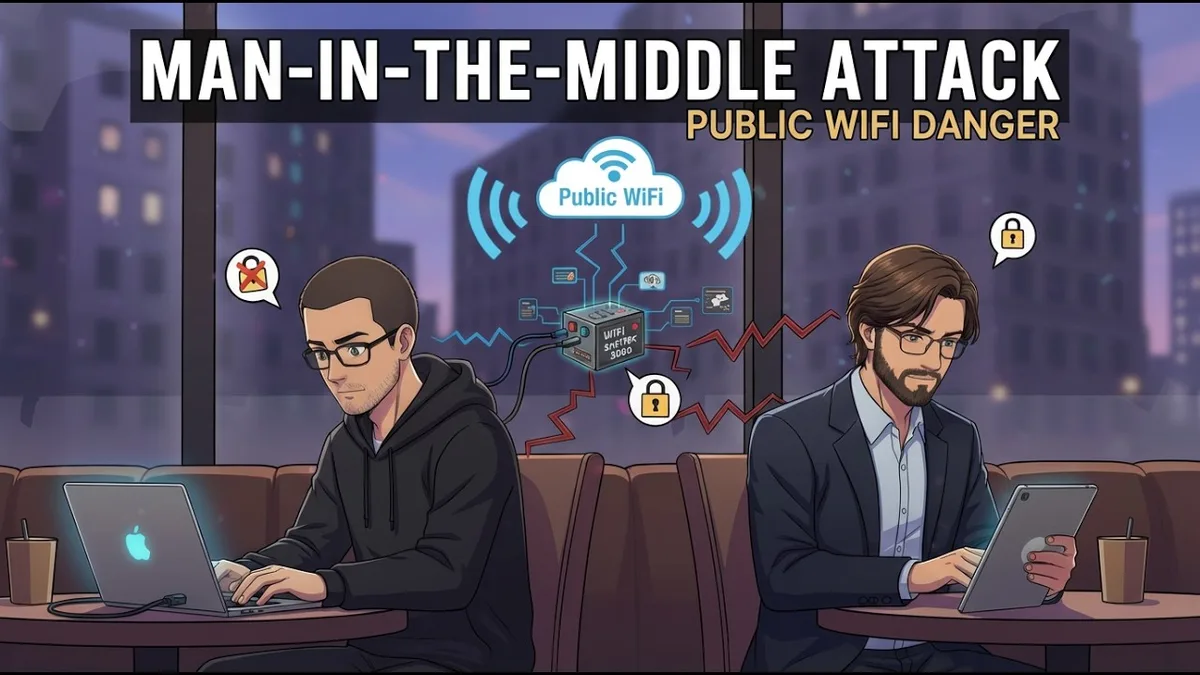
Image source: YouTube / Cyber Raaz (YouTube thumbnail (fair-use with source credit))
A MITM attack happens when someone intercepts the communication between your phone and the email server. On public Wi-Fi, an attacker can set up a rogue access point. When your mail app tries to connect, the rogue server intercepts the request and presents its own certificate.
If you accept it, the attacker captures your login credentials.
Never accept a certificate on a network you don't fully trust. Use your phone's cellular data or a VPN if you must connect. If you're experiencing connectivity issues on your home network, connecting over mobile data or checking your router's performance can help you maintain a stable and secure connection for email access.
Phishing Servers Disguised as Legitimate Email Hosts
Attackers can set up fake email servers that mimic your provider's login page. When your mail app connects, it sees a certificate that looks right but belongs to a different domain. Check the "Issued to" field in the certificate details.
If the server name doesn't match your email provider, it is a phishing attempt. Disconnect immediately and change your email password from a trusted device.
Why Major Email Providers (Gmail, Outlook, iCloud) Never Show This Warning
These providers use OAuth 2.0 authentication and pin their certificates. Certificate pinning means the mail app stores a copy of the provider's certificate. When the app connects, it compares the server's certificate against the pinned copy.
If they don't match, the app refuses to connect without showing you a warning.
Apple's iCloud uses certificates signed by Apple's internal CA. Google and Microsoft manage their own CAs. The entire chain is controlled from root to leaf, so there is never a trust mismatch.
The warning only appears when you use a third-party email server. That includes custom domains on shared hosting, VPS setups, or older Exchange servers running on-premises. If you're tired of seeing the warning, switching to a managed provider like Google Workspace or Microsoft 365 is the simplest long-term fix.
Just make sure your internet connection is fast enough to handle the transition smoothly, since email sync performance depends on your network speed.
Mistakes Most People Make When They See This Warning
Tapping "Accept" Without Checking the Details
The most common mistake is accepting the certificate without looking at any information on screen. Users see the warning, want it gone, and tap "Accept" without reading a single line. Always check the expiration date and the "Issued to" name before accepting.
If either looks wrong, cancel the connection.
Disabling SSL Entirely to Make the Warning Go Away
Some users change their mail account settings to use "None" for SSL instead of "Required." This makes the warning disappear because the app no longer checks for encryption. This is one of the worst things you can do. Without SSL or TLS, your email password and all message content travel in plain text.
Anyone on the same network can read everything. Never disable SSL.
Ignoring the Warning for Weeks
The warning appears every time you open the mail app. Some users close it and hope the problem fixes itself. Meanwhile, the expired certificate stays expired.
If you see the warning, set a reminder to investigate within 24 hours. If you don't control the server yourself, contact your email hosting provider.
How to Prevent the "Connection Insecure" Warning in the Future
Use an Email Provider with Proper TLS and OAuth
The simplest prevention is to use a provider that handles certificate management for you. Google Workspace, Microsoft 365, and iCloud all manage their own certificates and use OAuth. You never see the warning because the infrastructure is maintained by dedicated security teams.
Keep Your Self-Hosted Server's SSL Certificate Auto-Renewed
Image source: YouTube / minimul (YouTube thumbnail (fair-use with source credit))
If you run your own server, set up automatic renewal for Let's Encrypt. Certbot includes a systemd timer that runs twice daily and renews any certificate expiring within 30 days. Verify the timer is active with systemctl status certbot.timer.
For paid certificates, set calendar reminders 30 days before expiration.
Verify Your Server's TLS Configuration Periodically
Run the OpenSSL check once a month. A quick command like openssl s_client -connect yourserver.com:993 takes 10 seconds and tells you if anything changed. If you manage multiple servers, create a script that checks all of them and emails you the results.
This is especially important after server updates, since patches can sometimes reset TLS configurations.
Frequently Asked Questions
Can Someone Steal My Email If I Ignore This Warning?
Yes, but only if you accept the certificate on an untrusted network. If you ignore the warning and keep using the app, you simply can't access your email. The app blocks the connection until you accept the certificate or fix the server.
The real danger comes from accepting without verifying.
Why Does the Warning Keep Coming Back Even After I Accept?
Apple Mail on iOS does not permanently trust certificates you accept through the warning dialog. Each new connection triggers the check again. To stop the warning permanently, you must install the certificate as a trusted profile or fix the server configuration so the certificate validates properly.
Is It Safe to Use a Self-Signed Certificate for Personal Email?
Yes, for personal use on a server you control. Generate the certificate, install it on your phone as a trusted profile, and the warning disappears. The risk is lower because nobody else manages your server.
Just keep the certificate renewed and your server software updated.
What Should I Do If I Already Accepted a Suspicious Certificate?
Change your email password immediately from a different device on a trusted network. Enable two-factor authentication if your provider supports it. Run a security scan on your phone and revoke any app-specific passwords.
If you notice unusual activity, contact your email provider's support team.
The Bottom Line: When to Trust the Warning and When to Fix the Server
Every "connection insecure" warning deserves attention. The question is whether you should fix the server or walk away from the network.
If you control the email server, the warning is a configuration problem. Renew the certificate, upgrade the TLS version, or match the hostname. Fix it today.
The warning is your server telling you something is broken, and broken certificates don't fix themselves.
If you are on a public network or using a server you don't control, treat the warning as a security threat. Do not accept the certificate. Disconnect from the network and contact your email provider from a safe connection.
The warning exists to protect your credentials. Trust it.

Similar Posts