Do You Need Calibration Tool for Editing Monitor
You look at your monitor. You edit a photo, adjust the colors until they feel right. Then you send it to a client, or upload it to Instagram, or print it.
And it looks completely different. That mismatch is why people start asking: do you need calibration tool for editing monitor? The short version is: it depends on what you do with those images.
For some editors, a calibrator is essential. For others, it's money you don't need to spend.
Manufacturer specs indicate most monitors drift by a Delta E of 3 to 6 within six months of use. A Delta E under 2 is considered visually acceptable for most work. We'll walk through when you actually need a hardware calibrator, when you can skip it, and how to decide without guessing.
Quick Answer
You need a calibration tool if you do professional print work, video color grading, or any client-facing color-critical work. You can skip it if you only edit for web, social media, or personal projects on a decent modern monitor. A hardware calibrator costs $150 to $300 and takes 10 minutes every month.
Software-only calibration is unreliable for print.
The Real Problem: Why Your Monitor Looks Great to You but Terrible to Everyone Else
Every monitor ships with factory settings tuned to look punchy and bright on a showroom floor. Those settings are designed to sell TVs, not to give you accurate color. Out of the box, your monitor's white point might be too cool (bluish) or too warm (yellowish).
Its gamma curve is probably set to a generic 2.2, but not precisely. And the backlight drifts over time as the LEDs age.
The result is that the red you see on screen might actually be a burnt orange. The skin tones you carefully balanced could look sickly on another calibrated display. This isn't a flaw in your monitor; it's a normal behavior of any uncalibrated display.
The problem is that your eyes adapt to your monitor's inaccuracies. After 20 minutes of editing, that slightly blue white looks "white" to you. So you compensate for a color cast you don't even see.
Image source: Bing (Web (fair-use with source credit))
The fix is a colorimeter, a small puck that sits on your screen and measures the actual color output. It creates an ICC profile that tells your computer how to correct the monitor's built-in inaccuracies. But not everyone needs that level of precision.
Let's break down what actually happens inside the calibration process.
What Actually Happens When You Calibrate (and When It Doesn't Matter)
Calibration is a two-part process. First, you adjust the monitor's hardware settings (brightness, contrast, RGB gains) to hit specific targets. Then you create a profile that corrects the remaining errors in software.
The hardware calibrator measures patches of color, typically 50 to 100 patches, and builds a correction map.
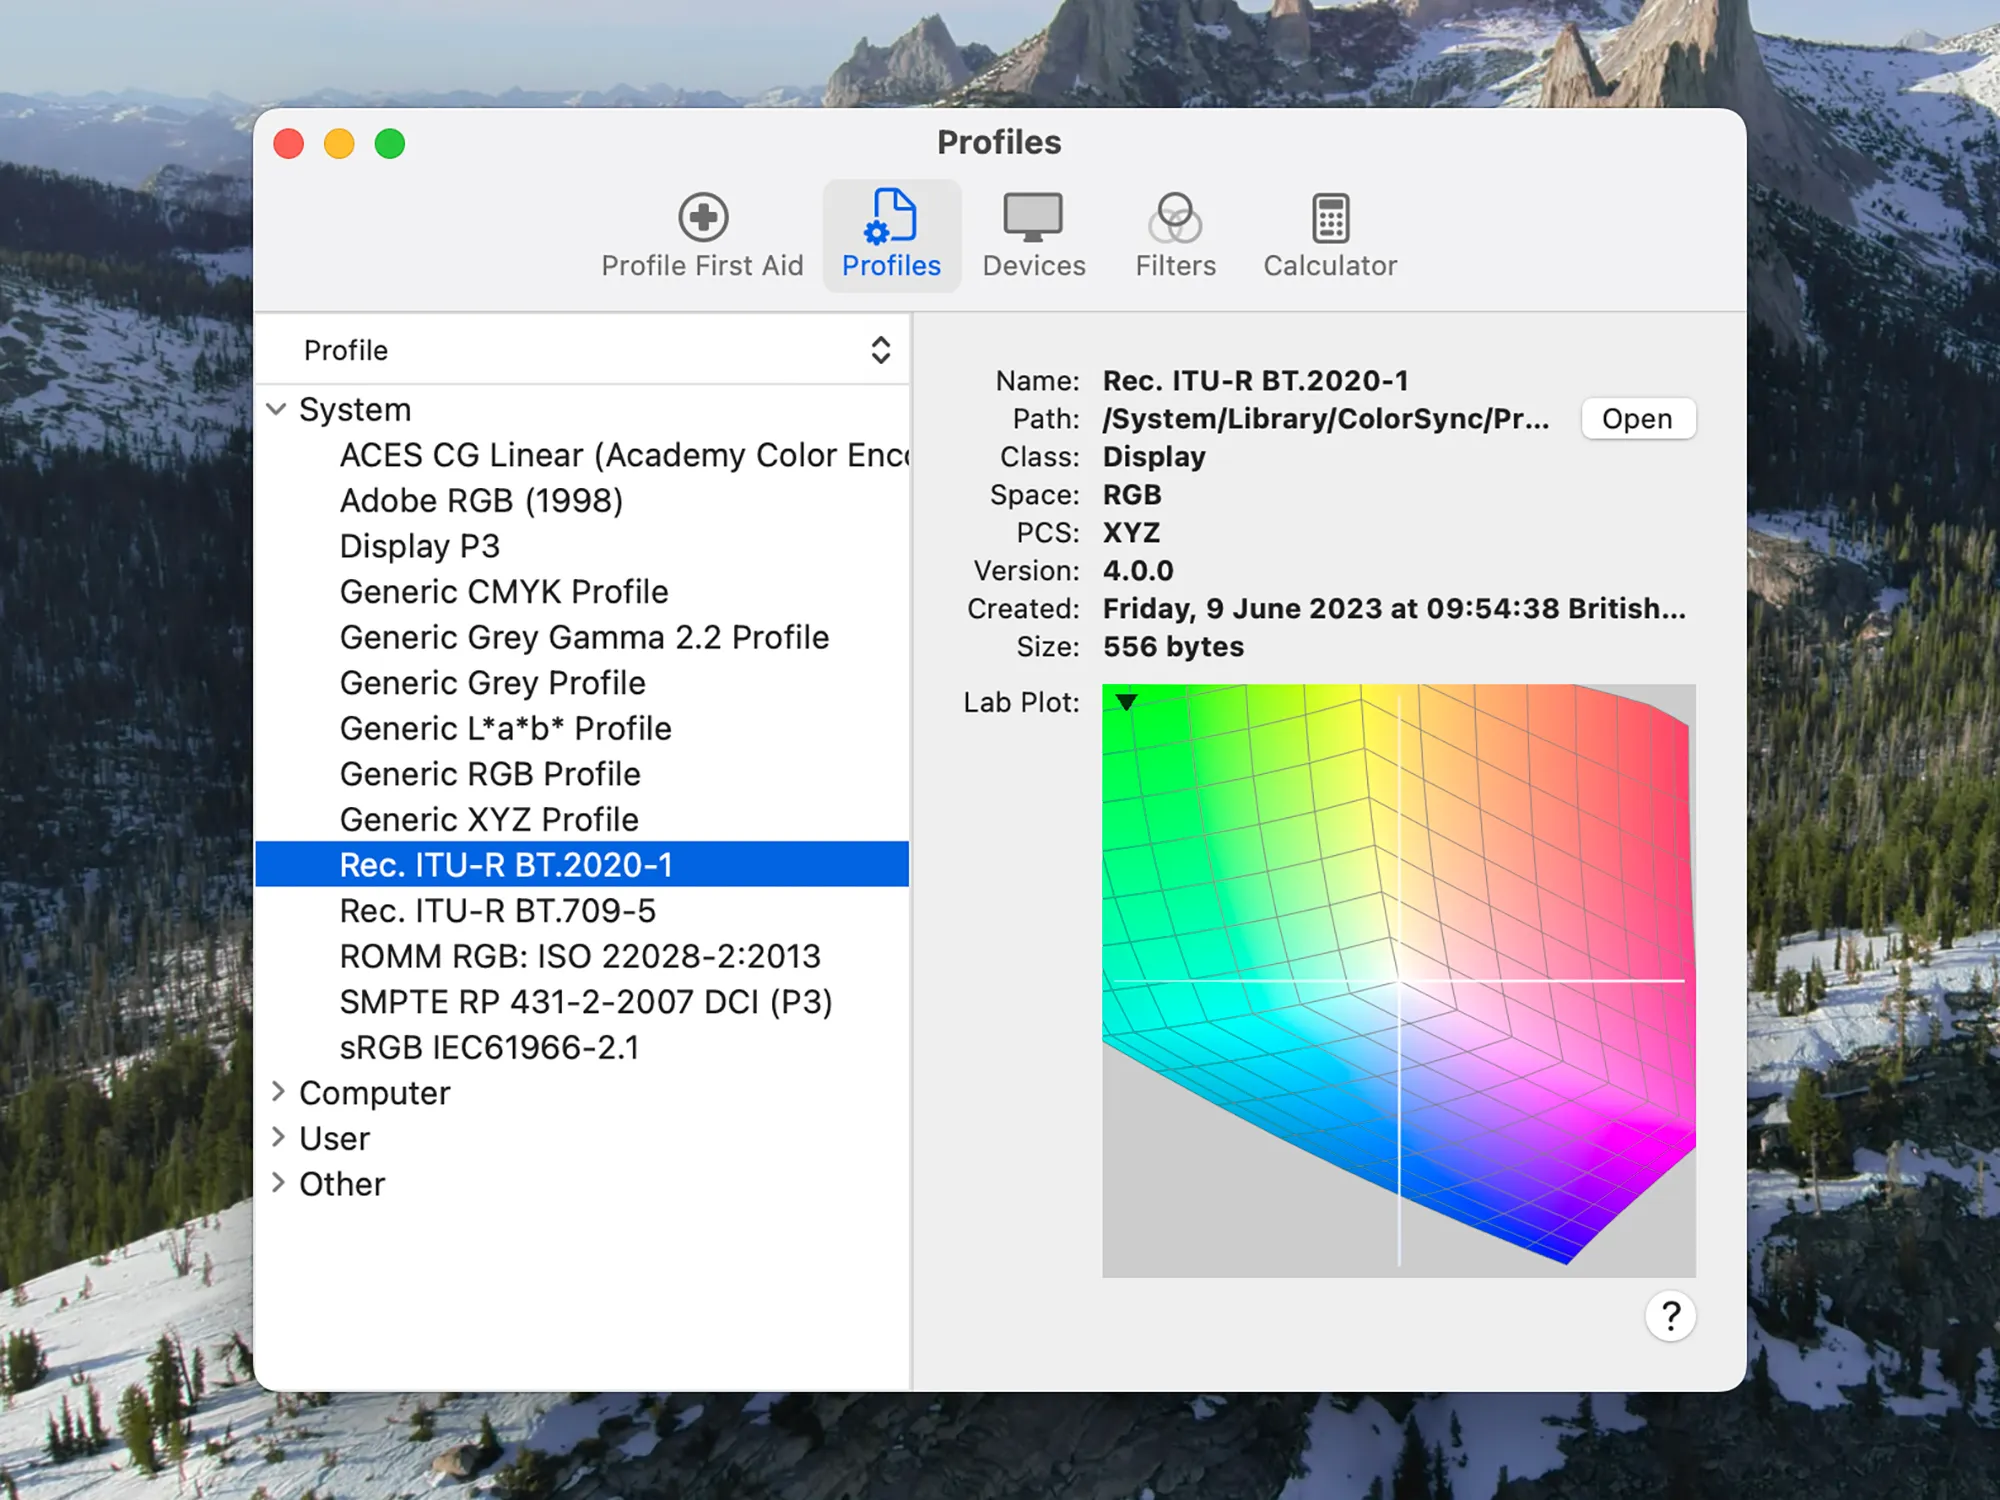
The targets you choose matter. For most photo and design work, the standard is:
- Gamma: 2.2
- White point: D65 (6500K)
- Luminance: 120 cd/m²
For video grading, you might use gamma 2.4 and 100 cd/m². For print proofing, D50 white point is common. The calibrator software walks you through setting these before you start.
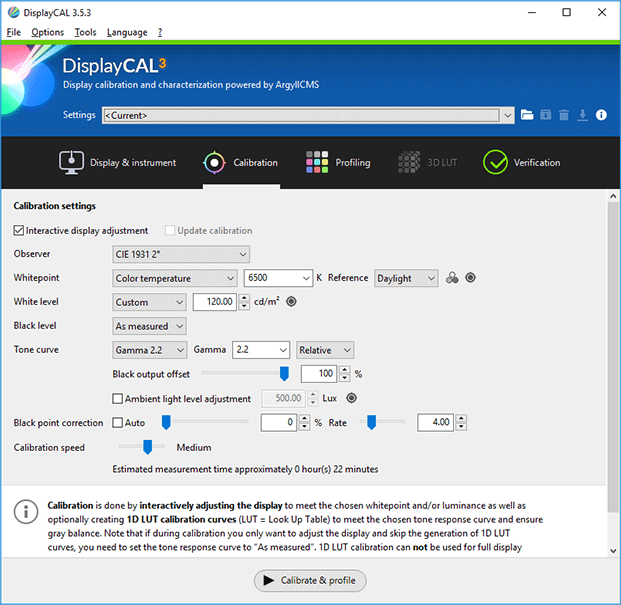
Image source: Bing (Web (fair-use with source credit))
But here's where it gets conditional. If you only edit for web or social media, your viewers are looking at uncalibrated phone screens and laptops anyway. A perfectly calibrated monitor won't guarantee they see your colors right.
The benefit is that you have a consistent reference point for your own editing process.
Calibration also doesn't fix a bad monitor. If your display covers only 65% of sRGB, a calibrator won't add missing colors. It can only make the colors it has accurate.
So the monitor you own is the first big variable in your decision.
The Big Condition Variables That Decide Your Answer
Three factors determine whether calibration is worth your money and time. Let's go through each.
What Kind of Editing Do You Really Do?
Print photography demands the highest accuracy. If you send files to a print lab or print yourself, a calibrator is nearly mandatory. The printer's output is physical and permanent.
A color mismatch means wasted ink, paper, and money.
If you shoot for web, social media, or YouTube thumbnails, the tolerance is much looser. Your audience sees your images on thousands of different devices. You don't need laboratory-grade accuracy.
Video color grading sits in the middle. If you're grading for broadcast or cinema, calibration is standard practice. For YouTube or streaming, many editors get by with a well-set monitor and no calibrator.
How Accurate Does Your Color Actually Need to Be?
This is the Delta E question. Delta E measures the difference between the intended color and the displayed color. A Delta E of 1 means a barely perceptible difference.
A Delta E of 3 is noticeable side-by-side but acceptable for most work.
- Delta E under 1: Critical for commercial print, medical imaging, and museum reproduction.
- Delta E under 2: Professional photography, graphic design with brand colors.
- Delta E under 3: Web design, social media, hobbyist work.
If you've never had a client complain about color, you might be fine with Delta E 3 or 4. If you get rejections, you need tighter accuracy.
What Monitor Do You Already Own?
A high-end monitor changes the math. Pro displays like the Eizo ColorEdge or BenQ SW series come with factory calibration reports showing Delta E under 2. They also have hardware LUTs that store the calibration directly in the monitor, so it survives driver changes.
If you own one of these, you can skip the calibrator for a year or more.
Mid-range monitors (Dell UltraSharp, ASUS ProArt) come with factory reports too, but they're less precise. A calibrator can tighten them to Delta E under 1.
Budget monitors often have poor uniformity and limited color gamut. A calibrator helps, but you're polishing a low-quality panel. Most experts recommend saving the calibrator money toward a better monitor instead.
The Decision Tree: Do You Need a Calibration Tool or Not?
Here's the branching logic. Follow your situation.
Branch 1 – You Definitely Need a Hardware Calibrator
You fall into this branch if:
- You do commercial print work or photography sold to clients.
- You're a video colorist for broadcast, cinema, or high-end streaming.
- You work on a team with a color-managed pipeline.
- You proof for SWOP or Fogra certification.
- You've had prints rejected for color mismatch.
Action: Buy a calibrator. Spend $150 to $300. Recalibrate every 2 to 4 weeks.
Branch 2 – You Might Want One (But It's Not Urgent)
You fall here if:
- You're a serious hobbyist who prints occasionally.
- You're a content creator who wants consistent color across devices.
- You own a decent mid-range monitor but no factory report.
- You've noticed your edits look different on your phone versus your desktop.
Action: Renting a calibrator for a single session is a good test. If you find the improvement compelling, buy one. Otherwise, calibrate once and repeat every 3 months.
Branch 3 – You Can Skip It (For Now)
You fall here if:
- You only design for web, UI, or social media.
- You own a factory-calibrated pro monitor (Eizo, BenQ SW/PV series).
- You edit only personal photos for social media or prints you don't sell.
- You're on a tight budget and your current monitor is old or low-end.
Action: Use the built-in macOS calibration assistant or Windows display calibration tool for a rough adjustment. Save your money for a better monitor first.
The "By-Eye" Trap: Why Software-Only Calibration Fails Most People
Every operating system includes a calibration utility. macOS has the Display Calibrator Assistant. Windows has the Display Color Calibration tool. They let you adjust gamma, brightness, contrast, and color balance by moving sliders until "the image looks right." This sounds like a free alternative, but it has a fatal flaw.
Your eyes are not objective instruments. They adapt to the current white point automatically. You can't tell if the gray patch on screen is slightly blue or slightly yellow because your brain normalizes it within seconds.
The best you can do with by-eye calibration is get close to a reasonable gamma curve. But you'll miss the white point by 500K to 1000K easily, and you'll never hit a precise luminance target.
Manufacturer specifications indicate that software-only calibration typically achieves a Delta E of 3 to 6. A hardware calibrator consistently hits Delta E under 1.5. That difference matters for print and client work.
For web design, it's usually acceptable.
There's another risk: software-only calibration can cause banding on 8-bit monitors. The calibration curve applies corrections in the graphics driver, which eats into the available color levels. A hardware LUT or a hardware calibrator that adjusts the monitor directly avoids this.
If your monitor is 8-bit (typical for most sub-$400 displays), software calibration can make gradients look posterized.
So if you're just shooting for personal social media, free calibration is fine. But don't trust it for anything you're getting paid for.
What to Buy If You Decide You Need One
You have three main options for a hardware calibrator: the SpyderX Pro, the i1Display Pro, and the Calibrite ColorChecker Display Plus. All three do essentially the same job. They measure color patches, generate an ICC profile, and tighten your monitor to Delta E under 1.5.
But there are real differences in speed, software, and build quality.
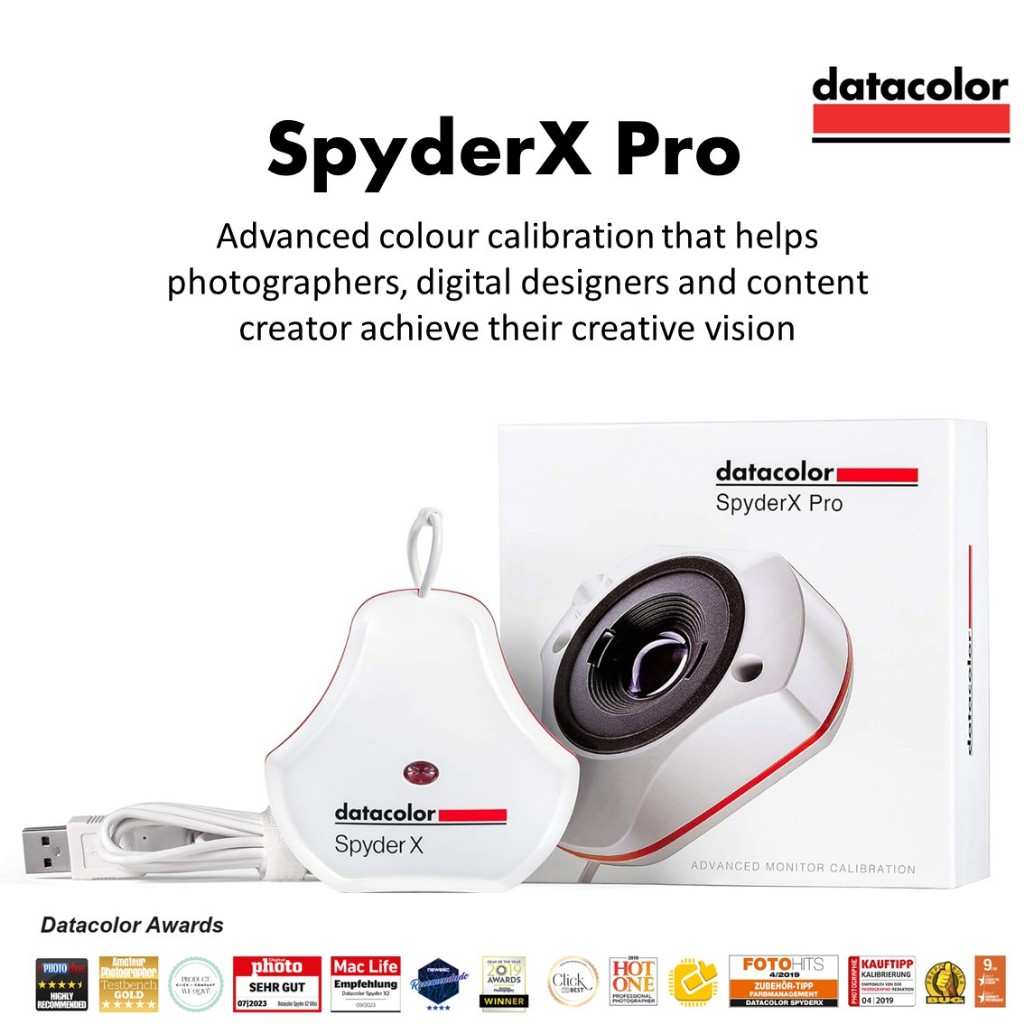
Image source: Bing (Web (fair-use with source credit))
The SpyderX Pro uses a lens-based sensor that measures faster than older models. Assembly reviews report a full calibration in about 5 minutes. It costs around $150 as of 2026.
The i1Display Pro costs roughly $270 and is widely used by professional studios. It supports advanced software like DisplayCAL, which gives you more control over targets and validation.
The Calibrite ColorChecker Display Plus is essentially the same hardware as the i1Display Pro at a slightly lower price (about $230). It comes with Calibrite's own software, which is simpler but still capable. All three work with Windows, macOS, and some Linux setups.
Which to pick? If accuracy beyond Delta E 1 is critical, go with the i1Display Pro or Calibrite. If you want a fast, simple workflow and a lower price, the SpyderX Pro is excellent. You can also rent a calibrator from camera stores or online services for about $40 per week.
That makes sense if you calibrate once a year and want to save money.
Step-by-Step: A Real Calibration Workflow in Under 15 Minutes
Here is the standard procedure. It works the same for all three calibrators.
Before you start: Turn your monitor on and let it warm up for 20 to 30 minutes. The backlight needs to stabilize. Disable any automatic brightness, True Tone, Night Shift, or ambient light sensors.
Set the room lighting to what you normally work in.
Step 1: Install the calibrator software and plug the device into a USB port. For the SpyderX Pro, use SpyderX Utility. For i1Display Pro, use DisplayCAL or i1Profiler.
Step 2: In the software, choose your target settings. For photo and web work: gamma 2.2, white point D65, luminance 120 cd/m². For video: gamma 2.4, luminance 100 cd/m².
For print proofing: gamma 1.8 or 2.2 with D50 white point.
Step 3: Place the calibrator on the center of the screen. It will hang in place if your monitor is tilted back or you use the counterweight. The software will display a series of colored squares.
The calibrator measures each one.
Step 4: The measurement takes 5 to 10 minutes. Do not touch the monitor or change lighting during this time. When it finishes, the software saves an ICC profile and sets it as the default.
Step 5: Validate the calibration. Most software includes a verification step that shows before/after Delta E. A good result is Delta E under 2, with most patches under 1.
Pro tip: Save the profile with a name that includes the date and your target settings. That way you can track drift over time.
Common Mistakes That Ruin Calibration (Even with Good Gear)
You can follow every step perfectly and still get poor results if you overlook these details.
Mistake 1: Calibrating in changing lighting. Your monitor looks different in bright daylight versus a dim room at night. Calibration is specific to the ambient light level.
If your room has a large window, calibrate with the blinds in the position you use most often. Do not calibrate at noon in sunlight then edit at 10 PM under a desk lamp.
Mistake 2: Ignoring monitor uniformity. A cheap monitor can have patches of color across the screen. Calibrating only the center leaves the edges wrong.
Some software offers multi-point measurement (5 or 9 points). Use it if your monitor is older or off-brand. The result is a profile that averages the whole screen.
Mistake 3: Forgetting to disable adaptive display features. MacOS True Tone, Windows Night Light, and monitor OSD auto-brightness all change the color output based on ambient conditions. They override your calibration profile.
Turn them off before you start and leave them off.
Mistake 4: Using the wrong white point for your work. D65 (6500K) is standard for most work. D50 (5000K) is for print proofing.
Using D50 for web work makes everything look too warm. Check what your output medium expects.
Image source: Bing (Web (fair-use with source credit))
Mistake 5: Not recalibrating often enough. Monitor drift is gradual. You won't notice it until a fresh calibration shocks you.
Stick to a schedule.
How Often Should You Recalibrate? (It's Not Once a Year)
Monitors drift for two reasons: the backlight ages and the color filters degrade slightly. This happens faster in the first six months of use and then slows down. Pro monitors drift slower than consumer ones.
- Critical print work: Every 2 to 4 weeks. Commercial printers and proofing studios follow this schedule.
- Professional photography or design: Every 4 to 6 weeks.
- Hobbyist with mid-range monitor: Every 3 months.
- Factory-calibrated pro monitor: Every 6 to 12 months. Check the manufacturer guidelines. Eizo recommends annual recalibration for their ColorEdge line.
- Never calibrated before: Do it now, then set a reminder.
One exception: if you change your room lighting significantly (moving desks, adding a window treatment), recalibrate immediately. The calibration profile is tied to ambient light.
The Money Question: Cost vs. Benefit for Your Specific Situation
A calibrator costs $150 to $300. That is a one-time expense for a device that lasts years if you handle it carefully. Compare that to the cost of color reprints, client rework, or the time wasted fixing mismatched images.
| Situation | Cost of no calibrator | Calibrator worth it? |
|---|---|---|
| Hobbyist, social media only | Low (frustration, no money lost) | No |
| Hobbyist, occasional prints | Repaper cost if prints look wrong | Maybe, if you print often |
| Freelance photographer | Client rejections, lost jobs | Yes |
| Graphic designer, brand work | Client dissatisfaction, revisions | Yes |
| Video colorist | Broadcast compliance failures | Yes |
| Student on a budget | Low stakes | Skip, save for better monitor |
If you fall into the "maybe" category, consider renting first. Many camera stores rent calibrators for $30 to $50 for a week. Calibrate once, check the improvement, and decide if the consistency is worth ownership.
Another perspective: a $250 calibrator paired with a $400 monitor gives you better results than a $650 monitor with no calibrator. The calibrator makes the most difference on mid-range displays. On a $200 monitor, the panel quality limits the benefit.
Quick Reference: Decision Guide Table
Here is a one-stop table to check against your situation.
| Your situation | Monitor type | Need a calibrator? | Recommended action |
|---|---|---|---|
| Print photographer selling work | Any | Yes | Buy SpyderX Pro or i1Display Pro. Calibrate monthly. |
| Web/UI designer | Mid-range or better | Probably not | Use OS calibration. Upgrade monitor first if budget allows. |
| Hobbyist, occasional prints | Budget | Maybe | Rent once. If results impress you, buy. |
| Video colorist | Pro-grade | Yes | i1Display Pro. Calibrate biweekly. Use gamma 2.4, 100 cd/m². |
| Social media content creator | Any | No | Skip it. Your audience sees uncalibrated devices anyway. |
| Student learning photography | Budget | No | Save the $200 for a better monitor later. |
Final Take: One Honest Sentence for Each Type of User
Photographer selling prints: Buy a calibrator and use it monthly.
Web designer: You are fine without one. Spend the money on a better monitor.
Hobbyist who prints occasionally: Rent a calibrator once. Then decide.
Video colorist: A calibrator is not optional. Get the i1Display Pro.
Social media creator: Skip it. Your viewers will never see your calibrated colors.
Frequently Asked Questions
Can I calibrate my monitor without a hardware tool?
Yes, but the accuracy is limited. The macOS Display Calibrator Assistant and Windows Display Color Calibration tool let you adjust by eye. You will achieve a Delta E of 3 to 6 at best.
That is acceptable for web design but not for print or client work.
How long does a calibration take?
The full process takes about 15 to 20 minutes. This includes warm-up time (20 to 30 minutes) plus the measurement itself (5 to 10 minutes). The actual measurement is automated.
You just need to start it and wait.
Do I need to recalibrate after a macOS or Windows update?
Not usually. The ICC profile survives OS updates. However, if the update resets your display settings or changes color management behavior, check your profile.
Recalibrating after a major OS version upgrade is a safe habit.
Does a calibrator fix a bad monitor?
No. A calibrator makes existing colors accurate. It cannot add missing colors or fix poor panel uniformity.
If your monitor covers less than 90% of sRGB, upgrade the monitor first. The calibrator will help more on a decent panel.
Can one calibrator work for multiple monitors?
Yes. Most calibrators are not locked to a single device. You can calibrate as many monitors as you want with the same puck.
Each monitor gets its own ICC profile. Just store the profiles and switch between them.
Is there a free alternative to paid calibrator software?
Yes. DisplayCAL is free and open source. It works with i1Display Pro and Calibrite devices.
It offers more control than the bundled software. The SpyderX Pro does not fully support DisplayCAL. Check compatibility before downloading.

Similar Posts