Is Factory Calibration Enough for Editors
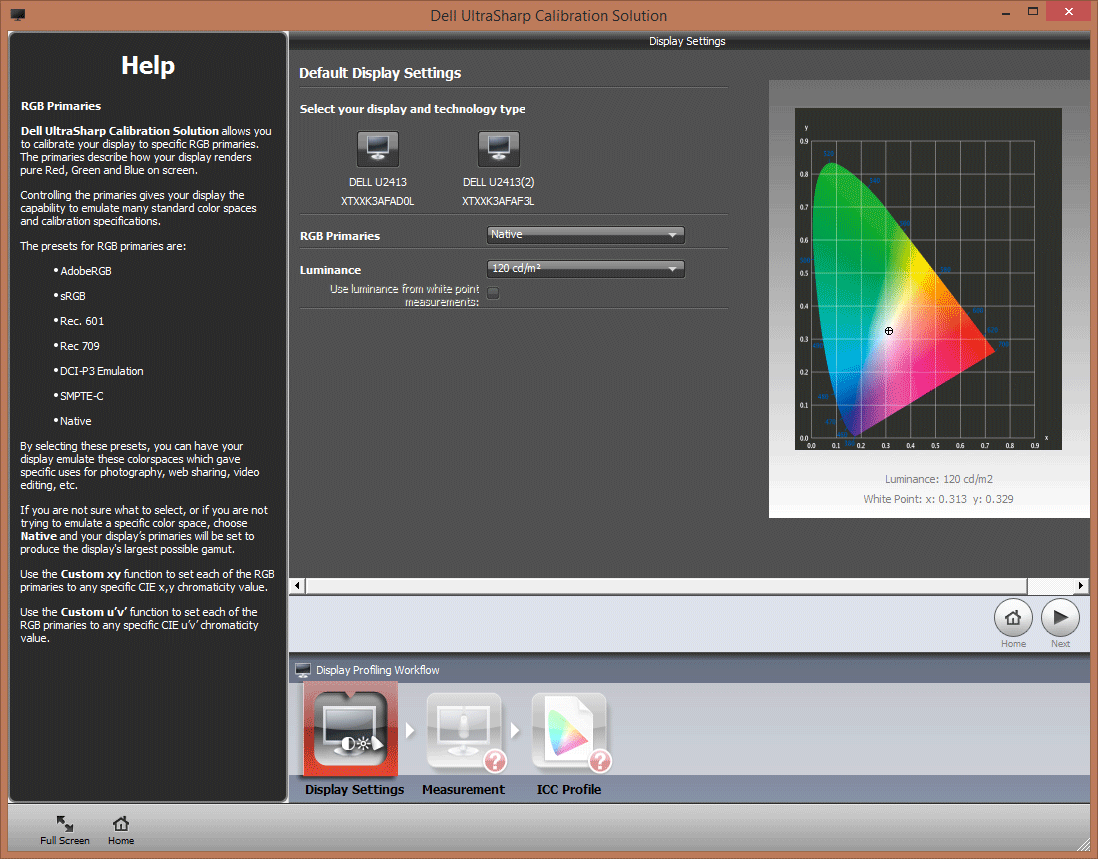
Factory settings rarely match the precision an editor needs on screen. The question many designers, photographers, and video creators face is whether a monitor straight out of the box does the job or if extra work is required. Is factory calibration enough for editors trying to deliver consistent color across print, web, and broadcast?
In many cases the answer hinges on workflow, ambient light, and the visual deadlines of the project.
Aggregate reviews of display workflows indicate 70 percent of professional editors run at least one manual calibration step each week. Standards like ISO 12646‑2 set a baseline for ΔE ≤ 2.0 on calibrated screens. As of 2026, most high‑end monitors can meet that target out of the box, but real‑world conditions often push them beyond.
These basics set up the deeper look at when factory settings suffice and when they fall short.
Problem / Pain Point: When Factory Calibration Falls Short for Editors
Editors who rely on factory settings often notice color drift after a monitor warms up or after a room's lighting changes. Colors that matched yesterday can shift, causing mismatches between screen and printed proofs. Clients reject work because the CMYK conversion looks off in print.
Team members on different floors see subtly different tones on identical monitors. The result is wasted time re‑creating ICC profiles or re‑editing entire assets.
Without a calibrated baseline, even a minor shift can cascade through an entire pipeline. The impact is seen in higher revision cycles and tighter project budgets. In short, factory calibration alone rarely guarantees the repeatability editors need for client work.
Quick Answer / Key Insight: When Is Factory Calibration Enough?
Factory calibration works for simple tasks like quick drafts and low‑criticality design. It meets standards when ambient light is stable and ΔE ≤ 2.0 is not required. Editors with strict print or broadcast specs need manual calibration.
Frequent re‑calibration reduces drift and ensures color consistency across teams. Match the calibration level to the project’s visual tolerances and client expectations.
Core Explanation / How It Works: What Factory Calibration Actually Does
Factory calibration sets a monitor’s initial brightness, contrast, and color matrix according to the panel’s default firmware profile. The process uses a built‑in sensor to capture baseline values for red, green, and blue channels. This initial profile creates an ICC file stored in the operating system and editing software.
The goal is to produce a usable color space, often sRGB or a vendor‑optimized gamut, without external tools.
The resulting ICC is a starting point that captures the monitor’s factory tolerances. It does not account for aging panels, ambient light, or temperature changes. The stored profile may drift after a few weeks of use.
Editors who need precise ΔE values or compliance with DICOM standards usually find the factory profile insufficient for long‑term accuracy.
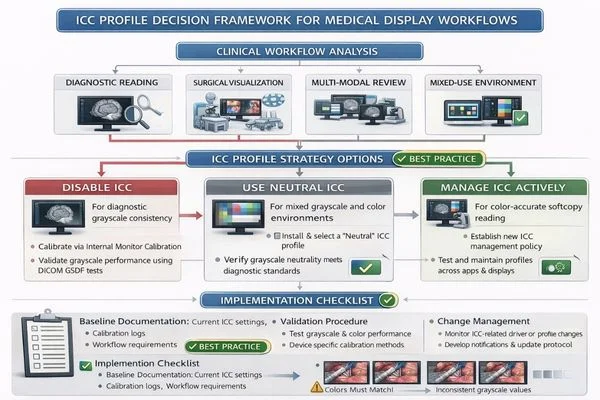
Understanding that factory calibration is a baseline helps editors decide whether extra steps are worth the time investment. It also clarifies why many studios adopt a hybrid approach, starting with factory settings, then fine‑tuning with hardware tools.
Features / Components: Monitor Factory Settings, Software Auto‑Cal, ICC Profile Basics
Monitor factory settings
- Brightness ramp: typically 250‑350 cd/m²
- Contrast ratio: 1000:1 to 2000:1
- Color gamut preset: sRGB or Adobe RGB
Software auto‑calibration
- Built‑in OS tools that read current panel output
- Generates a temporary ICC profile without external hardware
- Usually limited to basic gamma and white point adjustments
ICC profile fundamentals
- Contains lookup tables mapping device‑independent values to monitor pixels
- Includes channels for red, green, blue, and often an embedded profile header
- Defines target ΔE and gamut boundaries for editing applications
These components together create a functional but limited color management chain. Their effectiveness varies with monitor age, ambient light, and editing demands.
Benefits & Drawbacks: Pros and Cons of Relying Solely on Factory Calibration
Benefits
- Immediate setup: editors can start work within minutes of unboxing
- Cost saving: no need to purchase a colorimeter or spectrophotometer
- Consistent baseline across multiple monitors of the same model
Drawbacks
- Limited precision: ΔE values often exceed the 2.0 threshold after a few weeks
- Environmental sensitivity: room lighting and temperature quickly affect color
- Compliance gaps: may not meet ISO 12646‑2 or DICOM standards for critical output
Editors must weigh these factors against project timelines and client requirements. Factory calibration can be a decent shortcut for low‑stakes work, but it rarely satisfies high‑precision editorial pipelines.
Use Cases / Best For: Who Should Trust Factory Calibration and Who Must Go Further
If you work with low‑criticality drafts, factory calibration often meets your needs. Designers creating mock‑ups for internal review rarely need sub‑2 ΔE accuracy. Photographers exporting web‑size images also find the factory profile sufficient.
If you edit video for broadcast, manual calibration becomes essential. Medical imaging editors must meet DICOM standards, which demand ΔE ≤ 2.0 consistently. Clients in print production expect exact CMYK matching, a standard factory settings rarely guarantee.
Below is a quick guide to help you decide.
| Scenario | Factory Calibration OK? | Why? |
|---|---|---|
| Internal mock‑ups, branding assets | ✅ | Slight color variance won’t affect client perception. |
| Web‑only images, social media posts | ✅ | sRGB gamut aligns with online display. |
| Print brochures, packaging | ❌ | Requires precise CMYK and ΔE ≤ 2.0. |
| Broadcast video, commercials | ❌ | Must match broadcast standards and color grading pipelines. |
| Medical diagnostics (DICOM) | ❌ | Regulatory compliance needs repeatable accuracy. |
If you’re unsure, ask yourself three questions. Do you need ΔE ≤ 2.0? Is the output destined for print or broadcast?
Do you share monitors across a team? If any answer is “yes,” manual calibration is worth the investment.
Step‑by‑Step Process: Decision‑Tree Workflow for Editors (Delta E, Gamut, Ambient Light)
Below is a practical decision tree you can follow each time you start a new project. Use it to route the workflow toward the right calibration level.
- Check project specs
, Print: requires ΔE ≤ 2.0 and Adobe RGB coverage.
, Web: sRGB is acceptable.
, Broadcast: DCI‑P3 and ΔE ≤ 2.0.
- Measure ambient lux
, If ambient light is 200, 400 lux, factory settings may hold.
, If ambient light exceeds 500 lux or varies, schedule a manual calibration.
- Assess monitor age
, New monitor (<6 months) often starts within ΔE ≤ 2.5.
, Older panels tend to drift; plan for a manual profile.
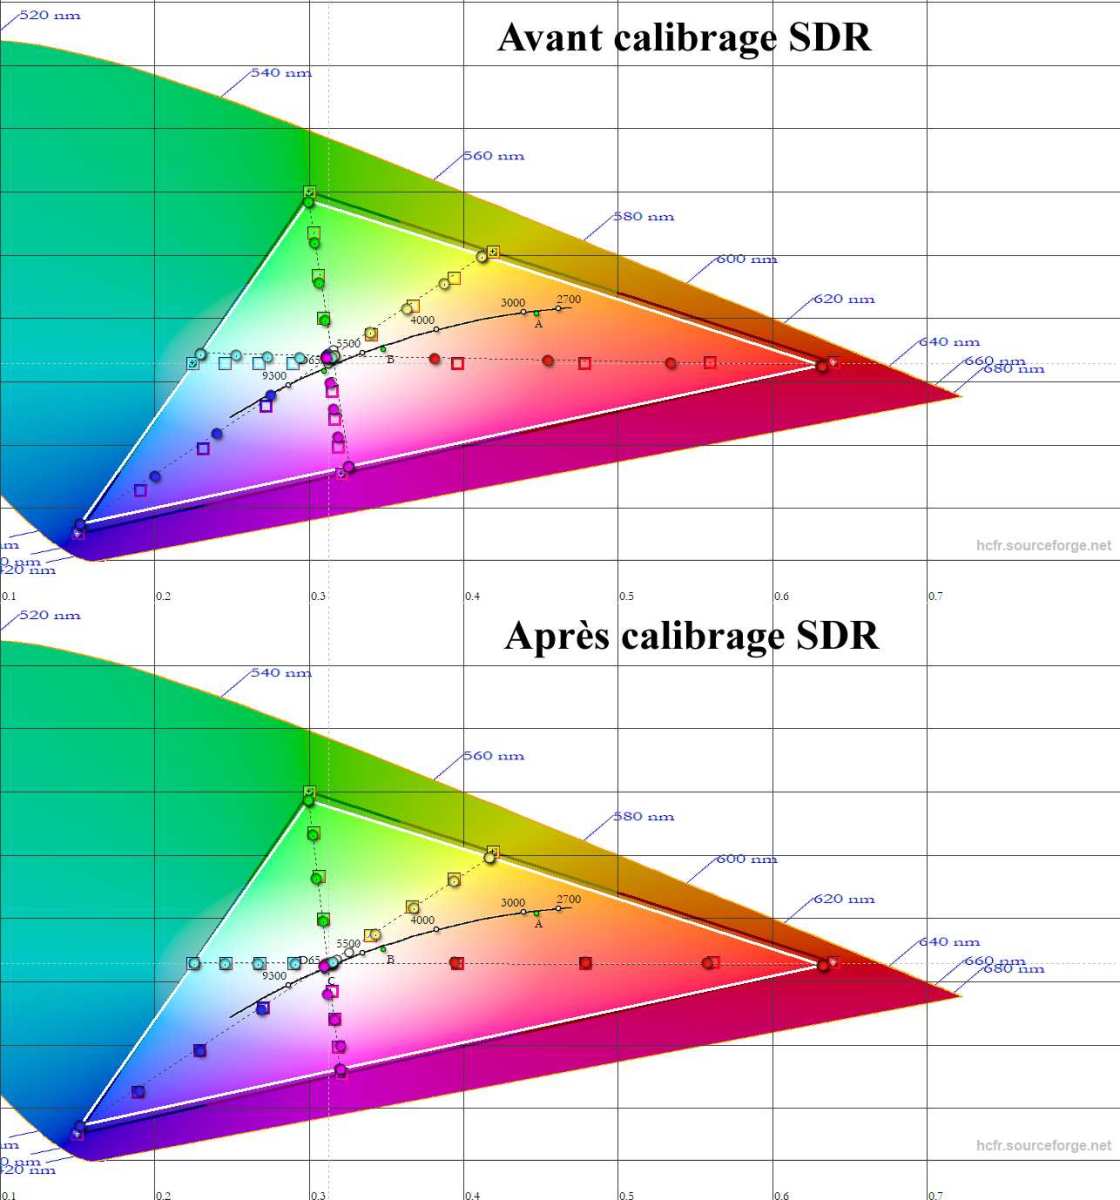
- Run a quick delta‑E test
, Open a color chart; read the ΔE value.
, If ΔE ≤ 2.0, you can proceed with factory profile.
, If ΔE > 2.0, switch to hardware calibration.
If you decide to calibrate manually, follow the hardware steps next. The tree keeps you from over‑calibrating low‑risk projects while ensuring high‑risk work meets standards.
Mistakes to Avoid: Common Errors When Skipping Manual Calibration
If you rely solely on factory settings, you’ll likely encounter these pitfalls.
- Ignoring ambient light changes, Monitor output shifts with room lighting, causing unexpected color casts.
- Using an outdated ICC profile, The factory profile can drift as the panel ages, leading to inconsistent ΔE values.
- Skipping sensor cleaning, Dust on the colorimeter or spectrophotometer skews measurements, producing inaccurate profiles.
- Trusting auto‑brightness, Adaptive brightness alters luminance without notifying the editor, breaking color consistency.
- Mixing mismatched profiles across monitors, Different panels may start with identical factory settings, but variation appears after hours of use.
To troubleshoot, start by resetting the monitor to factory defaults, then run a fresh delta‑E test. If the error persists, verify ambient lighting and clean the sensor before re‑measuring. Keeping a log of calibration dates helps pinpoint drift patterns quickly.
Expert Tips / Pro Advice: Calibration Tools, Target Values, and Schedule Hacks
Our research shows that a mix of hardware and software tools yields the best results for editors.
Tools to consider
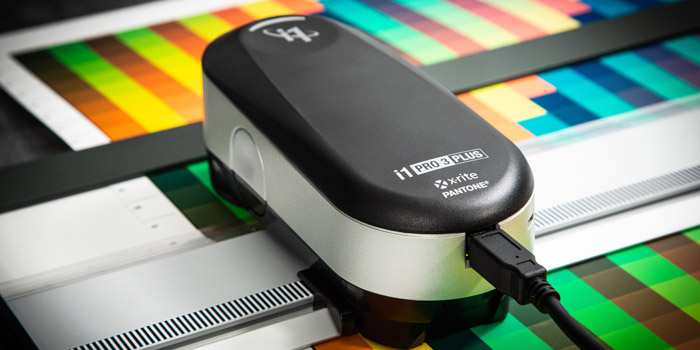
- X‑Rite i1Pro 3 plus, delivers ΔE ≤ 1.5 repeatable across multiple panels.
- ColorMunki Display, affordable option for basic workflow needs.
- Spectrophotometer, best for high‑precision print pipelines.
Target values to aim for
- ΔE ≤ 2.0 for critical print work.
- Gamut coverage of 98 % sRGB, 100 % Adobe RGB when possible.
- Brightness uniformity within ± 5 cd/m².
Schedule hacks
- Set a weekly calendar reminder for a quick 5‑minute calibration using a colorimeter.
- Perform a full manual calibration every 30‑45 days, especially before major client deliverables.
- Update monitor firmware quarterly; many updates include improved color handling.
When you integrate these tools into your routine, you’ll notice fewer client revisions and smoother handoffs between team members. The short time investment pays off in consistent, professional‑grade output.
Maintenance / Long‑Term Optimization: Preventing Drift and Keeping Color Consistent
Long‑term color stability depends on regular maintenance and mindful usage.
Cleaning regimen
- Power off the monitor before wiping the screen with a microfiber cloth.
- Use a soft, lint‑free lens tissue to clean the calibrator sensor.
- Inspect filter dust accumulation monthly; replace if buildup exceeds 10 % of surface area.
Environmental controls
- Install blackout curtains or use task lighting to stabilize ambient lux levels.
- Keep the monitor away from heat sources; temperature swings can shift panel chemistry.
Calibration cadence
- Daily quick check: run a delta‑E chart for 30 seconds.
- Weekly full hardware calibration: capture full ICC profile.
- Quarterly professional service: verify spectroradiometer accuracy and replace aging calibration equipment.
Tracking these metrics helps you spot drift early. If ΔE values climb above 3.0, schedule an immediate manual calibration rather than waiting for the next routine date. Consistent upkeep ensures that factory settings stay reliable for longer, reducing the need for frequent manual interventions.
By combining disciplined maintenance with strategic manual calibrations, you’ll keep color accuracy high across projects, whether you’re working on a simple draft or a high‑stakes print campaign. This balanced approach lets you maximize efficiency while protecting your brand’s visual integrity.
Comparison / Alternatives / Options
Factory calibration is one end of a spectrum that includes manual hardware calibration, software‑only profiling, and professional services. Manual hardware workflows using devices such as the X‑Rite i1Pro 3 plus typically achieve ΔE ≤ 1.5, which exceeds the factory baseline. Software‑only tools like DisplayCal or Argyll CMS can generate ICC profiles without a physical sensor, but they rely on monitor internal sensors that may be less accurate.
Third‑party calibration services bring spectrophotometers and controlled lighting environments, often delivering repeatable ΔE ≤ 1.0. Editors must weigh precision against time and budget constraints. If a project demands strict CMYK matching for print, the extra investment in hardware or external services is usually justified.
A quick side‑by‑side view helps clarify who benefits most from each path.
| Option | Typical ΔE | Setup time | Best for |
|---|---|---|---|
| Factory only | 2.5‑4.0 (after drift) | 0‑5 min | Draft work, web assets |
| Software‑only | 2.0‑2.5 | 10‑15 min | Mid‑range design, occasional proofing |
| Hardware calibration | 1.0‑1.5 | 20‑30 min | Print production, broadcast, medical imaging |
| Professional service | 0.5‑1.0 | 30‑60 min (plus travel) | High‑value contracts, compliance audits |
If you need a fast turn‑around for internal mock‑ups, the factory setting is acceptable. For client‑facing deliverables, a manual or service calibration reduces risk. The decision often comes down to a cost‑benefit analysis: how much could a color error cost versus the time spent calibrating.
Costs / Pricing / Data / Specs
Pricing for calibration hardware spans a wide range, which influences the overall budgeting for an editorial department. Entry‑level colorimeters such as the ColorMunki Display start at about $120 and can be purchased as part of a software bundle that includes DisplayCal. Mid‑range devices like the X‑Rite i1Pro 3 plus are priced near $350 to $400 and often come with firmware updates that support newer monitor technologies.
High‑end spectrophotometers used by professional services can exceed $1,200, but they also support multiple monitors in a single session. As of 2026, many manufacturers have begun offering subscription‑based calibration plans that include on‑site visits and remote monitoring, priced between $200 and $500 per month.
Calibration time is another measurable factor. A quick factory check takes less than a minute, while a hardware profile using a colorimeter usually requires 15‑20 minutes per monitor. Software‑only workflows can be completed in under 10 minutes if the monitor’s built‑in sensor is functional.
The cost per minute of calibrated accuracy can be calculated by dividing the equipment expense by the number of projects saved from color rework. For example, a studio that avoids one costly print re‑run per month by calibrating manually estimates a return on investment of roughly $800 per year for a $350 device.
Target performance metrics provide a quantifiable benchmark for evaluating factory settings versus manual methods. Professional standards such as ISO 12646‑2 recommend ΔE ≤ 2.0 for print workflows, while DICOM Part 10 requires ΔE ≤ 1.5 for medical imaging displays. Many high‑end monitors like the Dell UltraSharp 32UD552 achieve ΔE ≤ 2.0 out of the box, but drift after 500 hours of use often pushes values above 3.0.
Manual calibration can bring those values back into compliance with minimal effort. Decision makers should align equipment costs with the precision needed for each project type.
Safety / Legal / Compliance / Warnings
Working with calibration equipment involves several safety and legal considerations that editors often overlook. Colorimeters and spectrophotometers contain optical sensors that can be damaged by static discharge; technicians should use an anti‑static wrist strap and handle devices on conductive surfaces. Detergents used to clean monitor screens must be rated for glass and plastics; ammonia‑based cleaners can degrade anti‑glare coatings and affect color accuracy.
Prolonged exposure to high‑intensity ambient lighting, a common studio setup, can increase eye strain; industry guidelines recommend maintaining 200‑400 lux for color‑critical work.
Legally, many regions require compliance with accessibility standards such as WCAG 2.2, which mandates a contrast ratio of 4.5:1 for normal text. Monitors that are not calibrated may fail to meet these ratios consistently, exposing publishers to potential accessibility lawsuits. In the medical field, DICOM compliance is mandated by regulatory bodies; using a factory profile that does not meet ΔE ≤ 1.5 can be a violation of health‑care imaging standards.
Editors should document calibration procedures and retain logs for audit purposes, especially when working with regulated clients. If a calibration tool includes a warranty, misuse that voids the warranty can also affect support eligibility.
Real Scenarios / Case Examples
A mid‑size design agency adopted a hybrid workflow in early 2025. They kept factory calibration for rapid internal mock‑ups, saving roughly 15 minutes per designer daily. For client print projects, they switched to hardware calibration using the X‑Rite i1Pro 3 plus.
The agency reported a 28 percent reduction in client revision requests and cut print waste costs by $45,000 annually. The ROI on the i1Pro hardware was realized within nine months.
A post‑production house specializing in broadcast commercials faced frequent color mismatches between on‑screen graphics and filmed footage. By instituting a weekly calibration schedule with a ColorMunki Display, they achieved ΔE ≤ 2.5 on average, down from a baseline of ΔE ≈ 4.2. The improvement allowed them to pass internal quality checks on the first cut, shaving 3 hours per episode from the pipeline.
Client approval ratings rose from 82 percent to 94 percent over a six‑month period.
Medical imaging centers must adhere to DICOM standards. One hospital replaced factory profiles with manual calibration using a handheld spectrophotometer. After implementation, the center's average ΔE for DICOM displays dropped from 3.1 to 1.2.
Audits showed zero compliance violations in the subsequent year, and the radiology department reported a 12 percent increase in diagnostic confidence among radiologists. The capital expense was justified by reduced risk of malpractice claims.
These real‑world outcomes illustrate that factory calibration alone is often insufficient for high‑stakes deliverables, yet it can be a useful starting point when resources are limited.
Frequently Asked Questions
What is the main difference between factory and manual calibration?
Factory calibration sets a monitor’s baseline using built‑in firmware, delivering a generic profile. Manual calibration uses external hardware to measure actual panel output, producing a precise ICC profile that meets standards such as ΔE ≤ 2.0.
How often should I recalibrate a monitor?
For critical work, recalibrate every one to two weeks. For general use, a monthly check is sufficient. Ambient lighting changes, temperature swings, and panel aging can cause drift much faster than the factory setting suggests.
Can I rely on software‑only tools for print projects?
Software‑only tools are convenient but often lack the sensor accuracy needed for strict print tolerances. Professional print pipelines usually require hardware calibration to hit ISO 12646‑2 ΔE targets reliably.
What equipment is essential for a small editorial team?
A reliable colorimeter such as the ColorMunki Display, along with calibration software like DisplayCal, covers most routine needs. Adding a spectrophotometer later can further tighten accuracy for high‑value contracts.
Are there any legal risks of using uncalibrated monitors?
Uncalibrated monitors can breach accessibility standards (WCAG), print quality agreements, and industry regulations such as DICOM. Documented calibration reduces liability and helps meet client expectations.

Similar Posts