

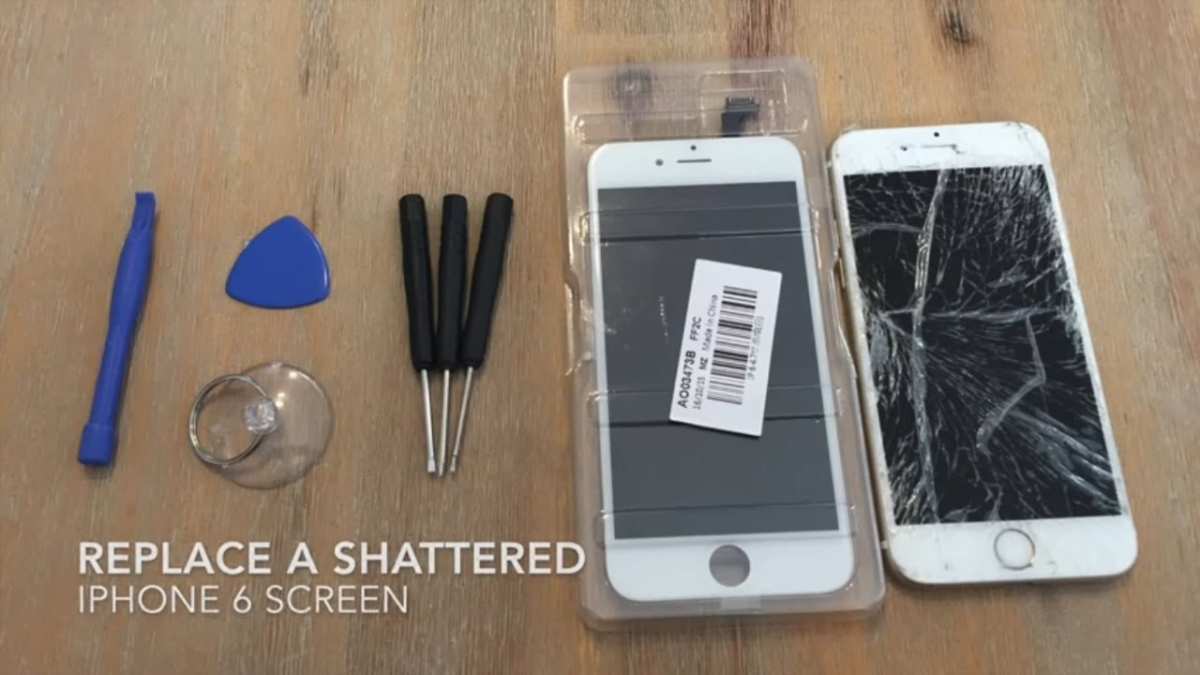
To do iPhone screen replacement yourself, start by gathering the right tools and carefully following a step-by-step process. **The key is patience and precision throughout the procedure.** If you’re wondering how to do iphone screen replacement, the process involves removing the damaged screen, disconnecting delicate connectors, and installing the new display securely. Taking your time ensures a successful repair without further damage. With clear instructions and steady hands, you can effectively restore your iPhone’s appearance and functionality.

How to Do iPhone Screen Replacement
Replacing your iPhone screen might seem like a daunting task, but with the right tools, patience, and step-by-step guidance, you can do it yourself. Whether your screen has cracked after a fall or has dead pixels, knowing how to replace it can save you money and extend the life of your device. In this section, we’ll walk you through the entire process, from preparing your workspace to carefully putting everything back together.
Gathering the Necessary Tools and Parts
Before starting the screen replacement, you need to make sure you have all the essential supplies. Having these ready will make your process smoother and avoid unnecessary interruptions.
- Replacement Screen — Make sure the new screen matches your iPhone model precisely.
- Pentalobe Screwdriver — For removing the bottom screws.
- Phillips Head Screwdriver — Used for internal screws.
- Plastic Pry Tools or Spudger — To safely open the device without damaging it.
- Suction Cup — Helps lift the screen away from the device body.
- Tweezers — To handle small screws and connectors.
- Sim Card Ejector Tool — To remove the sim card tray before starting.
- Adhesive Strips or Glue — For resealing the device after replacing the screen.
- Anti-Static Wrist Strap (optional but recommended) — To prevent static damage.
Make sure to order high-quality replacement screens from a trusted supplier to ensure good display performance and durability. Avoid cheap knock-offs that may have poor touch sensitivity or display quality.
Preparing Your Workspace
Set up a clean, well-lit workspace with a soft surface like a microfiber cloth or an anti-static mat. Keep all your tools arranged within easy reach. Working on a flat surface reduces the risk of losing tiny screws or damaging internal components.
Remember to power off your iPhone completely before starting. Press and hold the power button, then slide to power off. This step is critical for safety and preventing electrical shorts.
Disassembling the iPhone
The disassembly process involves removing the screen from the device carefully to avoid damaging internal components.
Removing the SIM Card Tray
Start by ejecting the SIM card tray with the ejector tool. This step helps prevent damage to the tray and makes the process smoother.
Removing the Pentalobe Screws
Use the pentalobe screwdriver to remove the screws at the bottom of the iPhone, near the charging port. Keep these screws in a safe container as they are small and easy to lose.
Creating a Gap for Screen Removal
Position a suction cup on the lower edge of the screen. Gently pull to create a small gap between the screen and the phone body. Carefully insert a plastic pry tool into this gap, sliding around the edges to loosen the adhesive.
Be patient here; applying gentle pressure prevents cracking the glass further or damaging internal components.
Disconnecting the Display Connectors
Once you’ve loosened the screen, lift it slightly to access the internal connectors. Use a small screwdriver or tweezer to disconnect the display cables. These connectors are delicate, so handle them with care.
Removing the Old Screen
After disconnecting all the relevant cables, you can fully detach the broken screen from the device. Place the old screen aside, and clean the edges of the device frame if there’s any leftover adhesive or debris.
Preparing and Installing the New Screen
Before installing the new screen, inspect it for any damages or defects. Connect the display cables carefully, ensuring each connector snaps into place securely.
Position the new screen at the correct angle and gently press to adhere it to the device frame. Use your fingers or a plastic tool to ensure the screen sits flush without gaps.
Reattaching Internal Connectors
Once the screen is positioned, reconnect all display cables. Double-check each connection for tightness and correct placement.
Sealing the Device
Apply fresh adhesive strips or a small amount of glue along the edges of the frame. Carefully press the screen into position, ensuring a snug fit. Use minimal adhesive to avoid excess that could interfere with the device’s waterproofing or cause misalignment.
After sealing, press gently along the edges to secure the adhesive bond evenly.
Reassembling the iPhone
Reinstall the bottom pentalobe screws and insert the SIM card tray back into the tray slot. Turn on your device to test the new screen’s functionality.
Check for touch sensitivity, display clarity, and ensure that all functions like front camera, sensors, and home button (if applicable) work properly.
Final Tips and Troubleshooting
– If the screen doesn’t display correctly, recheck your connections.
– For touch issues, ensure the connectors are properly seated.
– If you notice dead pixels or discoloration, verify if the replacement screen is compatible and undamaged.
– Use a soft cloth and screen cleaner to wipe off any fingerprints or smudges before finishing.
When to Seek Professional Help
If at any point you feel uncertain, or if the device doesn’t work after your attempt, consider consulting a professional technician. Sometimes internal complications or defective parts can make DIY repairs more challenging.
Knowing how to do iPhone screen replacement empowers you to save money and fix your device quickly. With patience and the right approach, you can successfully restore your screen and keep your iPhone working like new.
Frequently Asked Questions
What tools are essential for replacing an iPhone screen safely?
You will need a small Phillips and P2 pentalobe screwdriver, plastic opening tools, a suction cup, tweezers, and pry tools. Using an anti-static wrist strap can prevent static damage. Having a clean, organized workspace helps ensure that small parts don’t get lost or damaged during the process.
How can I avoid damaging other components while replacing the screen?
To prevent damage, work slowly and carefully when removing the screen. Use a plastic opening tool instead of metal tools to avoid scratching internal parts. Avoid applying excess force and disconnect the battery before removing the display to eliminate the risk of short circuits. Following a detailed guide or tutorial can help you understand each step visually.
What should I do after installing a new iPhone screen to ensure it functions correctly?
After replacing the screen, reconnect all cables securely, then power on your device. Check for proper display functionality, touch responsiveness, and verify that the display is free of dead pixels or flickering. It’s also important to calibrate the touch screen if necessary and test the device’s other functions, like cameras and buttons, to ensure everything works smoothly.
Are there any risks associated with DIY iPhone screen replacement?
Yes, attempting this repair without experience can cause additional damage, such as cracking the display further or damaging internal components. Incorrect reassembly may lead to water resistance issues or loose connections, which could reduce your device’s lifespan. If you’re unsure, consulting a professional technician may be a better choice to prevent costly repairs later.
How can I ensure my replacement screen matches the original in quality?
Choose a reputable supplier for your replacement screen that specifies compatibility with your iPhone model. Look for screens that offer high-resolution display quality and good touch sensitivity. Reading reviews and seeking recommendations can help you select a reliable product, ensuring your device performs as expected after the replacement.
Final Thoughts
Pour faire une réparation d’écran d’iPhone, commencez par éteindre votre appareil et retirez délicatement les vis avec un tournevis approprié. Utilisez un outil d’ouverture pour séparer doucement l’écran du châssis. Ensuite, déconnectez prudemment les câbles de l’écran et remplacez-le par un neuf.
Assurez-vous de bien fixer tous les câbles et de vérifier le fonctionnement de l’écran avant de refermer. La clé réside dans la patience et l’attention aux détails. En résumé, comment faire une étape d’iPhone screen replacement sans complications.
