Android Studio App Development Step By Step: A Complete Guide
Getting your Android app off the ground can seem daunting, but with a clear step-by-step approach, it becomes an exciting journey rather than a confusing task. Android Studio is the go-to platform for developing Android apps, and mastering its workflow is essential for success. The process involves setting up your environment, designing your app interface, coding functionalities, and testing your app thoroughly before launch. Whether you’re a beginner or looking to streamline your development process, understanding each phase helps you build robust apps efficiently. By following a structured path, you can turn your ideas into a fully functional Android application without feeling overwhelmed. Ready to dive in? Let’s explore the step-by-step process that’ll help you create your Android app with confidence and clarity.

Android Studio App Development Step by Step
Developing an Android app might seem complicated at first, but breaking it down into clear steps makes the process easier. Starting with the right tools and understanding each phase helps you build a successful app. In this guide, we will walk through each step in detail, so you can confidently create your own Android applications using Android Studio.
Getting Ready for Android Studio Development
1. Install Android Studio
The first step is to download Android Studio, which is the official Integrated Development Environment (IDE) for Android development. Visit the official website and select your operating system.
Follow the installation instructions carefully. Make sure to also install the SDK and necessary SDK tools during setup, as they are essential for app development.
2. Set Up Your Development Environment
After installation, open Android Studio. Complete the initial setup wizard, which helps you configure important settings. You can choose default options or customize based on your preferences.
Ensure you have a stable internet connection for downloading additional components like SDK packages and system images for emulators.
Understanding Android Studio Interface
Main Components
- Project Window: Shows all your project files and folders.
- Editor Area: The workspace where you’ll write and edit code.
- Toolbar: Provides quick access to common actions such as running your app or debugging.
- Gradle Console: Displays build information and errors.
- Device Emulator: Lets you test your app on virtual devices.
Customizing Your Workspace
You can rearrange panels and change themes for better comfort. It’s helpful to familiarize yourself with shortcuts and menu options to speed up workflow.
Creating Your First Android Project
1. Start a New Project
Click on the “Start a new Android Studio project” button. Choose a project template that matches your app idea, such as “Empty Activity” for a simple app.
Fill in project details like name, package name, save location, language (Java or Kotlin), and minimum SDK version. Kotlin is recommended for new projects due to its modern features.
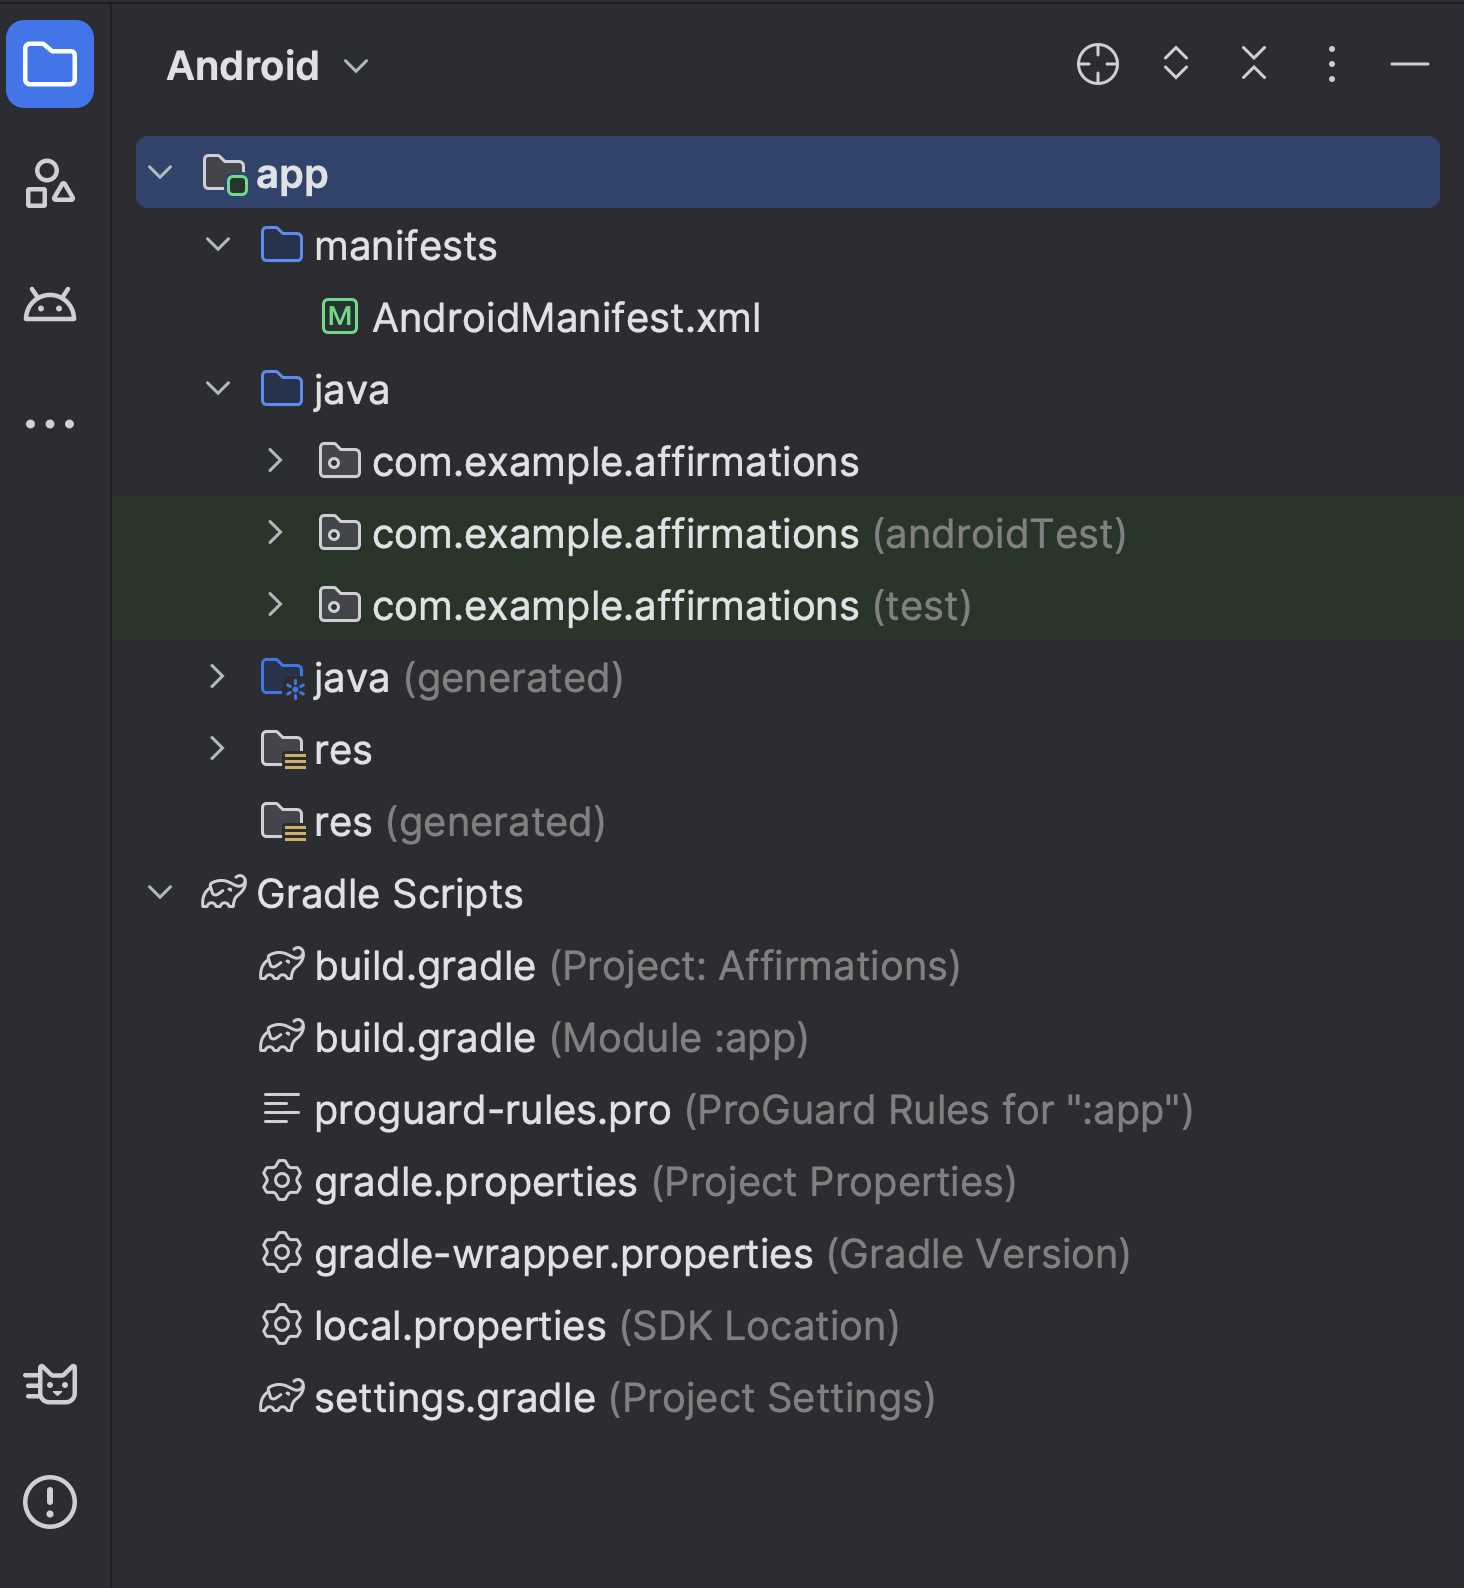
2. Understand Project Structure
| Folder | Description |
|---|---|
| app | Your main source folder containing Java/Kotlin code and resources. |
| gradle | Build system files that manage dependencies and build configurations. |
| res | Resources like layouts, images, and strings used in your app. |
| AndroidManifest.xml | Defines app components and permissions. |
Designing the User Interface
Working with Layouts
Navigate to res/layout/activity_main.xml to design your app screen. Use the built-in design editor or write XML code for precise control.
Common UI components include Buttons, TextViews, EditTexts, and ImageViews. Drag-and-drop features simplify interface creation for beginners.
Adding UI Elements
- Drag elements from the palette into the layout editor.
- Set properties like size, text, and ID in the Attributes panel.
- Use constraints in ConstraintLayout to position elements accurately.
Preview Your Layout
Use the Preview window to see how your app will look on different devices and screen sizes. This helps ensure your design works universally.
Implementing App Functionality
Writing the Code
Open MainActivity.java or MainActivity.kt, depending on your language choice. Here, you’ll add logic to respond to user interactions.
For example, setting a button click listener involves finding the button by ID and defining what happens when it is clicked.
Sample Code Snippet
Button myButton = findViewById(R.id.my_button);
myButton.setOnClickListener(new View.OnClickListener() {
    @Override
    public void onClick(View v) {
        // Code to execute when button is clicked
        Toast.makeText(getApplicationContext(), "Button clicked!", Toast.LENGTH_SHORT).show();
    }
});
Testing Your Code
Use the built-in emulator or connect a physical device via USB. Enable developer options on your device for testing on real hardware.
Running and Debugging the App
Launching the App
Click the “Run” button or press Shift + F10 to compile and launch your app. Choose your target device from the list.
Ensure your emulator is configured with the correct system image and sufficient resources to run smoothly.
Using Debugging Tools
- Set breakpoints in your code to pause execution and inspect variables.
- Monitor logs through Logcat for errors or messages.
- Use the debugger interface to step through code line by line.
Optimizing and Publishing Your App
Testing Thoroughly
Test on multiple devices and screen sizes to find and fix layout or functionality issues. Use testing frameworks and automated tests for efficiency.
Preparing for Release
- Remove debug code and log statements.
- Generate a signed APK or App Bundle, which is required for app submission.
- Optimize images and code to reduce app size and improve performance.
Publishing Your App
Create a developer account on Google Play Console. Follow the submission process, upload your APK or App Bundle, add descriptions, screenshots, and set pricing.
After review, your app will be available for download on the Google Play Store.
Additional Tips for Android App Development
Keep Learning and Experimenting
Explore Android documentation, tutorials, and community forums to stay updated with the latest features and trends.
Practice building different types of apps to improve your skills and understanding of Android Studio environment.
Use Version Control
Implement tools like Git for version control. This helps you track changes and collaborate efficiently.
Leverage Third-party Libraries
Incorporate libraries from platforms like Maven Central or JCenter to add functionalities such as networking, image loading, or database management easily.
Maintain Best Practices
- Follow Android design guidelines for user experience.
- Write clean, well-documented code.
- Keep your app updated with the latest SDKs and security patches.
Building Android apps with Android Studio involves understanding the environment, designing interfaces, coding functionalities, testing, and publishing. Following these step-by-step instructions helps you develop more confident and well-structured applications. Keep practicing, exploring new features, and refining your skills to excel in Android development.
Android Studio Tutorial (2024 Edition) – Part 1
Frequently Asked Questions
What are the initial steps to set up a new Android Studio project?
Begin by opening Android Studio and selecting ‘Start a new Android Studio project.’ Choose a project template that matches your app’s purpose, such as ‘Empty Activity.’ Enter your project name, package name, save location, and language preferences (Java or Kotlin). Set the minimum SDK level based on your target devices. Click ‘Finish’ to generate the project structure, which includes essential files like build.gradle, AndroidManifest.xml, and the main activity file.
How do you design the user interface within Android Studio?
Use the Layout Editor to design your app’s interface visually. Drag and drop UI components like buttons, text fields, and images onto the layout canvas. You can also edit the XML directly for more precise control. Assign unique IDs to each component to reference them later in your code. Utilize constraints to position elements relative to each other or the parent layout, ensuring your design adapts to different screen sizes.
What is the process for implementing app functionality after designing the UI?
After designing the interface, open the corresponding activity file to add interaction logic. Find the UI components by their IDs using methods like findViewById. Attach event listeners, such as onClickListeners, to handle user actions like button presses. Write Java or Kotlin code within these listeners to perform tasks like opening a new screen, fetching data, or updating the interface dynamically. Testing these functionalities on an emulator or physical device confirms they work as expected.
How do you troubleshoot and debug your app during development?
Use Android Studio’s built-in debugging tools to identify issues. Set breakpoints in your code to pause execution at specific points. Inspect variable values and app states in the Debug window. Monitor logcat logs for error messages or warnings that point to problems. Utilize the profiler to analyze app performance and detect memory leaks or slow operations. Regular testing on different devices ensures your app runs smoothly across various environments.
What are the key steps to prepare your app for release on the Google Play Store?
Generate a signed APK or App Bundle by creating a keystore and signing your app. Optimize your app by removing unused resources and code, compressing images, and ensuring compatibility with multiple device configurations. Update your app’s version information and provide necessary assets like app icons and screenshots. Perform thorough testing to eliminate bugs. Finally, submit your app to the Google Play Console, fill out the necessary metadata, and publish it for users to download.
Final Thoughts
Android Studio app development step by step provides a clear roadmap for beginners. Starting with setting up the environment, you can create a new project and choose your preferred language. Designing the user interface becomes straightforward with drag-and-drop features.
Next, write the code to add functionalities and test your app regularly to fix bugs. Finally, prepare your app for launch by optimizing performance and submitting it to the Play Store. Following these steps ensures a smooth development process from start to finish.
Related posts

how to enable wifi calling cricket on android
You’re staring at your Android settings, searching for the Wi‑Fi Calling toggle, and it’s just not there. If…

how to disable system update in android
So you want to stop those Android system update notifications, or maybe you're worried a new version will…

how to remove search bar from home screen android
So you just want the search bar gone. That little Google pill sitting on your home screen, taking…