
Yes, ultrawide monitors work with Macs! This comprehensive guide will walk you through everything you need to know, from checking compatibility to connecting and optimizing your setup. You’ll learn about the different resolutions, connection types, and essential tips to ensure a smooth and productive ultrawide experience with your Apple device. Get ready to expand your workspace!
 Generally, Macs are excellent at handling external displays, including ultrawide ones. Apple has a strong track record of supporting a wide range of monitors. However, there are a few key areas to check for optimal compatibility:
Once you’ve confirmed compatibility, it’s time to connect! The process is usually straightforward.
Once connected, macOS should automatically detect the external display. You might need to make a few adjustments to get everything looking just right.
Generally, Macs are excellent at handling external displays, including ultrawide ones. Apple has a strong track record of supporting a wide range of monitors. However, there are a few key areas to check for optimal compatibility:
Once you’ve confirmed compatibility, it’s time to connect! The process is usually straightforward.
Once connected, macOS should automatically detect the external display. You might need to make a few adjustments to get everything looking just right.
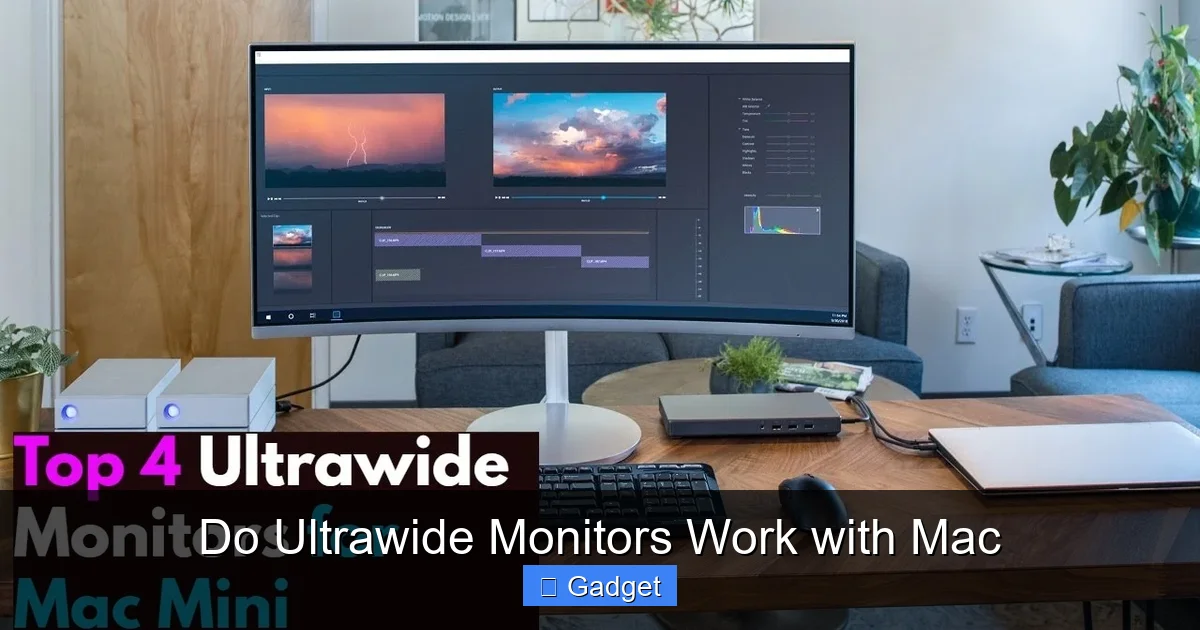
Do Ultrawide Monitors Work with Mac
Are you looking to supercharge your productivity and immerse yourself in a wider digital workspace? Ultrawide monitors offer a sprawling canvas, perfect for multitasking, creative work, and gaming. But if you’re a Mac user, you might be wondering: do ultrawide monitors work with Mac computers? The short answer is a resounding yes! Modern Macs are generally very compatible with ultrawide displays. However, like any tech setup, there are a few things you’ll want to consider to ensure a smooth and enjoyable experience. This comprehensive guide will demystify the process. We’ll walk you through everything from understanding compatibility to the physical connection, software settings, and even some handy tips and tricks to make the most of your new ultrawide setup. Whether you’re using a MacBook, an iMac, or a Mac mini, you’re likely in for a treat. Let’s dive in!Contents
- 1 Key Takeaways
- 2 Understanding Ultrawide Monitor Basics
- 3 Checking Mac and Ultrawide Monitor Compatibility
- 4 Connecting Your Ultrawide Monitor to Your Mac
- 5 Configuring Your Ultrawide Monitor in macOS
- 6 Leveraging Ultrawide for Productivity on Mac
- 7 Troubleshooting Common Ultrawide Monitor Issues with Mac
- 8 Conclusion
Key Takeaways
- Seamless Compatibility: Most modern ultrawide monitors are compatible with Macs, but checking resolutions and refresh rates is crucial.
- Connection is Key: Ensure your Mac has the right ports (HDMI, DisplayPort, USB-C/Thunderbolt) and that you have the correct cables.
- Resolution Matters: Understand common ultrawide resolutions like 3440×1440 and 2560×1080 and their impact on your Mac’s performance.
- Picture-by-Picture (PBP) and Picture-in-Picture (PIP): Learn how to leverage these features for multitasking and connecting multiple devices.
- Software Optimization: Explore macOS features and third-party apps to enhance your ultrawide experience, from window management to custom resolutions.
- Troubleshooting Common Issues: Address potential problems like scaling, flickering, or lack of signal with practical solutions.
Understanding Ultrawide Monitor Basics
Before we connect anything, let’s quickly touch upon what makes an ultrawide monitor “ultrawide.” The key differentiator is its aspect ratio. While standard monitors are typically 16:9, ultrawide monitors usually sport a 21:9 or even 32:9 aspect ratio. This extra horizontal real estate means they are wider than they are tall, giving you more screen space side-by-side. Common resolutions for ultrawide monitors include:- 2560×1080 (WFHD): A good entry-level ultrawide resolution, offering more width than a standard 1080p monitor.
- 3440×1440 (WQHD): This is a very popular resolution, providing a significant step up in sharpness and detail, balancing productivity and visual quality.
- 5120×1440 (DQHD): Essentially two 1440p monitors side-by-side, offering an enormous workspace.
- 5120×2160 (DUHD): An even wider and taller resolution, providing an unparalleled visual experience.
Checking Mac and Ultrawide Monitor Compatibility
Visual guide about Do Ultrawide Monitors Work with Mac
Image source: i.ytimg.com
Resolution Support
Your Mac needs to be able to output the native resolution of your ultrawide monitor. Most recent Macs (especially those with Thunderbolt 3 or 4 ports) can easily handle high resolutions like 3440×1440 and even 5120×1440.-
* Check your Mac’s specifications: Visit Apple’s support website or your Mac’s “About This Mac” > “System Report” to see its graphics capabilities and maximum supported resolutions.
* Check the monitor’s specifications: Ensure the ultrawide monitor lists its native resolution and refresh rate.
Refresh Rate
While not as critical for productivity as resolution, the refresh rate (how many times per second the screen updates) affects motion smoothness. Most ultrawide monitors for productivity come with 60Hz or 75Hz refresh rates, which are easily supported by Macs. For gaming ultrawides with higher refresh rates (120Hz, 144Hz, 200Hz), ensure your Mac’s graphics card and the connection type can handle it. For more details on how refresh rates impact performance, especially in fast-paced environments, read our comparison of 144Hz vs 240Hz monitors.Connection Ports
-
* HDMI: Common on many Macs and monitors. However, older HDMI standards might limit resolution or refresh rate on ultrawide displays. HDMI 2.0 or higher is recommended for 3440×1440 at 60Hz or more.
* DisplayPort (DP) / Mini DisplayPort (Mini-DP): Often offers better bandwidth for higher resolutions and refresh rates compared to HDMI. Many Macs have Thunderbolt ports which can output DisplayPort signals (often via an adapter).
* USB-C / Thunderbolt 3 / Thunderbolt 4: This is the most versatile and common connection for modern Macs. Thunderbolt ports can carry DisplayPort signals, making them ideal for ultrawide monitors. You can often connect an ultrawide monitor directly via USB-C or using a USB-C to DisplayPort cable/adapter.
Connecting Your Ultrawide Monitor to Your Mac

Visual guide about Do Ultrawide Monitors Work with Mac
Image source: teahub.io
Step 1: Identify Your Mac’s Ports
Look at the sides or back of your Mac. You’ll see ports like USB-A, USB-C, Thunderbolt (which look like USB-C but often have a lightning bolt icon), HDMI, or Mini DisplayPort.Step 2: Identify Your Monitor’s Ports
Check the back or underside of your ultrawide monitor. You’ll find its input options, typically HDMI, DisplayPort, and sometimes USB-C.Step 3: Choose the Right Cable or Adapter
-
* **Direct USB-C Connection:** If both your Mac and monitor have USB-C ports that support DisplayPort Alternate Mode (Alt Mode), a single USB-C cable can often handle video, data, and even power delivery (if supported by both devices). This is the cleanest solution.
* **USB-C to DisplayPort:** If your Mac has USB-C/Thunderbolt and your monitor has DisplayPort, use a USB-C to DisplayPort cable or adapter. This is a very reliable combination for ultrawide monitors.
* **USB-C to HDMI:** If your Mac has USB-C/Thunderbolt and your monitor has HDMI, use a USB-C to HDMI cable or adapter. Ensure the HDMI version (e.g., 2.0) supports your monitor’s resolution and refresh rate.
* **DisplayPort or Mini DisplayPort:** If your Mac has a Mini DisplayPort (like older MacBook Pros or iMacs) and your monitor has DisplayPort, use a Mini DisplayPort to DisplayPort cable.
* **HDMI to HDMI:** If both your Mac and monitor have HDMI ports, use a standard HDMI cable. Again, check the HDMI version for compatibility with your monitor’s specs.
Step 4: Connect the Cables
Plug one end of the cable into your Mac’s port and the other end into the corresponding input port on your ultrawide monitor.Step 5: Power On
Turn on your ultrawide monitor and then power on your Mac.Configuring Your Ultrawide Monitor in macOS
Visual guide about Do Ultrawide Monitors Work with Mac
Image source: planetofthepaul.com
Step 1: Access Display Settings
-
* Click the Apple menu in the top-left corner of your screen.
* Select “System Settings” (on newer macOS versions) or “System Preferences” (on older macOS versions).
* Click on “Displays.”
Step 2: Arrange Your Displays
In the Displays settings, you’ll see representations of your built-in Mac display and your ultrawide monitor.-
* Click and drag the monitor icons to match their physical arrangement on your desk. This ensures your mouse cursor moves naturally between screens.
* The main Mac display (usually the one with the white menu bar) is your primary display. You can drag the white bar to your ultrawide monitor if you prefer that as your main workspace.
Step 3: Set the Resolution and Refresh Rate
-
* Select your ultrawide monitor from the list of displays.
* Under “Resolution,” you’ll typically see options like “Default for display” or a list of scaled resolutions.
* **”Default for display”:** This is usually the best option as it uses the monitor’s native resolution for the sharpest image.
* **Scaled:** If the text or icons appear too small or too large, choose a “Scaled” option. macOS offers several scaled resolutions that effectively adjust the UI size without changing the monitor’s native output, which can sometimes lead to a slightly softer image.
* **Refresh Rate:** Ensure the refresh rate is set to the highest supported by your monitor and connection.
Step 4: Adjust Brightness and Color (Optional)
You can adjust the brightness of your ultrawide monitor within the macOS Display settings if your monitor supports brightness control via software. You can also adjust color profiles for a more accurate visual experience.Leveraging Ultrawide for Productivity on Mac
The beauty of an ultrawide monitor is its expansive real estate, which can significantly boost your productivity. Here’s how to make the most of it:Window Management
-
* Native macOS Split View: macOS has a built-in Split View mode. Hover your mouse over the green full-screen button in the top-left corner of a window. You’ll see options to send the window to the left half or the right half of the screen. This is great for quickly snapping two apps side-by-side.
* Third-Party Window Management Apps: While macOS is improving, dedicated window management apps offer more granular control and customization. Popular options include:
* Rectangle: Free and open-source, offering keyboard shortcuts and drag-to-snap functionality for arranging windows.
* **Magnet:** A paid app with a similar drag-to-snap interface and customizable keyboard shortcuts.
* **Moom:** Another paid option with extensive customization for window sizing and positioning.
Multitasking Efficiency
With an ultrawide monitor, you can comfortably have several applications open and visible simultaneously without constant switching.-
* Coding/Development: Keep your code editor open on one side, the browser with your live preview in the middle, and your terminal or documentation on the other.
* Writing: Have your document open on one side, research materials or a reference website on the other, and perhaps a music app or communication tool in the remaining space.
* Creative Work: For photo or video editing, you can have your timeline or canvas on the main portion of the screen and your tools, reference images, or project files readily accessible on the sides.
Picture-by-Picture (PBP) and Picture-in-Picture (PIP)
-
* PBP (Picture-by-Picture): Allows you to connect two different video sources to your monitor and display them side-by-side as if they were two separate monitors. This is fantastic for connecting a work laptop and a personal desktop, or a Mac and a gaming PC, to a single ultrawide screen.
* PIP (Picture-in-Picture): Displays a second video source in a small window overlaid on the main display. This can be useful for keeping an eye on a video call or stream while working on other tasks.
Troubleshooting Common Ultrawide Monitor Issues with Mac
While generally smooth, you might encounter a few hiccups. Here’s how to address them:No Signal or Black Screen
-
* **Check Cables:** Ensure all cables are securely plugged in at both ends.
* **Try a Different Cable/Port:** Use a different cable or port on your Mac and monitor. If possible, try a DisplayPort cable as it’s often more reliable for higher resolutions.
* **Restart Devices:** Power cycle your monitor and Mac.
* **Check Input Source:** Ensure your monitor is set to the correct input source (HDMI, DisplayPort, USB-C) for the connected cable.
* **Test with Another Device:** If possible, test the monitor and cable with another computer to rule out a hardware issue with the monitor or cable.
Flickering or Artifacts
-
* **Lower Refresh Rate:** If your monitor has a high refresh rate (e.g., 144Hz) and you’re experiencing flickering, try setting it to 60Hz or 75Hz in macOS Display settings.
* **Check Cable Quality:** A poor-quality or damaged cable can cause flickering, especially at high resolutions. Consider upgrading to a certified cable.
* **Update macOS:** Ensure your macOS is up to date, as updates often include graphics driver improvements.
Incorrect Resolution or Scaling Issues
-
* **Force Native Resolution:** As mentioned earlier, try holding the Option key while clicking “Scaled” in Display Settings to reveal more resolution options.
* **Third-Party Tools:** If macOS struggles to set the correct resolution, tools like SwitchResX (paid) can offer more advanced control over display resolutions.
* **Monitor Settings:** Check your monitor’s OSD settings for any scaling options that might be interfering.
Text Appears Blurry or Jagged
-
* **Use Native Resolution:** Always aim to use the monitor’s native resolution for the sharpest image.
* **Adjust Scaling (Carefully): If you need to use scaled resolutions, try different options to find one that balances readability and sharpness. Avoid resolutions that are drastic deviations from the native one.
* **ClearType/Font Smoothing:** macOS has font smoothing, which can sometimes make text appear slightly softer on high-resolution displays. While macOS doesn’t have a direct “ClearType” equivalent for users to toggle on/off in the same way Windows does, it generally handles font rendering well. If you find it an issue, ensure you are using the native resolution.