

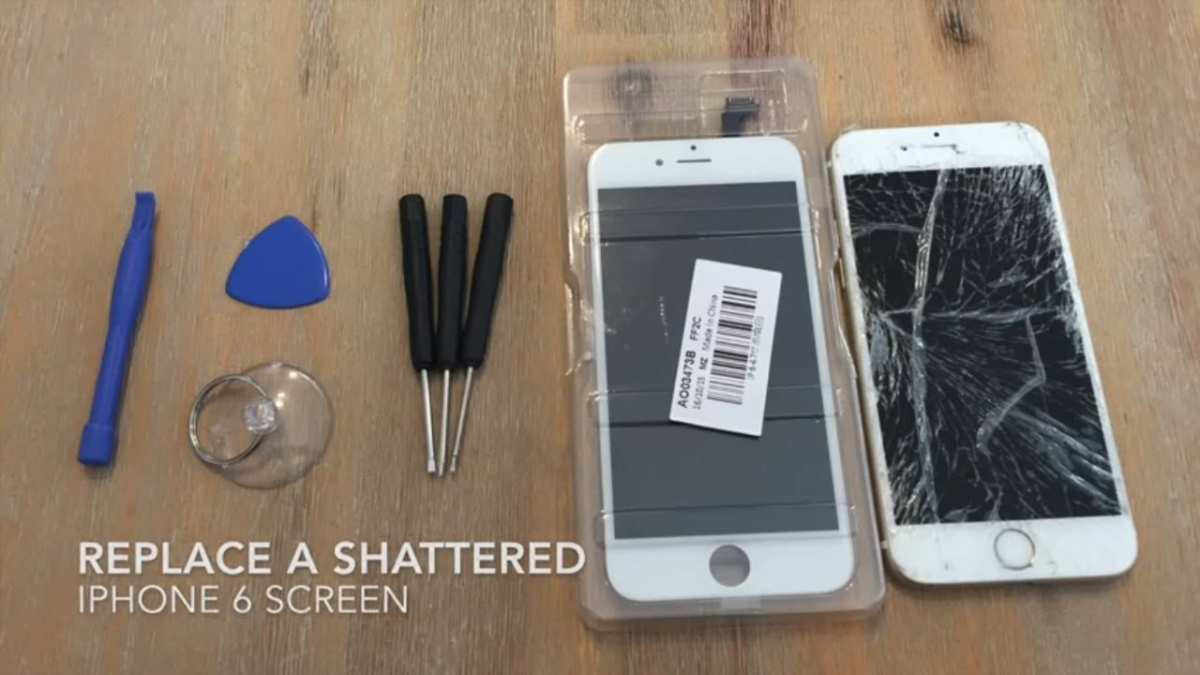
To fix a broken iPhone screen quickly, you can replace the glass yourself or seek professional help. **Knowing how to repair iPhone broken screen** involves carefully following repair steps or visiting an expert.
If your screen is shattered or unresponsive, don’t panic. With the right tools and instructions, you can often repair it at home or decide when to see a technician. Taking swift action saves time and money, making the process less stressful.

How to Repair iPhone Broken Screen
Getting a cracked or shattered iPhone screen can be frustrating. Whether it’s a small crack or a completely broken display, knowing how to fix it can save you money and time. In this guide, we’ll go over everything you need to know about repairing an iPhone screen, from diagnosing the damage to choosing the right repair method. Let’s walk through each step carefully, so you can get your iPhone looking and working like new again.
Understanding the Types of Screen Damage
Before jumping into repairs, it’s essential to identify what kind of damage your iPhone has. The type of break influences whether you should attempt a repair yourself or seek professional help.
Cracked Screen
– The most common damage.
– Usually results from drops or impacts.
– Might still respond to touch, but appearance is marred by visible cracks.
– Often requires replacing the display assembly.
Black or White Screen
– Screen remains blank or shows only a white or black display.
– Usually caused by a damaged LCD or faulty connectors.
– Might be fixable by replacing the LCD or re-seating connections.
Unresponsive Touch Screen
– Touch functionality is lost or erratic.
– Could be due to a damaged digitizer or software issues.
– Often needs digitizer replacement alongside the screen.
Preparing for Repair: What You Need
Once you know what damage your iPhone has, gather the necessary tools and parts before starting the repair:
- Replacement screen compatible with your iPhone model
- Small Phillips and Pentalobe screwdrivers
- Plastic opening tools or pry tools
- Suctions cup for lifting the display
- Tweezers for handling tiny components
- Adhesive strips or glue for reassembling
- Anti-static wrist strap (optional but recommended)
Having these items ready helps ensure a smoother repair process.
Step-by-Step Guide to Repairing Your iPhone Screen
Now, let’s walk through the main steps of replacing an iPhone screen. Although procedures vary slightly by model, the core process remains similar.
Step 1: Power Off Your Device
– Always turn off the iPhone before starting any repair.
– Press and hold the power button, then slide to power off.
– This prevents electrical shorts and protects internal components.
Step 2: Remove the Pentalobe Screws
– Use a pentalobe screwdriver to unscrew the screws at the bottom of the iPhone.
– Keep screws organized to avoid losing any.
Step 3: Use the Suction Cup and Pry Tools
– Place the suction cup just above the charging port.
– Gently pull to create a gap between the screen and the rear case.
– Carefully insert a plastic pry tool into the gap to lift the display.
Step 4: Disconnect the Display Connectors
– Remove the screws securing the metal brackets covering the display connectors.
– Use a plastic tool to disconnect the display cables gently.
– Be cautious not to damage delicate connectors or flex cables.
Step 5: Remove the Broken Screen
– Once disconnected, lift the display assembly away from the device.
– Place it safely aside, ensuring no connectors are strained.
Step 6: Transfer Components to New Screen (if necessary)
– If your replacement screen doesn’t come with certain components, transfer the necessary parts like the front camera, earpiece, or home button.
– Keep track of small parts and screws during this process.
Step 7: Connect the New Screen
– Reconnect the display flex cables carefully.
– Secure the connectors with the metal brackets and screws.
Step 8: Reassemble the iPhone
– Align the display with the chassis and press gently to snap into place.
– Reinstall the pentalobe screws at the bottom.
– Power on the device to test the new screen.
Testing the Repaired Screen
After reassembling, it’s essential to test the new screen thoroughly:
- Check touch responsiveness across the entire display.
- Look for dead pixels or discoloration.
- Ensure all features like Face ID, speakers, and buttons work properly.
- Test the display brightness and color accuracy.
If any issues remain, recheck connections or consider consulting a professional.
DIY Repair vs. Professional Service
While DIY repairs save money, they aren’t suitable for everyone. Consider doing it yourself if:
- You have experience with small electronics.
- You possess the right tools and patience.
- Your iPhone is under warranty that might be voided by DIY attempts.
Otherwise, hiring a professional guarantees quality work, especially for complex issues like LCD replacements or if your iPhone model has advanced features like Face ID.
Tips and Precautions
To make your repair process safer and more successful, keep these tips in mind:
- Work on a clean, static-free surface.
- Organize screws and parts using small containers or magnetic mats.
- Handle components by the edges to avoid damaging internal circuits.
- Follow detailed guides specific to your iPhone model.
- Be patient and gentle—rushing can cause additional damage.
Common Challenges and How to Overcome Them
Even with careful work, issues can arise. Here are some common problems and solutions:
Screen Not Responding After Replacement
– Double-check all connections.
– Ensure the replacement screen is of good quality.
– Re-seat display connectors carefully.
Black or White Display
– Confirm the LCD connector is properly seated.
– Consider replacing the LCD assembly if the issue persists.
Touch Sensitivity Problems
– Verify digitizer connections.
– Avoid flexing or bending cables during assembly.
Maintaining Your iPhone’s Screen After Repair
Once your screen is fixed, keep it in good shape by:
- Using a tempered glass screen protector.
- Applying a protective case to prevent drops.
- Avoiding pressure on the screen during regular use.
- Cleaning regularly with a soft microfiber cloth.
Proper maintenance helps extend your screen’s lifespan and keeps your device looking fresh.
Replacing a broken iPhone screen may seem challenging at first, but with patience and the right tools, you can do it yourself successfully. Remember to diagnose the damage correctly, gather quality parts, and follow careful steps during disassembly and reassembly. If you feel unsure at any point, don’t hesitate to seek professional help. Taking proper precautions and working methodically will save you money and keep your iPhone functioning smoothly for years to come.
Frequently Asked Questions
What are the steps to replace a cracked iPhone screen at home?
To replace a cracked iPhone screen yourself, first power off your device and remove the SIM card. Use appropriate tools to carefully pry open the device’s casing, usually starting from the bottom. Disconnect the battery connector before removing the broken screen, then detach the display assembly. Place the new screen in position and reconnect all cables securely. Finally, reassemble the device, turn it on, and check that the new display functions correctly.
How can I avoid damaging internal components while fixing my iPhone screen?
To prevent damage, handle tools with care and work on a clean, static-free surface. Use plastic prying tools instead of metal ones to reduce the risk of scratches or short circuits. Disconnect the battery first to eliminate power flow before handling internal parts. Follow detailed repair guides step-by-step and avoid applying excessive force. If unsure about any step, consider seeking professional help to avoid costly damage.
What tools are essential for repairing a broken iPhone screen?
You need a set of precision screwdrivers compatible with small screws, plastic prying tools, a suction cup for lifting the screen, tweezers for handling tiny components, and a spudger to disconnect cables safely. An adhesive strip or glue designed for screens can help seal the device after repair. A heat gun or hairdryer may be useful to soften adhesive, but use cautiously to avoid overheating components. Having a clean workspace and proper lighting also contributes to a smoother repair process.
Final Thoughts
To repair an iPhone broken screen, start by turning off your device and removing any case or accessories. Use a specialized toolkit to carefully detach the screen, paying close attention to avoid additional damage. Follow the steps precisely or seek professional help if unsure.
Knowing how to repair iPhone broken screen can save time and money. Practice patience and handle components delicately. With the right approach, you can restore your device’s functionality efficiently.
