How To Make Your Own Keyboard Android For Custom Typing
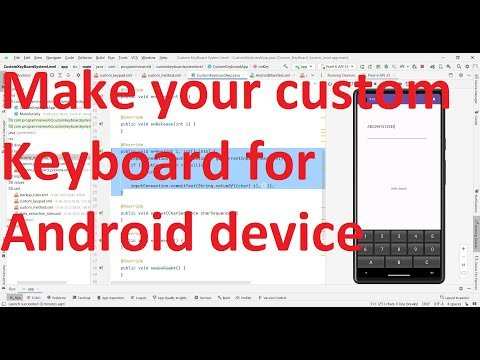
Creating your own keyboard for Android is straightforward with the right tools. **You can design a custom keyboard by using open-source apps and customizing layouts.** Knowing how to make your own keyboard Android involves downloading a keyboard-building app, selecting your preferred design, and configuring the layout to suit your style. It feels rewarding to have a personalized keyboard that fits your needs. With simple steps, you can make a unique keyboard that sets your device apart.

How to Make Your Own Keyboard Android
Creating your own customized keyboard for Android devices can be a fun and rewarding project. Whether you want a keyboard with a unique style, special features, or just want to learn how Android apps work under the hood, building your own keyboard can be a great way to do it. In this guide, we’ll walk through all the important steps and details needed to develop your own Android keyboard. We’ll cover everything from setting up your development environment to designing the user interface, coding the core functions, and testing your keyboard app.
Understanding the Basics of Android Keyboard Development
Before diving into the actual building process, it helps to understand what makes an Android keyboard app different from other applications. Android keyboards are a type of Input Method Editor (IME), which allows users to input text into their devices. These apps have special permissions and use specific APIs provided by the Android SDK.
Some key points to understand are:
- Android Keyboard is an Input Method Service (IMS) that extends the InputMethodService class.
- Android APIs provide the necessary tools for creating the keyboard’s layout, handling user input, and managing interactions.
- Customizing a keyboard involves designing views, managing key events, and handling text input properly.
Knowing these basics will help you plan your development process effectively.
Setting Up Your Development Environment
To start creating an Android keyboard, you need a proper development setup:
- Android Studio: Download the latest version from the official website and install it. Android Studio provides all the tools you’ll need for coding, designing, and testing.
- Java or Kotlin: Choose your preferred programming language. Both are supported for Android development, but Kotlin is now recommended by Google for new projects.
- SDK tools: Make sure you have the latest SDK tools installed through Android Studio’s SDK manager.
Once your environment is ready, create a new project:
- Select “Empty Activity” as your project template.
- Specify the minimum SDK version (such as API 21 or higher for better compatibility).
- Name your project, e.g., “CustomKeyboard”.
After creating the project, you will organize your code files into relevant directories, especially focusing on your services and UI components.
Designing the Layout of Your Keyboard
The visual part of your keyboard is critical to user experience. You need to design an intuitive and attractive layout:
- Define the keyboard layout: Decide how many keys you want, the arrangement, and the additional keys like space, backspace, enter, etc.
- Create XML layouts: Use Android’s layout XML files to arrange your keys. Typical layout for a keyboard includes multiple rows, each containing several keys.
- Design keys visually: Use
ButtonorImageButtonelements for each key, customizing colors, fonts, and sizes for better aesthetics.
You may also want to include special keys or symbols, so plan your layout accordingly. A sample XML layout might look like this:
“`xml
“`
Consider using a grid layout for easier button arrangement, or create a custom view if you want more control over how keys are rendered.
Implementing the Input Method Service
Once your layout is ready, start implementing the core functionality. Your main class will extend Android’s InputMethodService. This class manages the keyboard’s lifecycle, UI, and input events.
Some critical steps include:
- Overriding onCreateInputView(): Inflate your custom keyboard layout here and return the view to be displayed.
- Handling key presses: Set onClickListeners for your keys to detect when users press them.
- Managing input: Use the
InputConnectionobject provided by the system to insert, delete, or replace text in the current input field.
Here’s a small example of how to handle key presses:
“`java
@Override
public View onCreateInputView() {
View keyboardView = getLayoutInflater().inflate(R.layout.keyboard_layout, null);
Button keyA = keyboardView.findViewById(R.id.key_a);
keyA.setOnClickListener(v -> {
InputConnection ic = getCurrentInputConnection();
if (ic != null) {
ic.commitText(“A”, 1);
}
});
return keyboardView;
}
“`
This code detects when the ‘A’ key is pressed and inserts the character into the active input field.
Adding Functionality and Custom Keys
A simple keyboard handles basic letter input, but you can add more features:
- Special keys: Backspace, Enter, Space, Shift, etc.
- Language switching: Toggle between different languages or character sets.
- Emoji support: Add an emoji panel for expressive communication.
- Theme customization: Allow users to choose color schemes or fonts.
For each new feature, you craft additional buttons, bind actions, and modify the input logic accordingly.
Handling Special Keys and Functions
For example, the backspace key needs to delete characters:
“`java
backspaceButton.setOnClickListener(v -> {
InputConnection ic = getCurrentInputConnection();
if (ic != null) {
ic.deleteSurroundingText(1, 0);
}
});
“`
Adding features like language switching involves managing multiple dictionaries and updating the keys’ labels dynamically.
Testing and Debugging Your Keyboard
Testing is a crucial part of your development:
- Run your app: Use an emulator or physical device connected via USB.
- Enable your keyboard: Go to device Settings > Languages & Input > Virtual keyboard > Manage keyboards, then turn on your app.
- Switch to your keyboard: When typing, select your custom keyboard and test all features.
As you test, keep an eye out for:
- Layout issues or misaligned keys
- Input lag or unresponsive keys
- Crashes or errors during input handling
Use Android Studio’s debugger and logcat for troubleshooting issues. Fix bugs, refine the UI, and optimize performance.
Optimizing Your Keyboard for Better User Experience
User experience makes a big difference:
- Ensure your keys are large enough to tap comfortably.
- Maintain a clean and simple layout.
- Provide visual feedback when keys are pressed (such as changing colors).
- Support different screen sizes and orientations.
- Implement predictive text features if possible for a more efficient typing experience.
Consider collecting user feedback, then iterate on your design to make it more intuitive and fun to use.
Publishing Your Custom Keyboard on Google Play
When your keyboard is ready:
- Create a signed APK or App Bundle for distribution.
- Prepare your app store listing with screenshots, descriptions, and app icons.
- Follow Google Play’s guidelines for input methods and privacy policies.
- Publish your app and promote it among friends or online communities.
Make sure to monitor user reviews and update your app regularly to fix issues and add new features.
Frequently Asked Questions
What are the essential components needed to build a custom Android keyboard?
To create a custom Android keyboard, you need to develop an input method service, design your keyboard layout, and handle user interactions. Additionally, you must have the Android SDK installed and understand basic programming in Java or Kotlin. Including custom features like predictive text or emojis requires integrating relevant APIs or developing your own algorithms. Testing your keyboard on different devices ensures compatibility and smooth operation.
How can I customize the appearance of my Android keyboard during development?
Customize your keyboard’s appearance by modifying the layout XML files, adjusting colors, fonts, and key sizes. Use drawable resources to add background images or icons. You can also implement themes that allow users to switch between different styles. Incorporate styling attributes in your layout files to make your keyboard visually appealing and consistent with your app or personal preferences.
What steps should I follow to publish my custom Android keyboard app?
First, ensure your app passes all Google Play Store policies and guidelines. Prepare your app by thoroughly testing it on various devices for performance and compatibility. Create an attractive app listing with clear descriptions and screenshots. Build a signed APK or App Bundle, then upload it to the Google Play Console. After submitting your app for review and approval, monitor user feedback and update your keyboard regularly to fix bugs and add new features.
How can I add special features like emoji support or word prediction to my keyboard?
To include emoji support, integrate an emoji picker or Unicode emojis directly into your keyboard layout. For word prediction, implement a language model that analyzes input patterns and suggests words. You can use existing APIs or develop your own algorithms to enhance predictive capabilities. Continuously update these features based on user feedback to improve accuracy and usability.
What challenges might I face when creating a custom Android keyboard and how can I address them?
Challenges include ensuring compatibility across different devices and Android versions, managing resource constraints, and providing a user-friendly interface. To address these, test your keyboard extensively on various devices, optimize code for performance, and gather user feedback to refine the design. Keep up with Android input method updates and guidelines to ensure your keyboard remains functional and compliant with platform requirements.
Final Thoughts
To make your own keyboard android, start by choosing a reliable keyboard app builder. Customize the layout, themes, and features to suit your preferences. Test your creation on your device to ensure it functions smoothly.
In summary, to make your own keyboard android, select a builder, personalize it accordingly, and test thoroughly. This approach helps you craft a unique keyboard that enhances your typing experience effortlessly.

Similar Posts































