How To Make Touch Pen For Android Phone: Easy Diy Guide
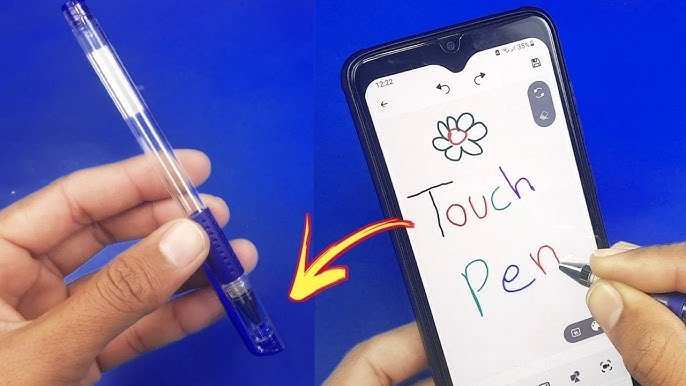
To make a touch pen for an Android phone, you can easily create one using everyday materials. **Cut a piece of foam or sponge and wrap it with a piece of aluminum foil.** This DIY touch pen mimics a capacitive stylus, allowing smooth interaction with your device.
Learning how to make touch pen for Android phone becomes simple when you understand that conductive materials like foil work well. Just attach the foil to the foam tip, and you’re ready to go. This quick project saves money while enhancing your touchscreen experience.

How to Make a Touch Pen for Your Android Phone
Creating your own touch pen for your Android phone can be a fun and rewarding project. Whether you want to save money, customize your stylus, or just enjoy a creative DIY activity, making a touch pen at home is easier than you think. In this guide, we’ll walk you through the steps of making an effective and affordable touch pen using simple materials. We’ll also explore different types of touch pens, tips for improving functionality, and safety precautions to keep in mind during your DIY journey.
Understanding How Touch Screens Work
Before diving into the process of making a touch pen, it’s helpful to understand how touch screens operate. Most Android phones use capacitive touch screens, which detect the electrical properties of your finger to register touch inputs. When you touch the screen with your finger, it distorts the screen’s electrostatic field. A stylus designed for capacitive screens must mimic this electrical conductivity.
Here are some key points about capacitive touch screens:
- They respond to the electrical charge of your finger or other conductive objects.
- They are sensitive enough to detect even slight electrical differences.
- Non-conductive objects, like regular plastic or rubber, won’t activate the screen.
- Styluses for capacitive screens need to have a conductive tip to work properly.
This understanding helps us choose the right materials for making an effective touch pen.
Tools and Materials Needed
Gathering the right tools and materials makes the DIY process smoother. Here’s what you’ll need:
Basic Materials
- Conductive material (such as a piece of conductive foam, copper tape, or conductive fabric)
- Pen or pencil (preferably with a removable cap)
- Empty pen tube or a similar hollow object (like a marker shell)
- Foam or sponge (to create a cushioned tip)
- Wetting agent (like a small amount of water, or conductive gel)
- Scissors or craft knife
- Adhesive tape or glue
Optional Additional Items
- Conductive thread or wire
- Small piece of aluminum foil
- Rubber or silicone grip (for comfortable handling)
Having these materials ready allows you to start making your touch pen without delay.
Step-by-Step Guide to Making Your Own Touch Pen
Follow these simple steps to craft a functional capacitive stylus suitable for your Android device.
Step 1: Prepare the Conductive Tip
Create a conductive tip that can touch the screen comfortably:
- If using conductive foam, cut a small square or circle (about the size of a fingertip).
- If using copper tape, cut a piece approximately one inch long and wide enough to wrap around the tip of the pen or tube.
- If using conductive fabric, cut a small patch and attach it securely to the tip area.
The goal is to have a conductive surface that makes contact with the screen without scratching or damaging it.
Step 2: Secure the Conductive Material
Attach your conductive material at the tip of your pen or pencil:
- Wrap the copper tape or conductive fabric around the tip of the pen or inside the hollow pen tube.
- Ensure the material extends slightly beyond the end to make good contact with the screen.
- Use adhesive tape or glue to fix the conductive material in place, preventing it from moving.
Make sure that the attachment is firm so the conductive surface remains in contact with your screen during use.
Step 3: Add a Cushioning Tip
To prevent damage to your screen, add a soft cushion at the tip:
- Place a small piece of sponge or foam over the conductive tip.
- Secure it with a small piece of tape or glue.
- This cushion helps glide smoothly on your screen and prevents scratches.
The cushion ensures the stylus is gentle on your device while maintaining conductivity.
Step 4: Moistening the Tip
Capacitive screens respond better when the stylus tip is slightly moist:
- Lightly dampen the foam or sponge tip with water or conductive gel.
- Be careful not to soak the tip excessively, as too much moisture can damage your device or cause the stylus to slip.
- Test the stylus on your phone to adjust the moisture level as needed.
This step boosts conductivity and improves touch responsiveness.
Step 5: Final Assembly and Testing
Bring everything together:
- Insert the completed tip into the hollow pen tube or attach it to your existing pen or pencil.
- If needed, add a rubber grip or tape around the stylus for comfort and better control.
- Test your DIY stylus on your Android phone, adjusting the moisture level or conductive material if it doesn’t register properly.
Now you have a homemade touch pen ready to use!
Enhancing Your DIY Touch Pen for Better Performance
To make your stylus more functional and comfortable, consider these enhancements:
Adding a Better Conductive Material
Experiment with different conductive elements:
- Conductive Thread or Wires: Sew or attach conductive thread to the tip for better connectivity.
- Aluminum Foil: Wrap a small piece around the tip for increased conductivity.
Creating a Comfortable Grip
Use rubber or silicone grips to:
- Make holding the stylus more comfortable for longer periods.
- Improve control and precision when drawing or navigating.
Improving Durability
Make your stylus last longer by:
- Using sturdy materials for the pen body.
- Applying protective coatings or waterproofing the conductive parts.
Safety Tips and Precautions
While crafting and using your DIY touch pen is straightforward, keep these safety tips in mind:
- Use non-toxic, skin-safe materials where possible.
- Avoid excessive moisture, which can cause short circuits or damage your device.
- Do not force the stylus on the screen; gentle touches work best.
- Regularly check the conductive parts for wear and tear, replacing them as needed.
Alternative Materials for DIY Touch Pens
If you don’t have the materials listed earlier, consider these options:
| Material | Advantages | Notes |
|---|---|---|
| Aluminum Foil | Easy to find, highly conductive | Wrap tightly around the tip, avoid sharp edges |
| Conductive Fabric or Cloth | Flexible and comfortable | Attach securely to the tip |
| Wired Conductive Thread | Precise and durable | Sew onto the tip or wrap around it |
Using these materials, you can customize your stylus for optimal performance.
Making a touch pen for your Android phone doesn’t have to be complicated or expensive. By using common conductive materials and a few simple steps, you can craft a stylus that enhances your touch experience. Not only does this project save you some money, but it also allows you to get creative with your materials and design. Remember to focus on conductivity, comfort, and gentle handling to get the best results. Now, grab your materials and start creating your own personalized touch pen today!
Frequently Asked Questions
What materials are necessary to create a DIY touch pen for an Android device?
To make a simple touch pen, gather a smooth, non-porous material such as a foam or sponge ball, a thin conductive wire or foil, a pen casing or a pen barrel, and an adhesive like glue. You may also need scissors and a small piece of conductive fabric or aluminum foil to enhance conductivity. Using readily available materials ensures that you can assemble a functional touch pen with ease.
How can I ensure the homemade touch pen interacts accurately with my Android screen?
Ensure the tip of your DIY touch pen is conductive by wrapping it with a small piece of aluminum foil or attaching a conductive fabric. Keep the tip smooth and rounded to mimic a finger’s surface for precise interaction. Test the pen on different areas of your device to confirm accurate responsiveness, making adjustments if necessary to improve contact and minimize false touches.
Are there any safety precautions to consider when making a touch pen at home?
When constructing your touch pen, handle conductive materials like aluminum foil carefully to avoid short circuits or damage to your device. Use insulating materials around the conductive parts to prevent accidental shocks or shorts. Always test the pen on an old or protected device first, and avoid using overly sharp or fragile components that could scratch or harm your phone’s screen.
What are some common mistakes to avoid during the DIY process?
Avoid using materials that are not conductive, such as regular plastic or rubber, as they will not interact with the touchscreen. Do not apply excessive pressure when using your homemade pen, as it might damage the screen. Also, ensure that the conductive components are firmly attached and do not come loose during use to maintain consistent performance.
Can I customize the appearance of my homemade Android touch pen?
Yes, personalize your touch pen by decorating the outer casing with paint, stickers, or wrapping it with colorful tape. Use materials that do not interfere with the conductivity of the tip. Customizing your pen adds a personal touch and makes it easier to locate among other accessories while maintaining functionality.
Final Thoughts
In summary, making a touch pen for an Android phone is simple and cost-effective. Use common materials like a stylus tip, a pen body, and conductive fabric or foil. Attach the conductive material to the pen tip and connect it to a conductive wire for proper functionality.
Test your DIY touch pen on your Android device to ensure responsiveness. With a little creativity, you can create a functional touch pen that works seamlessly. Overall, knowing how to make touch pen for android phone offers an easy way to customize your device accessories.
Related posts

how to enable wifi calling cricket on android
You’re staring at your Android settings, searching for the Wi‑Fi Calling toggle, and it’s just not there. If…

how to disable system update in android
So you want to stop those Android system update notifications, or maybe you're worried a new version will…

how to remove search bar from home screen android
So you just want the search bar gone. That little Google pill sitting on your home screen, taking…