Can You Install Android Tv On Raspberry Pi For Media Use
Yes, you can install Android TV on a Raspberry Pi, making your device a versatile media center. Many users ask, “can you install android tv on raspberry pi,” and the answer is straightforward. With the right software and some steps, turning your Raspberry Pi into an Android TV device is achievable. This setup offers a simple way to enjoy Android apps and streaming services on a compact platform. Setting it up can seem daunting, but clear guides make the process accessible for most users.

Can You Install Android TV on Raspberry Pi?
Many tech enthusiasts ask whether it’s possible to turn their Raspberry Pi into a smart TV hub running Android TV. The good news is, yes, you can install Android TV on a Raspberry Pi, but it comes with some important details you need to understand before starting. In this section, we will explore everything you need to know about installing Android TV on your Raspberry Pi, from hardware requirements to installation steps, and tips for optimal performance.
Understanding the Raspberry Pi and Android TV Compatibility
Before diving into the installation process, it’s crucial to understand what makes Raspberry Pi different from traditional Android devices, and whether your specific model can run Android TV smoothly.
- Hardware limitations: Raspberry Pi boards, especially older models, have limited processing power, RAM, and graphics capabilities compared to typical smartphones and tablets. This can impact how well Android TV functions.
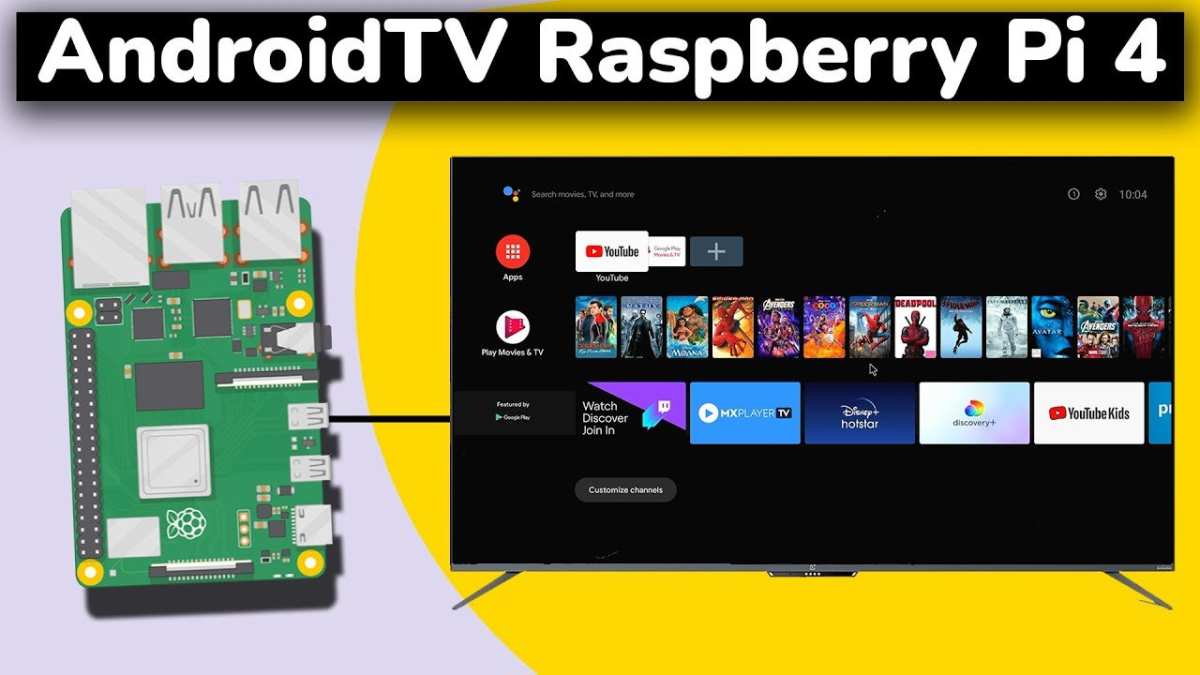
- Supported Raspberry Pi models: Currently, Raspberry Pi 4 and Raspberry Pi 400 are the most compatible models for running Android TV. Their higher specs, including more RAM and better GPU, make them suitable for media streaming and app use.
- Operating system considerations: Raspberry Pi runs on Raspberry Pi OS by default, but installing Android TV requires replacing or dual-booting with an Android-based OS. This means you need compatible firmware and drivers for hardware components like Wi-Fi, Bluetooth, and the HDMI output.
It’s important to choose the right Raspberry Pi model for your goals. For instance, if you want a smooth video experience or multiple app usage, the Raspberry Pi 4 with at least 4GB RAM is recommended.
What Is Android TV and How Does It Differ?
Android TV is a version of Google’s Android operating system tailored for smart TVs and media streaming devices. It offers a user-friendly interface optimized for a big screen, with easy-to-navigate menus, integrated apps, and voice control.
Some key features include:
- Navigation designed for remote control use
- Deep integration with Google Play Store for apps like Netflix, YouTube, Hulu, and more
- Voice search and commands via Google Assistant
- Personalized recommendations based on viewing habits
- Cast content from phones and tablets using Chromecast built-in
Installing Android TV on a Raspberry Pi essentially transforms your device into a small, custom media center that can stream content, play games, and run Android apps.
Step-by-Step Guide to Installing Android TV on Raspberry Pi
The process involves several steps, from preparing the hardware to configuring the software. Here’s a detailed walkthrough:
Gathering Hardware and Software
Ensure you have the following:
- Raspberry Pi 4 or Raspberry Pi 400 (preferably 4GB or 8GB RAM)
- MicroSD card with at least 32GB capacity (preferably 64GB or more)
- Power supply suitable for your Raspberry Pi model
- HDMI cable
- Keyboard and mouse (for initial setup)
- Wi-Fi connection or Ethernet cable
- Computer for downloading and flashing the OS
Software needed:
- Android TV image compatible with Raspberry Pi (such as LineageOS for Raspberry Pi or other custom builds)
- Balena Etcher or Raspberry Pi Imager (to flash the OS onto the microSD card)
Downloading the Android TV Image
Since Android TV isn’t officially supported directly by Google for Raspberry Pi, the best way is to obtain a custom build like LineageOS. Follow these steps:
- Visit trusted sources such as the LineageOS community or forums where prebuilt images are shared.
- Download the latest stable image compatible with Raspberry Pi 4 or Pi 400.
- Verify the checksum to ensure file integrity.
Flashing the OS onto MicroSD Card
Once you have the image:
- Insert the microSD card into your computer.
- Open your chosen flashing tool (like Etcher).
- Select the downloaded Android TV image.
- Choose the microSD card as the destination.
- Start the flashing process and wait until it completes.
Initial Setup of Your Raspberry Pi
After flashing:
- Insert the microSD card into your Raspberry Pi.
- Connect peripherals such as keyboard, mouse, and display.
- Power on your Raspberry Pi.
- Follow the on-screen instructions to complete initial setup, including Wi-Fi connection and language preferences.
Configuring and Optimizing Android TV on Raspberry Pi
Once the OS boots up:
- Update the system and apps to ensure you have the latest features and security patches.
- Install your favorite streaming apps from the Google Play Store or sideload APKs if necessary.
- Configure display settings for the best resolution and refresh rate compatible with your monitor or TV.
- Adjust network settings for stable internet connectivity.
Additional tips:
- Use a cool case or heatsink to prevent overheating during extended use.
- Consider adding Bluetooth or Wi-Fi dongles if your Raspberry Pi model doesn’t have these built-in or if you need better connectivity.
- Install a file manager or media player app for easy content navigation.
Challenges and Troubleshooting Common Issues
While this setup is achievable, some users encounter issues:
- Wi-Fi or Bluetooth not working: Ensure drivers are compatible; sometimes flashing a newer firmware or choosing a different build helps.
- Performance lag or video stutter: Reduce display resolution or close background apps.
- Boot failures or black screens: Verify the integrity of your OS image and power supply quality.
- Problems with app compatibility: Use compatible apps or sideload APKs carefully, ensuring they’re from trusted sources.
Alternatives to Installing Android TV
If installing Android TV seems complex or you want other options, consider:
- Using Kodi or Plex media center OS for media streaming.
- Running a lightweight Linux OS with media player apps.
- Using specialized media centers like LibreELEC or OSMC which support Raspberry Pi.
Although these alternatives may not have all Android TV’s features, they often offer smooth media playback and simplicity.
Final Thoughts on Installing Android TV on Raspberry Pi
Running Android TV on Raspberry Pi opens up many entertainment opportunities, turning a small device into a versatile media hub. While the setup involves some technical steps, following the right procedures and using compatible hardware ensures a satisfying experience. Keep in mind that performance may vary based on your Raspberry Pi model and the Android TV build you use. With patience and a little troubleshooting, you can enjoy your favorite streaming apps, games, and more—all from your Raspberry Pi running Android TV.
Frequently Asked Questions
Is it possible to run Android TV on a Raspberry Pi 4?
Yes, you can install Android TV on a Raspberry Pi 4. The Raspberry Pi 4 has the necessary hardware capabilities to support Android TV, and there are custom images available that allow you to set up the operating system. However, the installation process involves flashing the image onto an SD card and configuring settings to ensure optimal performance.
What are the best Android TV images compatible with Raspberry Pi?
Several custom Android TV images are designed specifically for Raspberry Pi devices. Popular options include builds based on Android 9 and Android 11, which are optimized for Raspberry Pi 4 and earlier models. It’s essential to choose images from trusted sources and follow installation instructions carefully to avoid compatibility issues.
Are there any limitations when installing Android TV on a Raspberry Pi?
While installing Android TV on a Raspberry Pi is feasible, you might encounter limitations such as reduced performance on older models, limited support for some peripherals, and occasional bugs. The hardware constraints of the Raspberry Pi can affect the smoothness of video playback and app compatibility, so setting realistic expectations is important.
Can I use Android TV on a Raspberry Pi without additional peripherals?
To operate Android TV effectively, you will need peripherals like a compatible HDMI display, a keyboard, and a remote control. While some setups might work with minimal peripherals, having these accessories enhances usability and provides a better experience when navigating Android TV.
What steps are involved in installing Android TV on a Raspberry Pi?
The process involves downloading a suitable Android TV image, flashing it onto an SD card using tools like BalenaEtcher, and then inserting the SD card into the Raspberry Pi. After initial setup, you may need to configure Wi-Fi, update drivers, and install essential apps. Following detailed guides can make this process smoother and help you avoid common issues.
Final Thoughts
Yes, you can install Android TV on a Raspberry Pi. Many prefer this setup to enjoy a smart TV experience with a small device. The process involves flashing a compatible Android TV image onto an SD card and booting the Raspberry Pi from it.
While performance varies depending on the model, Raspberry Pi 4 handles Android TV well with proper configuration. Users can access apps, games, and streaming services seamlessly.
In conclusion, can you install Android TV on Raspberry Pi? Absolutely. It offers a practical way to turn your Pi into a versatile media center, making it a popular choice among tech enthusiasts.
Related posts

how do you text a gif android
If you've ever tapped around your Android keyboard looking for a way to send a GIF and ended…

how to enable wifi calling cricket on android
You’re staring at your Android settings, searching for the Wi‑Fi Calling toggle, and it’s just not there. If…

how to disable system update in android
So you want to stop those Android system update notifications, or maybe you're worried a new version will…