

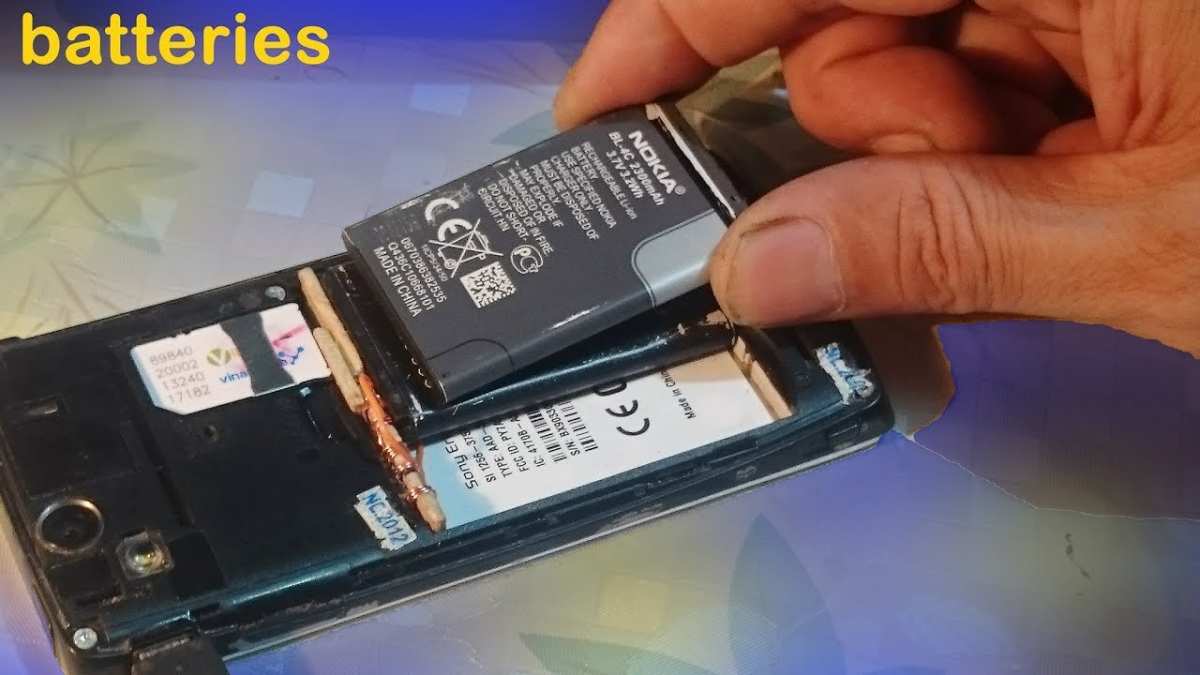
To remove the battery from an Android phone, start by turning off the device and removing the back cover. **Carefully disconnect the battery connector and lift the battery out.** Knowing how to remove battery from android phone can extend its lifespan or help with quick repairs. Ensure you handle components gently and keep track of screws or clips. With patience, replacing or removing the battery becomes straightforward and safe.

How to Remove Battery from Android Phone
Removing the battery from an Android phone might sound complicated, especially if you’ve never done it before. But with the right steps and a little patience, you can do it safely and efficiently. Whether you need to replace a faulty battery, clean contacts, or just want to understand your device better, this guide will walk you through each step in detail.
Let’s start by talking about the types of batteries your Android phone might have, the tools you need, and then move on to the step-by-step process. We’ll also cover some important safety tips and common questions, so you’re well-equipped to handle this task confidently.
Understanding Your Android Phone’s Battery Type
Before you begin, it’s essential to know what kind of battery your phone has. Most modern Android phones use Lithium-ion (Li-ion) batteries, which are sealed inside the device and are not designed to be removed by users. However, some older models and certain budget phones come with removable batteries that you can take out easily.
Here’s a quick overview:
- Removable Batteries: Found in older or budget Android phones. These have a pop-out cover or back cover that allows easy access to the battery.
- Non-removable Batteries: Common in newer models. These are sealed inside the phone, and removing them might require special tools and skills.
Knowing your phone’s battery type helps you determine whether removing the battery is straightforward or requires more caution and tools.
Tools Needed for Removing the Battery
Depending on your phone model, you might need specific tools. Here’s what you might require:
- Small Phillips screwdriver: For removing screws if your device has a secured back cover.
- Plastic opening tools: To pry open the back cover without damaging the phone.
- Sim ejector tool or paperclip: Sometimes needed to remove SIM cards and SD cards before opening the phone.
- Tweezers: For handling small connectors or contacts.
Make sure you work on a clean, flat surface and keep track of all screws and parts you remove.
Preparing Your Phone for Battery Removal
Preparation is key for a safe and smooth process. Follow these steps:
- Power off your device: Never try to remove the battery while the phone is on. Turn it off completely to prevent any damage or shorts.
- Remove the SIM and SD cards: Accessing the battery might require removing the back cover, which can block these cards. Use a sim ejector tool or paperclip to gently eject them.
- Work in a dust-free environment: Dust or dirt can get inside your phone if the cover is removed, so picking a clean workspace helps avoid damage.
- Gather all necessary tools: Have everything ready before you start to avoid interruptions.
Now, let’s get into the actual removal process.
Step-by-Step Guide to Remove Battery from Android Phone
The steps can vary depending on whether your device has a removable or non-removable battery. Here’s a detailed breakdown for both.
Removing a Removable Battery
If your Android phone has a removable battery, the process is much simpler:
- Locate the back cover: Usually, there’s a small notch or indentation on the edge of the back cover to help you pry it open.
- Use your fingernail or plastic opening tool: Gently insert it into the notch and pry the cover off. Work slowly to avoid cracking the cover.
- Lift the battery out: Once the cover is removed, you’ll see the battery. Carefully lift it from the edges, generally starting from a corner.
- Check the contacts: Examine the battery contacts and the device’s connectors for any dirt or corrosion. Clean gently if needed.
Your battery is now free to be replaced or inspected.
Removing a Non-Removable Battery
In phones with sealed cases, removing the battery is more complicated and requires additional tools:
- Remove screws: Use a small Phillips screwdriver to take off the back cover or the frame. Keep track of all screws.
- Open the case: Gently pry open the back using a plastic opening tool or a thin metal pry tool. Be cautious to avoid cracking the casing.
- Disconnect internal connectors: Many phones have connectors attaching the battery to the motherboard. Use tweezers to carefully disconnect these connectors if necessary.
- Remove adhesive or clips: Sometimes, the battery is glued in place. Use a plastic card or a specialized adhesive remover to gently separate the battery from the device.
- Lift out the battery: Once all connectors and adhesive are apart, carefully lift the battery out of the device.
Note: If you’re not comfortable with handling internal parts or do not have the right tools, it’s best to seek professional help to avoid damaging your phone.
Important Safety Tips During Battery Removal
Handling batteries requires caution to prevent accidents:
- Avoid puncturing or damaging the battery: Lithium-ion batteries can catch fire if punctured or crushed.
- Work in a well-ventilated area: Sometimes, batteries can emit fumes if damaged. Ensuring good ventilation adds safety.
- Do not expose the battery to liquids or extreme temperatures: Heat can cause the battery to swell or explode.
- Handle with care: Use non-metallic tools to avoid short circuits.
- Dispose of batteries properly: Follow local regulations for recycling or disposal. Do not throw batteries in the trash.
Reassembling Your Phone After Battery Removal
Once the battery is removed and if you’re replacing it:
- Insert the new battery: Line up the contacts correctly and gently press it into place.
- Reconnect any internal connectors: Ensure all cables are firmly attached.
- Seal the case: Replace screws and snap back the cover, making sure everything fits snugly.
- Insert SIM and SD cards: Reattach these components if you removed them earlier.
- Power on your device: Turn it on to test if everything works correctly.
If your device has issues turning on or functioning after reassembly, double-check connections or consult a professional technician.
Additional Tips for Maintaining Your Android Phone’s Battery
Proper maintenance extends the life of your device’s battery. Here are some helpful tips:
- Avoid overcharging: Don’t leave your phone charging overnight constantly.
- Keep the battery between 20% and 80%: Regularly charging within this range helps maintain battery health.
- Avoid extreme temperatures: Don’t leave your phone in very hot or cold environments.
- Use official chargers: Cheap or incompatible chargers can harm your battery over time.
- Close unused apps: Reducing background activity can lessen battery drain.
Following these practices will help your phone’s battery stay healthy longer.
When to Seek Professional Help
If you feel uncomfortable or unsure at any point, especially with non-removable batteries or internal components, it’s best to consult a certified technician. Attempting complicated repairs without proper tools or experience can cause permanent damage or safety hazards.
In summary, removing a battery from an Android phone involves understanding your device type, preparing properly, and following the right steps carefully. Whether your phone’s battery is removable or sealed inside, taking your time and working gently will lead to a safe and successful removal process.
Frequently Asked Questions
What tools do I need to safely remove the battery from my Android phone?
Most Android phones with removable batteries do not require special tools. However, a small plastic pry tool or thin opening tool can help you gently lift the back cover without damaging it. If your phone has screws securing the back panel, a precision screwdriver set is necessary. Always handle tools carefully to prevent cracking the back cover or damaging internal components.
How can I properly turn off my Android device before removing the battery?
To ensure safety and prevent data loss, power off your device completely before removing the battery. Hold down the power button until the power menu appears, then select ‘Shutdown’ or ‘Power off.’ Wait until the screen turns off and the device is completely inactive before proceeding to open the back cover and take out the battery.
What steps should I follow to remove the battery without damaging my phone?
Start by turning off the device and removing any SIM or SD cards if accessible. Use a plastic pry tool to gently lift the back cover from a corner or edge—avoid using metal tools that could scratch or crack the casing. Carefully detach the battery connector if it is connected to the device’s motherboard. Once disconnected, lift the battery straight out, supporting it to prevent bending or puncturing. Handle components with care and avoid forcing parts apart.
Are there any precautions I should take while removing the battery from my Android phone?
Yes, always work in a clean, static-free environment to prevent damage to internal components. Use appropriate tools and avoid applying excessive force. Make sure your hands are dry and clean to prevent short circuits. Do not attempt to remove the battery if it appears swollen, leaking, or damaged. If unsure about the process, consult a professional technician to avoid voiding your warranty or causing damage.
What should I do after removing the battery from my Android phone?
Once you remove the battery, inspect it for any signs of damage or swelling. If you plan to replace it, insert the new battery carefully, ensuring it aligns correctly with connectors and slots. Reattach the back cover securely and power on the device to verify proper operation. If the device does not turn on or shows issues, seek professional assistance or refer to the manufacturer’s guidelines for further troubleshooting.
Final Thoughts
Removing the battery from an Android phone is straightforward but requires careful handling. Turn off your device and locate the back cover or battery compartment. Use a plastic pry tool to gently lift the cover or remove the back panel if it’s removable.
Once exposed, gently disconnect the battery connector if needed, then lift the battery out of the phone. Always handle components with care to avoid damage. Knowing how to remove battery from android phone allows you to perform maintenance or replace faulty batteries easily.
