If your iPhone screen is shattered, the quickest solution is to replace it. **To replace an iPhone broken screen, carefully order the right replacement parts and follow a step-by-step guide.** Knowing how to replace iPhone broken screen can save you time and money. You’ll need the right tools and patience, but it’s doable with patience and attention. Once completed, your phone will look and function like new, providing peace of mind and saving an expensive repair fee.

How to Replace iPhone Broken Screen
When your iPhone screen cracks or shatters, it’s more than just an annoyance — it can affect how your phone works and make using it frustrating. Many people wonder if they should go to an Apple store or try fixing it themselves. Replacing a broken iPhone screen might sound complicated, but with the right tools and steps, it is doable. In this guide, you’ll learn exactly how to replace an iPhone broken screen, whether you choose to do it yourself or seek professional help.
Understanding When to Replace Your iPhone Screen
Before jumping into the repair process, it’s important to assess the damage on your phone. Sometimes, a cracked screen is just a cosmetic issue, but other times, it can interfere with the phone’s functionality.
Signs You Need a Screen Replacement
- The display is cracked or shattered
- Touch responsiveness is lost or inconsistent
- There are flickering black spots or lines
- The screen doesn’t turn on, but the phone vibrates or makes sounds
- There are visible signs of liquid damage inside the screen
If your iPhone shows any of these signs, replacing the screen is probably the best option. If the damage is limited to superficial cracks without affecting touch sensitivity or display quality, you might opt for a screen protector instead of a full replacement.
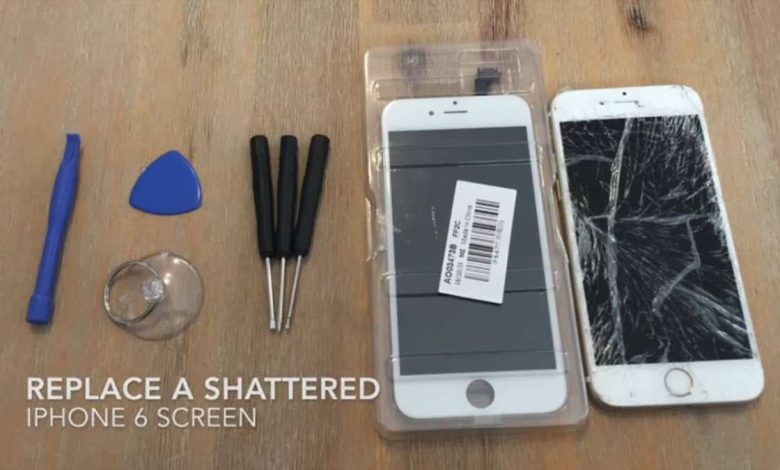
Gathering the Tools and Parts Needed
Performing a screen replacement requires specific tools and replacement parts. Having everything ready before you start will help you work smoothly.
Tools Typically Used for iPhone Screen Replacement
- Pentalobe screwdriver
- Phillips screwdriver
- Plastic opening tools or prying tools
- Suction cup
- Tweezers
- Spudger or plastic pry tool
- Replacement screen compatible with your iPhone model
- Adhesive strips or glue for reassembling
Choosing the Right Replacement Screen
– Make sure the screen is compatible with your iPhone model (e.g., iPhone 13, iPhone 12, etc.)
– Consider buying from reputable suppliers to ensure quality
– Look for screens with good reviews and warranties
– Decide if you want an original Apple part or a third-party alternative
Preparing for the Repair Process
Before opening your phone, it’s vital to prepare a clean workspace and ensure your device is turned off.
Steps to Properly Prepare
- Work in a dust-free, well-lit area
- Keep a soft cloth to place your phone on
- Power down your iPhone completely
- Remove any cases or screen protectors
- Disconnect from power sources and remove SIM card if necessary
Having a tidy workspace reduces the risk of losing small screws or damaging internal components.
Step-by-Step Guide to Replacing Your iPhone Screen
Replacing an iPhone screen involves several precise steps. Follow this detailed guide carefully, and remember to handle all components gently.
Disassemble the iPhone
– Remove the pentalobe screws at the bottom of your device using the pentalobe screwdriver.
– Use the suction cup to gently lift the display from the case. Place the suction cup near the edge and pull lightly to create a gap.
– Insert a plastic opening tool or prying tool into the gap and gently slide around the perimeter to loosen the adhesive.
– Be cautious of the flex cables connecting the screen to the motherboard. Don’t pull too hard or force the display away.
Disconnecting Components
– Remove the screws securing the display connectors cover using a Phillips screwdriver.
– Use a plastic spudger to disconnect the display connectors carefully. This prevents damage to the flex cables.
– If your model requires, disconnect the battery connector to prevent accidental shorts during the repair.
Removing the Broken Screen
– Once all connectors are detached, you can remove the broken screen completely.
– Handle the display assembly carefully, especially if the glass is shattered, to avoid injury.
Preparing the New Screen
– Transfer any necessary components such as the front camera, sensors, or home button from the old screen to the new one.
– Avoid touching the new display’s glass or connectors with your fingers, as oils can affect adhesion.
Reassembling the iPhone
– Connect the new screen’s flex cables to the motherboard, ensuring each connector clicks into place.
– Replace the connector cover screws securely.
– If you disconnected the battery, reconnect it.
– Carefully align the new display and press it into the case, making sure it is seated well.
– Screw back the pentalobe screws at the bottom.
Testing the New Screen and Final Steps
Before sealing the device fully, turn on your iPhone to check that the new screen works correctly:
– Power on the device
– Test the touch responsiveness across the entire screen
– Check for display issues like flickering or dead spots
– Test other functions such as Face ID, home button, or speakers
If everything works fine, proceed to seal the device:
– Remove any remaining adhesive strips or residues
– Apply new adhesive strips if needed for a secure fit
– Carefully press the display back into the frame until it clicks into place
Additional Tips for a Successful Repair
– Work slowly and patiently; rushing increases the risk of damage
– Use an anti-static wrist strap if available to prevent static discharge
– Keep track of screws and small parts; organize them in small containers
– Follow video tutorials specific to your iPhone model for visual guidance
– If at any point you feel unsure, consult a professional technician
When to Seek Professional Help
While DIY repairs can save money and be rewarding, they are not suitable for everyone. If your iPhone has extensive internal damage, or if you’re worried about damaging delicate components, visiting an authorized service provider is wise. Professionals have the right tools and training to handle complex repairs safely.
Final Words
Replacing an iPhone broken screen requires patience, proper tools, and careful handling, but it is indeed possible to do it yourself. Understanding each step, from disassembly to testing, helps ensure a successful repair. Whether you choose to perform the replacement yourself or seek professional help, knowing the process empowers you to restore your phone to its best condition. Remember, taking your time and being cautious can save you money and extend your iPhone’s lifespan.
Frequently Asked Questions
What steps should I follow to safely replace an iPhone screen at home?
First, gather the necessary tools such as a pentalobe screwdriver, opening picks, a suction cup, and a replacement screen. Turn off your iPhone and remove the two pentalobe screws at the bottom. Use the suction cup and opening picks to gently lift the screen from the device, taking care to disconnect the connectors carefully. Once the old screen is removed, connect the new screen’s flex cables, secure it in place, and reassemble your iPhone by replacing the screws. Make sure to handle all components delicately to prevent additional damage.
What are common mistakes to avoid during a screen replacement?
Avoid applying excessive force when lifting the screen, as this can damage internal components or the display itself. Do not forget to disconnect the battery before handling the screen to prevent short circuits. Using incorrect tools or rushing the process may lead to misaligned parts or further damage. Also, be cautious with the connectors; pulling or bending them can break delicate flex cables, which might require costly repairs later.
How can I test my iPhone after replacing the screen to ensure it works properly?
Power on your iPhone and check the display for responsiveness, clarity, and any dead pixels. Test the touch functionality across different areas of the screen to confirm full responsiveness. Verify that the display brightness adjusts smoothly and that the color reproduction appears accurate. Also, test features like Face ID, front and rear cameras, and the home button (if applicable) to ensure all hardware functions correctly after the repair.
Final Thoughts
To replace iPhone broken screen, gather the necessary tools like a pentalobe screwdriver, pry tools, and a replacement screen. Power off your device and carefully remove the screws. Use the pry tools to separate the screen from the phone body, avoiding damage to delicate components.
Follow the proper steps to disconnect the connectors and replace the broken screen with a new one. Reassemble the device in reverse order, ensuring all connections are secure.
In conclusion, how to replace iPhone broken screen involves patience and attention to detail. Carefully following these steps helps you save money and avoid further damage.