

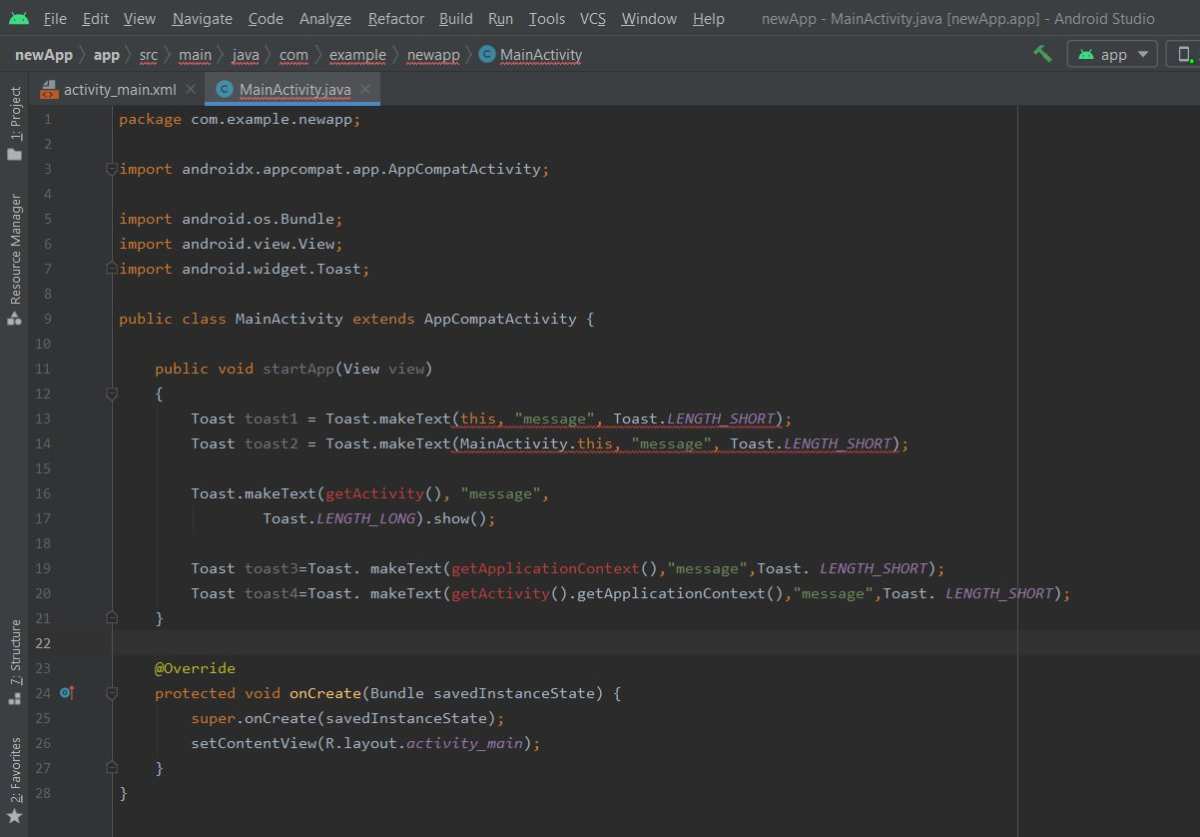
To make a toast in Android Studio, you simply create a Toast object and display it with a single line of code. When someone asks how to make toast Android Studio, I tell them it’s quick and straightforward. First, you define the message and then call the show() method on the Toast.
In this guide, you’ll learn how to implement a simple toast notification in your app. It’s a handy way to give users quick feedback. Let’s get started with clear steps to add this feature seamlessly.

How to Make Toast in Android Studio: A Step-by-Step Guide
Making a toast in Android Studio might seem like a small task, but mastering it is essential for any Android developer. Toasts are a simple way to give users feedback or notify them about something important without interrupting their experience. Whether you’re a beginner or looking to refine your skills, understanding how to successfully implement toast messages can make your app more interactive and user-friendly.
In this guide, we’ll walk through everything you need to know about creating toast messages in Android Studio. From setting up your project to customizing your toast, you’ll find detailed explanations and practical tips. Let’s dive in!
Understanding Toasts in Android Development
Before jumping into the code, it’s important to understand what toasts are and why you should use them.
What Is a Toast?
A toast is a small, pop-up message that appears on the screen for a few seconds when triggered. It provides feedback to users about an action they performed. Toasts are commonly used to notify users of successful actions, errors, or other important information.
Why Use Toasts?
- Simple to implement and use
- Non-intrusive, doesn’t interrupt user activity
- Great for short messages
- Can be customized for better appearance and behavior
Getting Started with Toasts in Android Studio
To show a toast message, you’ll need to add some code to your app. Here’s a quick overview of what you need:
– An Android project set up in Android Studio
– A user interface (UI) with a button or another trigger
– Java or Kotlin code to create and display the toast
Let’s go through each step carefully.
Setting Up Your Android Project
Open Android Studio and create a new project:
- Select “Empty Activity” when creating your project
- Choose a suitable name, like “ToastExample”
- Select Java or Kotlin as the programming language
- Finish creating the project
Once your project opens, you’ll see the default MainActivity.java or MainActivity.kt and the layout file activity_main.xml.
Designing Your User Interface
To make your app interactive, add a button that users can press to see a toast message.
Modifying the Layout File
Open activity_main.xml and add the following code inside the RelativeLayout or ConstraintLayout:
<Button
    android:id="@+id/showToastButton"
    android:layout_width="wrap_content"
    android:layout_height="wrap_content"
    android:text="Show Toast"
    android:layout_centerInParent="true" />
This creates a button labeled “Show Toast” centered on the screen.
Writing the Code to Show Toast
Next, link your button to your code and define what happens when it’s clicked.
In Java
Open MainActivity.java and include the following code inside the onCreate method:
Button button = findViewById(R.id.showToastButton);
button.setOnClickListener(new View.OnClickListener() {
    @Override
    public void onClick(View v) {
        Toast.makeText(MainActivity.this, "Hello! This is a toast message.", Toast.LENGTH_SHORT).show();
    }
});
Here’s what each part does:
– Finds the button by its ID
– Sets an event listener for clicks
– Creates and shows a toast message
In Kotlin
Open MainActivity.kt and add this inside the onCreate function:
val button = findViewById<Button>(R.id.showToastButton)
button.setOnClickListener {
    Toast.makeText(this, "Hello! This is a toast message.", Toast.LENGTH_SHORT).show()
}
This code does the same as the Java version but uses Kotlin syntax.
Customizing Your Toast Messages
The basic toast shown above is useful, but sometimes you want to make your messages stand out or look better.
Changing Toast Duration
To control how long the toast appears:
- Toast.LENGTH_SHORT: Displays the toast for about 2 seconds
- Toast.LENGTH_LONG: Displays for about 3.5 seconds
Example:
Toast.makeText(context, "This will last longer!", Toast.LENGTH_LONG).show();
Adding Custom Layouts
You can design a custom toast to include images, different fonts, or colors.
- Create a new layout XML file (for example, custom_toast.xml).
- Design your layout with TextView, ImageView, etc.
- Inflate this layout in your code and set it as the view for your toast.
Example code snippet:
LayoutInflater inflater = getLayoutInflater();
View layout = inflater.inflate(R.layout.custom_toast, (ViewGroup) findViewById(R.id.custom_toast_container));
Toast toast = new Toast(getApplicationContext());
toast.setDuration(Toast.LENGTH_SHORT);
toast.setView(layout);
toast.show();
This approach enables you to create more engaging and personalized feedback for your users.
Handling Multiple Toasts and Managing Timing
Sometimes, your app might need to show multiple toast messages quickly. If not managed properly, these can overlap or cause a confusing user experience.
Using Handler for Delayed Toasts
To control when to show each toast and avoid overlapping:
- Use a Handler to schedule the toast display
- Clear any existing toast before showing a new one
Sample:
private Toast currentToast;

public void showToastMessage(String message) {
    if (currentToast != null) {
        currentToast.cancel();
    }
    currentToast = Toast.makeText(this, message, Toast.LENGTH_SHORT);
    currentToast.show();
}
This ensures only one toast appears at a time, providing a cleaner user experience.
Best Practices and Common Mistakes
While toasts are simple, some common pitfalls can reduce your app’s usability.
Best Practices
- Keep your toast messages brief and clear
- Avoid overusing toasts; too many in quick succession can annoy users
- Use longer durations for more important messages
- Design custom toasts for better visual impact
- Test on different devices to ensure readability
Common Mistakes to Avoid
- Creating too many toasts at once, leading to overlap
- Using toasts for critical alerts, which should be handled with dialogs or notifications
- Neglecting to cancel existing toasts before showing new ones
- Ignoring accessibility considerations, such as providing sufficient contrast and size
Enhancing Your Toast Implementation
Beyond the basics, you can enhance your toast notifications with additional features.
Adding Sounds or Vibration
Combine a toast with device vibrations or sounds to grab user attention:
- Use the Vibrator class to provide haptic feedback
- Play a sound using MediaPlayer or SoundPool
For example:
Vibrator v = (Vibrator) getSystemService(Context.VIBRATOR_SERVICE);
v.vibrate(500); // Vibrate for 500 milliseconds
Integrating with Other UI Elements
Use toasts alongside other UI feedback mechanisms like Snackbar for more options.
Summary
Creating and customizing toast messages in Android Studio is an essential skill for app builders. From simple notifications to more elaborate designs, toasts help communicate with users effectively. By understanding how to implement toasts, managing their timing, and customizing their appearance, you can significantly improve the user experience of your Android applications.
Remember, keep your messages brief, relevant, and visually appealing. Practice integrating toasts into your apps, experiment with custom layouts, and always test across different devices to ensure your notifications look great everywhere.
Happy coding!
Frequently Asked Questions
How can I display a toast message when a button is clicked in Android Studio?
To show a toast when a button is clicked, first get a reference to the button using findViewById(). Then, set an OnClickListener on the button. Inside the listener, create a Toast object with the desired message and duration, and call show() on it. This way, the toast appears whenever the user taps the button.
What is the correct way to customize toast appearance in Android Studio?
You can customize a toast by creating a custom layout using XML, then inflating that layout in your Java or Kotlin code. After inflating, set your message in the layout and pass it to a new Toast object using setView(). Adjust properties like position or duration as needed before calling show() to display your personalized toast.
How do I display a toast message for a specific duration in Android studio?
Android provides two standard durations: Toast.LENGTH_SHORT and Toast.LENGTH_LONG. Choose the appropriate constant based on how long you want the toast to stay visible. When creating the toast with Toast.makeText(), pass the desired duration constant to control how long it displays.
Is it possible to show multiple toasts at the same time in Android Studio?
Yes, Android allows multiple toasts to appear simultaneously. You can create and show each toast independently. However, managing multiple toasts can lead to a cluttered user experience, so consider queuing or cancelling existing toasts if you want to display only relevant messages at a time.
How can I prevent toasts from showing repeatedly in Android Studio?
To avoid multiple toasts overlapping, cancel any existing toast before showing a new one. Keep a reference to the current toast, call its cancel() method before creating and displaying a new toast. This approach ensures that only one toast appears at a time, keeping the interface clean.
Final Thoughts
To make toast android studio, start by creating a new project and adding a button in the layout. Then, use the code to trigger a Toast message when the button is clicked. Keep the code simple and clear for easy implementation.
In conclusion, making a Toast in Android Studio is straightforward. Remember, how to make toast android studio involves defining the message and display duration accurately. This small addition improves user experience and provides quick feedback.
