

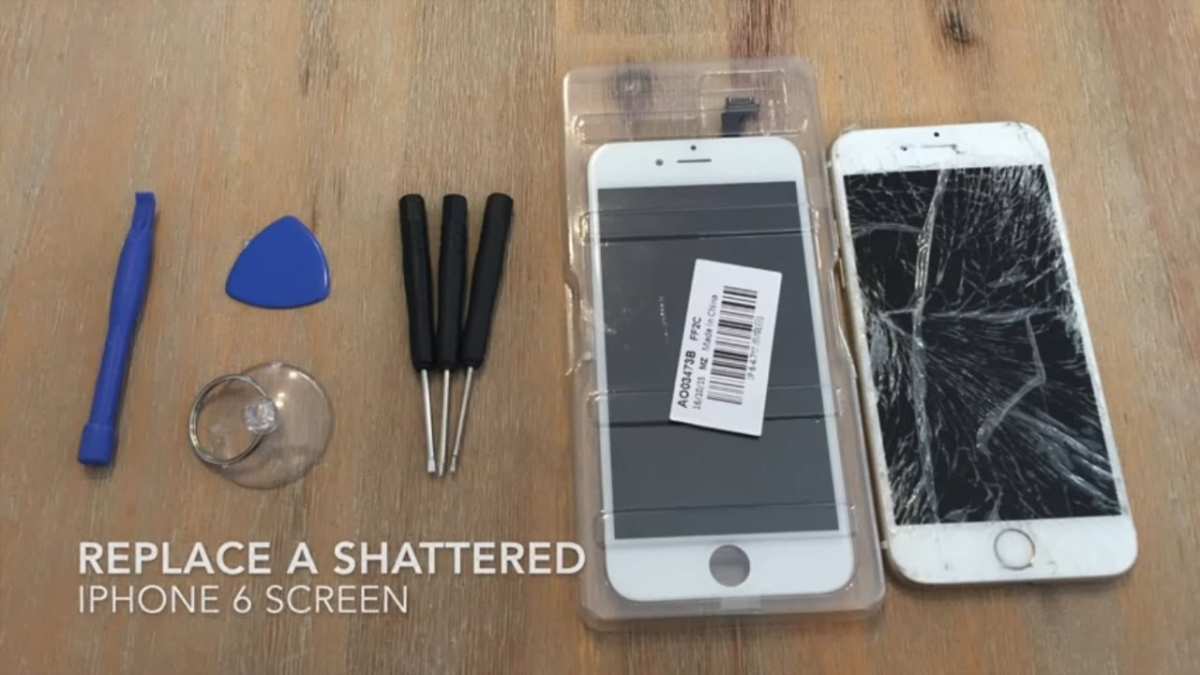
Replacing an iPhone screen is achievable with the right tools and guidance. The first step is to gather a replacement screen and necessary screwdrivers. **How to do iPhone screen replacement** involves carefully removing the damaged display, disconnecting cables, and attaching the new screen securely. Many find this process manageable at home with patience and attention to detail. A smooth replacement minimizes costs and keeps your device functioning like new, making it a worthwhile skill to learn.

How to Do iPhone Screen Replacement: A Step-by-Step Guide
Replacing your iPhone screen might seem complicated at first, but with the right tools and careful steps, it becomes a manageable task. Whether your screen is cracked, unresponsive, or showing strange lines, fixing it yourself can save you money and time. This guide will walk you through each part of the process with clear explanations, tips, and precautions to help you do a successful iPhone screen replacement.
Understanding When to Replace Your iPhone Screen
Before jumping into the repair, it’s important to recognize when replacing your screen is necessary. Sometimes, minor scratches or cracks don’t affect phone performance, but if your display shows signs like:
- Cracks or shattered glass
- Unresponsive touch screen areas
- Vertical or horizontal lines appearing on the display
- Distorted colors or flickering
- Display completely black but phone still rings or vibrates
then it’s time to consider replacing the screen. Doing so can restore your device’s functionality and appearance. Keep in mind that if your device has other issues such as battery problems or water damage, those might need attention first.
Gathering the Necessary Tools and Parts
Having the right tools makes the process safer and more straightforward. Here’s a list of what you’ll need:
- Replacement iPhone screen (make sure it’s compatible with your model)
- Small Phillips screwdriver
- Pentalobe screwdriver (for iPhones)
- Plastic opening tools or spudgers
- Thin pry tools or guitar pick
- Tweezers (preferably anti-static)
- Suctions cup
- Adhesive strips or glue (if required for reassembling)
- Isopropyl alcohol and a microfiber cloth (for cleaning)
- Opening tray or a soft, clean workspace
Keep in mind that sourcing high-quality replacement screens is crucial. Cheaper parts might look good but can be less responsive or fall apart quickly. Buying from reputable suppliers or authorized sellers helps ensure your new screen lasts.
Preparing for the Repair Process
Before opening your iPhone, take these important steps:
- Backup your data: Save your photos, contacts, and important files to iCloud or your computer.
- Power off your device: Turning it off prevents accidental touches and short circuits.
- Create a clean workspace: Use a soft cloth or mat to prevent small parts from rolling away.
- Gather your tools: Lay them out within easy reach.
- Work in a dust-free environment: Tiny particles can get trapped under the screen or adhesive.
Safety first! If you feel unsure at any point, consider consulting a professional or watching tutorial videos to better understand the process.
Removing the Broken Screen
The first physical step involves detaching the damaged display from the rest of the iPhone. Follow these detailed steps:
Step 1: Remove the Pentalobe Screws
Locate the two pentalobe screws at the bottom of your device, near the charging port. Using the pentalobe screwdriver, carefully unscrew them and keep them safe.
Step 2: Create a Gap Using a Suction Cup
Attach the suction cup just above the charging port. Gently pull to create a small gap between the screen and the phone body. Be patient—forcing it can crack the glass further.
Step 3: Insert a Pry Tool
Insert a plastic opening tool or a thin pry pick into the gap. Carefully slide it around the edges to loosen the adhesive holding the screen. Move slowly to avoid damaging internal components.
Step 4: Lift and Separate the Display
Once the adhesive weakens, gently lift the display at an angle. Remember, some cables connect inside, so don’t yank the screen away completely. Keep the display tilted upward and proceed to disconnect internal cables.
Disconnecting Internal Components
Most iPhones have several cables connecting the screen to the motherboard. Disconnecting these safely is key:
Step 1: Remove the Shield Covers
Use your screwdriver to unscrew any small brackets or shield covers covering the connectors. Keep these screws organized.
Step 2: Disconnect the Display Cables
Using tweezers or a plastic spudger, gently lift the connector locks and disconnect the cables. Be cautious—these connectors are delicate.
Step 3: Remove the Broken Screen
With all cables detached, carefully lift the damaged display away from the device. Set it aside in a safe place.
Preparing and Installing the New Screen
Now, it’s time to attach the new screen:
Step 1: Transfer Internal Components
Some screens come with the original home button, front camera, or sensors pre-installed. If not, you may need to transfer these parts from your old screen to the new one. Use your screwdriver and tools to carefully detach and reattach these components.
Step 2: Connect the New Display
Gently connect the display cables to the motherboard. Make sure each connector clicks into place securely.
Step 3: Test the New Screen
Before sealing everything, turn on your iPhone to check if the new display works correctly. Verify touch responsiveness, brightness, and display clarity.
Step 4: Reassemble the Device
Once satisfied, reattach any shield covers and screws. Carefully align the new screen with the body of the phone.
Reapplying Adhesive and Sealing the Phone
The final step involves sealing the device to make it look and function like new:
- Apply new adhesive strips or a small amount of glue around the edges of the screen.
- Gently press the display into place, ensuring it fits snugly and evenly.
- Hold the screen in position for a few minutes to let the adhesive set properly.
- Replace the pentalobe screws at the bottom of the device.
After reassembly, give your device a gentle test to ensure everything works. Wipe the screen with a microfiber cloth to remove fingerprints or smudges.
Tips for a Successful iPhone Screen Replacement
– Take your time and don’t rush the process. Careful handling prevents damage.
– Keep track of all screws and parts. Use small containers or magnetic mats.
– Watch tutorial videos specific to your iPhone model for visual guidance.
– Use high-quality replacement parts to ensure durability and performance.
– If at any point you feel uncertain, consult a professional technician.
Performing an iPhone screen replacement requires patience and attention to detail, but it is entirely achievable with the right approach. Each step improves your understanding of your device and saves you money, all while giving you the satisfaction of fixing your phone yourself.
Frequently Asked Questions
What tools do I need to replace my iPhone screen safely?
To replace your iPhone screen safely, gather essential tools such as a precision Phillips screwdriver, a pentalobe screwdriver, a plastic opening tool, a suction cup, tweezers, and a spudger. Additionally, having a clean workspace, an anti-static wrist strap, and a replacement screen compatible with your iPhone model helps ensure a smooth repair process.
How can I disconnect the battery safely before replacing the screen?
Begin by turning off your iPhone completely. Remove the bottom screws using a pentalobe screwdriver and gently lift the display assembly using a suction cup. Carefully disconnect the battery connector with a spudger to prevent power from flowing through the device. This step protects you from static and reduces the risk of damaging internal components during screen removal.
What is the best way to detach the cracked screen without causing damage?
Use a combination of a suction cup and a plastic opening tool to gently lift the cracked screen from the device frame. Insert the opening tool carefully along the edges, working slowly to loosen adhesive. Avoid prying too forcefully to prevent damaging the internal components or the display assembly. Patience and gentle handling are key for a safe removal.
How should I handle and transfer the new screen into my iPhone?
Before installing the new screen, ensure it is free of dust and fingerprints. Align it carefully with the device frame, starting from one side and gently pressing down as you work across the edges. Use a plastic tool to snap the screen into place securely. Reconnect any necessary cables, including the display and battery connectors, then test the device before fully sealing it.
What steps should I follow to verify the screen works properly after installation?
Power on your iPhone to check if the display lights up correctly and responds to touch inputs. Navigate through menus to ensure the touchscreen functions smoothly and that there are no dead spots or irregularities. Also, verify that the display’s color and brightness meet your expectations. If everything appears normal, proceed to secure all screws and close the device carefully.
Final Thoughts
To do iPhone screen replacement successfully, start by powering off your device and removing the pentalobe screws. Carefully use a plastic pry tool to lift the screen without damaging internal components. Disconnect the display cables and replace the screen with a new one, then reassemble your iPhone.
In conclusion, knowing how to do iPhone screen replacement provides a cost-effective alternative to professional repairs. Follow the correct steps cautiously, and you can restore your device efficiently.
