

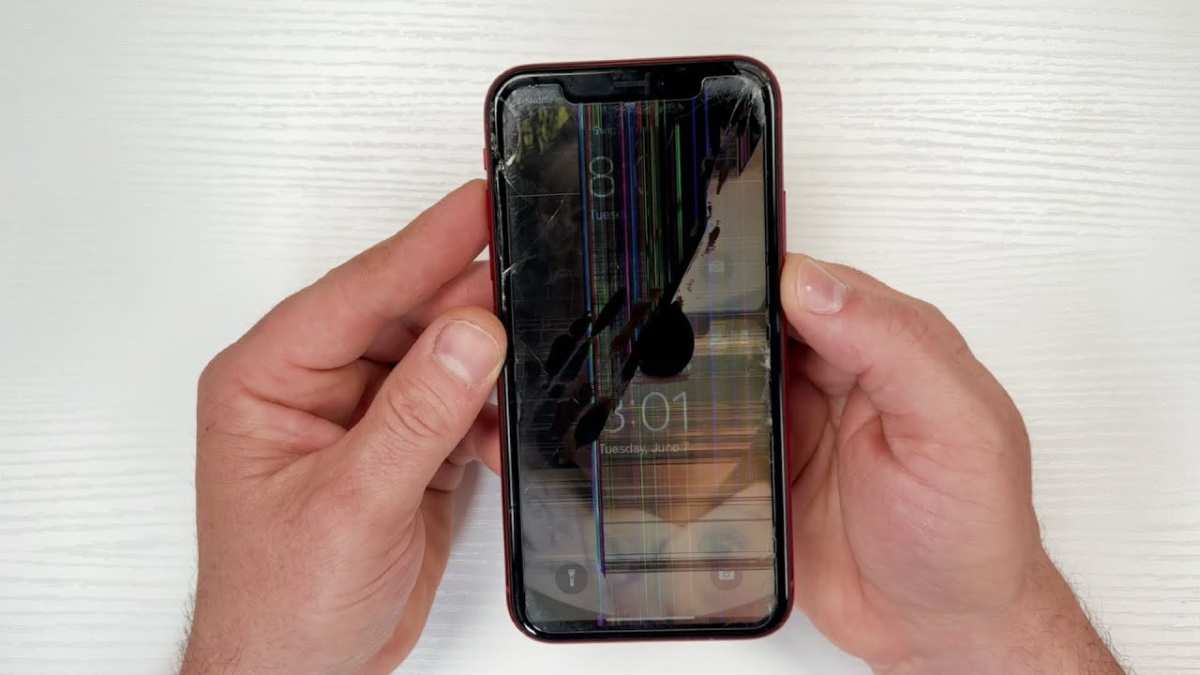
If your iPhone screen shatters unexpectedly, the easiest solution is to replace it. **The quickest way to replace iPhone broken screen is to visit an authorized service provider or do it yourself with a repair kit.** Knowing how to replace iPhone broken screen can save time and money, especially if you’re comfortable with small repairs. Carefully follow a step-by-step guide to ensure the process goes smoothly and your phone looks and functions like new. This guide helps you get back to using your device without stress or unnecessary delays.

How to Replace iPhone Broken Screen
When your iPhone screen gets cracked, shattered, or stops responding, it can feel frustrating and overwhelming. Thankfully, replacing a broken iPhone screen is possible whether you choose to do it yourself or have a professional handle it. This guide walks you through each step thoroughly, providing tips, tools, and safety precautions so you can navigate the process with confidence.
Understanding the process of replacing a broken iPhone screen helps you save money, reduce waste, and get your device back in working order quickly. Let’s explore the entire procedure, from preparing your workspace to finishing the repair.
Understanding Why an iPhone Screen Breaks
Before you start, it’s helpful to know how screens break. iPhone screens can crack due to several reasons:
- Accidental drops onto hard surfaces like concrete or tiles.
- Applying excessive pressure on the device, such as sitting on it or pressing too hard.
- Impact from other objects, causing internal damage even if the surface looks intact.
- Wear and tear over time that weakens the glass material.
Knowing why your screen broke can help you prevent future damage and choose the best repair method.
Assessing the Damage
Before starting the repair, determine what kind of damage your screen has:
- Cracked glass only: The display still works, but the glass is shattered.
- Unresponsive touchscreen: The display responds poorly or not at all.
- Display issues: Vertical lines, flickering, or dead pixels.
- Full blackout: The screen is completely black but the phone still rings or vibrates.
In many cases, if only the glass is cracked and the display functions normally, a screen replacement can restore your device perfectly.
Gathering the Necessary Tools and Parts
Getting the right tools saves time and prevents damage. Here’s what you need:
- Replacement screen: Purchase a compatible iPhone screen. Make sure it matches your model.
- Small Phillips screwdriver: For opening the device.
- Tri-point screwdriver: Required for some models.
- Prying tools and plastic opening tools: To gently lift parts without damaging the casing.
- Suction cup: Helps lift the glass or display assembly.
- Tweezers: For handling small components.
- Adhesive strips or glue: To secure the new screen.
- Anti-static wrist strap: To prevent static electricity from damaging parts.
Order quality replacement parts from reputable suppliers to ensure a good fit and durability.
Preparing Your Workspace
Create a clean, well-lit workspace, ideally with a soft cloth or mat to place your phone on. Keep tools organized and avoid clutter. Use an anti-static mat if possible, and wear the anti-static wrist strap to prevent electrostatic discharge, which can damage internal components.
Ensure your device is powered off completely to prevent electrical shorts or further damage.
Removing the Broken Screen
This step requires patience and care. Follow these general steps, but always consult model-specific guides or videos for precise instructions:
Step-by-Step Breakdown
- Remove the SIM card tray: Use a SIM ejector tool or paperclip to eject the tray.
- Unscrew the device: Use the appropriate screwdrivers to remove screws from the bottom of the iPhone.
- Open the device carefully: Use a suction cup near the edge of the screen, then gently insert a plastic opening tool to pry the screen away from the casing. Be cautious of cables connecting the display to the motherboard.
- Disconnect display connectors: Inside, you’ll find several ribbon cables. Use your screwdriver and pry tools to disconnect these connectors carefully. Avoid pulling on the cables directly.
- Remove the old screen: Once disconnected, lift the broken screen away from the device.
Be gentle during each step to prevent damaging internal components or the casing.
Preparing the New Screen for Installation
Before installing the new display, make sure it’s functioning correctly:
- Test the new screen on your device if possible, before sealing everything up.
- Remove any protective films or stickers from the new screen.
- Ensure all connectors are clean and free of dust or debris.
The new screen should come with pre-installed adhesive, but you may need to apply additional strips to secure it properly.
Installing the New Screen
Follow these essential steps to ensure a successful installation:
Step-by-Step Instructions
- Reconnect the display connectors: Carefully align and plug the ribbon cables into their respective sockets. Make sure each is securely connected.
- Test the display again: Before sealing the device, turn it on briefly to verify that the new screen displays correctly and touch functionality works.
- Seal the device: Use adhesive strips or glue to secure the new screen into the casing. Apply evenly and avoid excess adhesive that could seep into internal parts.
- Reattach screws and components: Secure all screws, covers, and brackets removed earlier.
- Replace the SIM tray: Insert the SIM card tray back into the device.
Be patient and gentle during the sealing process to prevent misalignments or damage.
Final Testing and Troubleshooting
Once assembled, power on your device and check:
- Display clarity, brightness, and color accuracy
- Touch responsiveness across the entire screen
- No dead pixels or flickering
- Functionality of external buttons and cameras
If something isn’t working correctly, revisit connections or consider redoing the repair if necessary.
Safety Tips and Common Mistakes to Avoid
– Always handle internal parts with care to prevent further damage.
– Don’t force connectors or parts; they should fit smoothly.
– Use the correct tools for each step.
– Keep track of screws and small components.
– Avoid touching the display connectors with dirty or greasy fingers.
– Make sure your workspace is static-free to protect fragile electronics.
When to Seek Professional Help
If you’re unsure about any step, or if your device shows signs of internal damage beyond the cracked glass, seek assistance from a professional repair shop. Sometimes, attempting DIY repairs can void your warranty or cause more issues if not done correctly.
Summary of Tips for a Successful Screen Replacement
- Double-check model compatibility before buying replacement parts.
- Follow detailed guides or videos specific to your iPhone model.
- Work patiently and avoid rushing each step.
- Keep your workspace organized and tools sterilized.
- Test your device thoroughly after the repair before sealing everything up.
Replacing an iPhone screen might seem intimidating at first, but with proper preparation, patience, and the right tools, you can restore your device’s appearance and functionality without high costs. Always consider safety first, and don’t hesitate to ask for professional help if needed. Your iPhone will look and work like new in no time!
Frequently Asked Questions
What tools are needed to replace a broken iPhone screen?
To replace a broken iPhone screen, you’ll need specific tools such as a pentalobe screwdriver, a Phillips screwdriver, a plastic opening tool, a suction cup, tweezers, a spudger, and adhesive strips or glue. Having these tools ensures you can safely remove the damaged screen and attach the new one securely without damaging internal components.
How should I prepare my workspace before replacing my iPhone screen?
Prepare a clean, well-lit workspace with a soft surface to prevent scratching your device. Power off the iPhone completely and remove the SIM card to avoid damage. Keep track of small parts and screws by organizing them in compartments or containers. Wearing anti-static wristbands can also help prevent static damage to sensitive components.
What are the common mistakes to avoid during iPhone screen replacement?
Avoid applying excessive force when removing the screen to prevent damaging internal parts. Do not rush the process; carefully follow each step to avoid disconnecting or breaking delicate cables. Also, ensure the new screen matches your iPhone model exactly and handle the display connectors gently to prevent tearing or damaging the internal connectors.
Final Thoughts
Pour remplacer un écran cassé d’iPhone, commencez par éteindre l’appareil et retirez délicatement la coque pour accéder aux composants internes. Utilisez des outils spécialisés pour détacher prudemment l’écran brisé sans endommager la connectique. Installez ensuite le nouvel écran en suivant les étapes inverses.
En suivant ces instructions, vous pouvez efficacement effectuer la réparation vous-même. Cela peut sembler complexe, mais avec de la patience et des outils appropriés, il est faisable.
How to replace iPhone broken screen devient simple lorsque vous respectez chaque étape avec soin et précision.
